
 One the the highlights from our visit in Geneva, was the day trip to Chamonix and Mont Blanc. We booked this full-day tour using Viator and can be viewed HERE. Find out more of what we did and saw on our lovely day in France/ top of Europe.

One the the highlights from our visit in Geneva, was the day trip to Chamonix and Mont Blanc. We booked this full-day tour using Viator and can be viewed HERE. Find out more of what we did and saw on our lovely day in France/ top of Europe.

Florence | Firenze | The Best
We can officially say both of us have been to Florence, but separate times. K was able to study abroad in this beautiful city during her junior year at UCSB. Now T got to experience it for herself. All those years k talked about how much she loved this city and T now knows why. And for our readers – here is why:

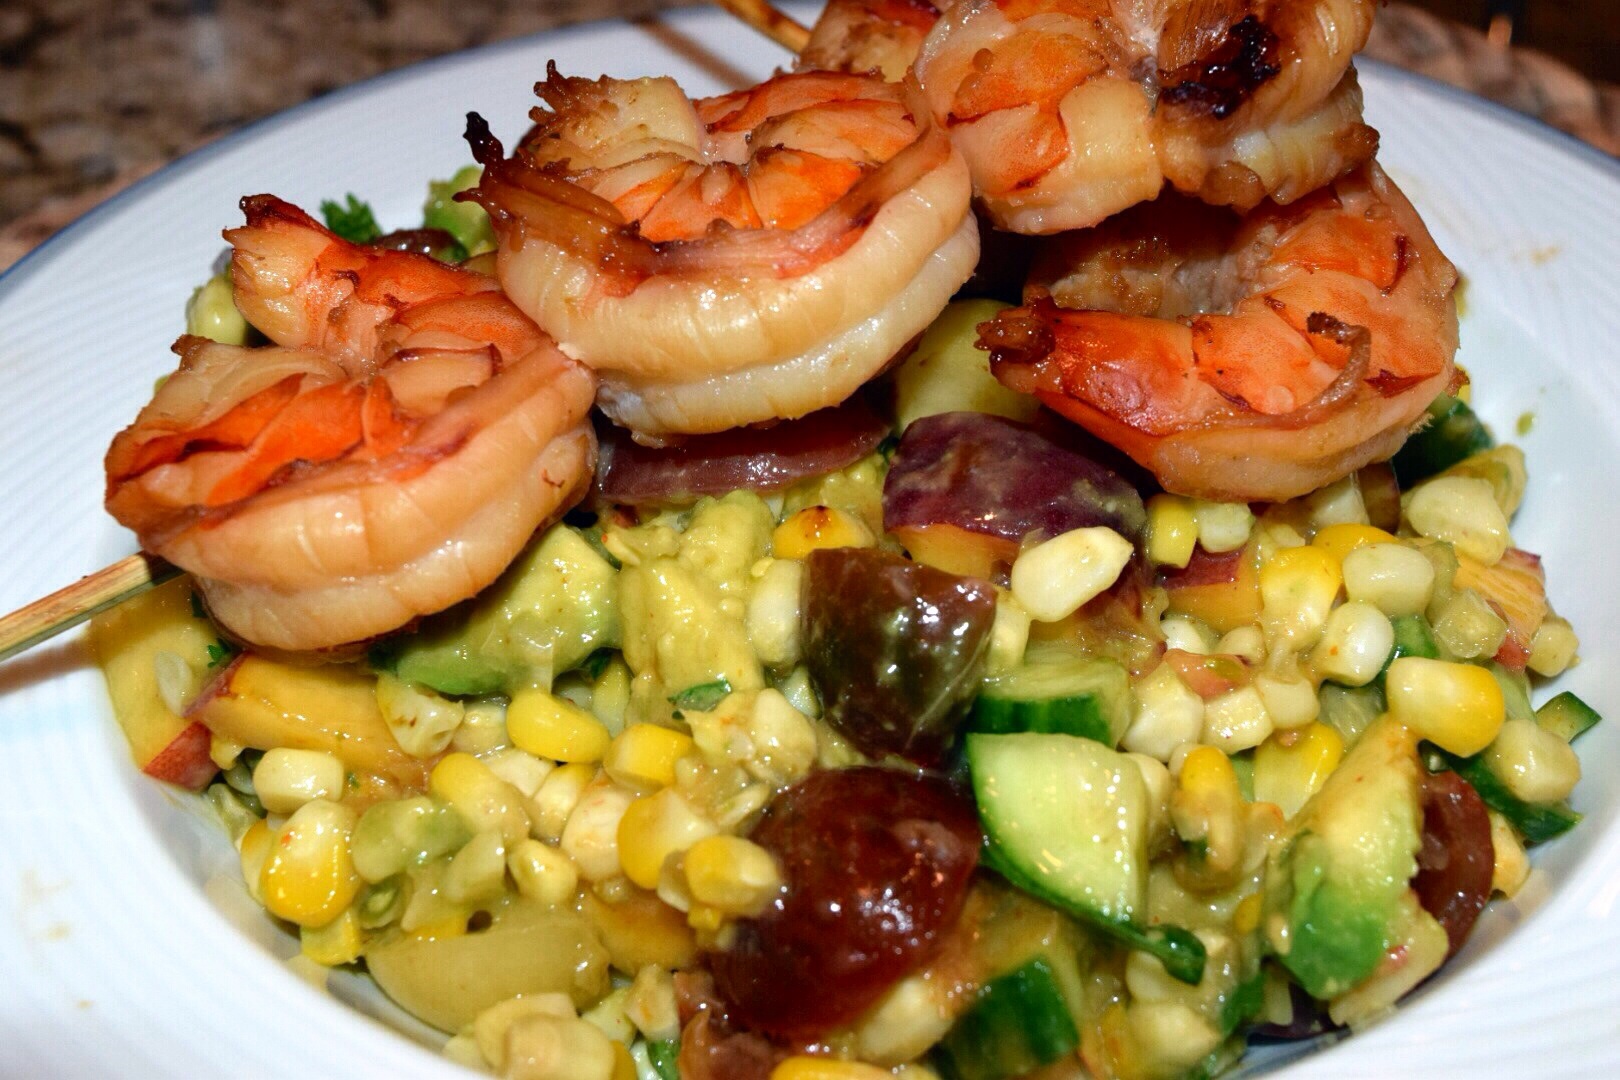
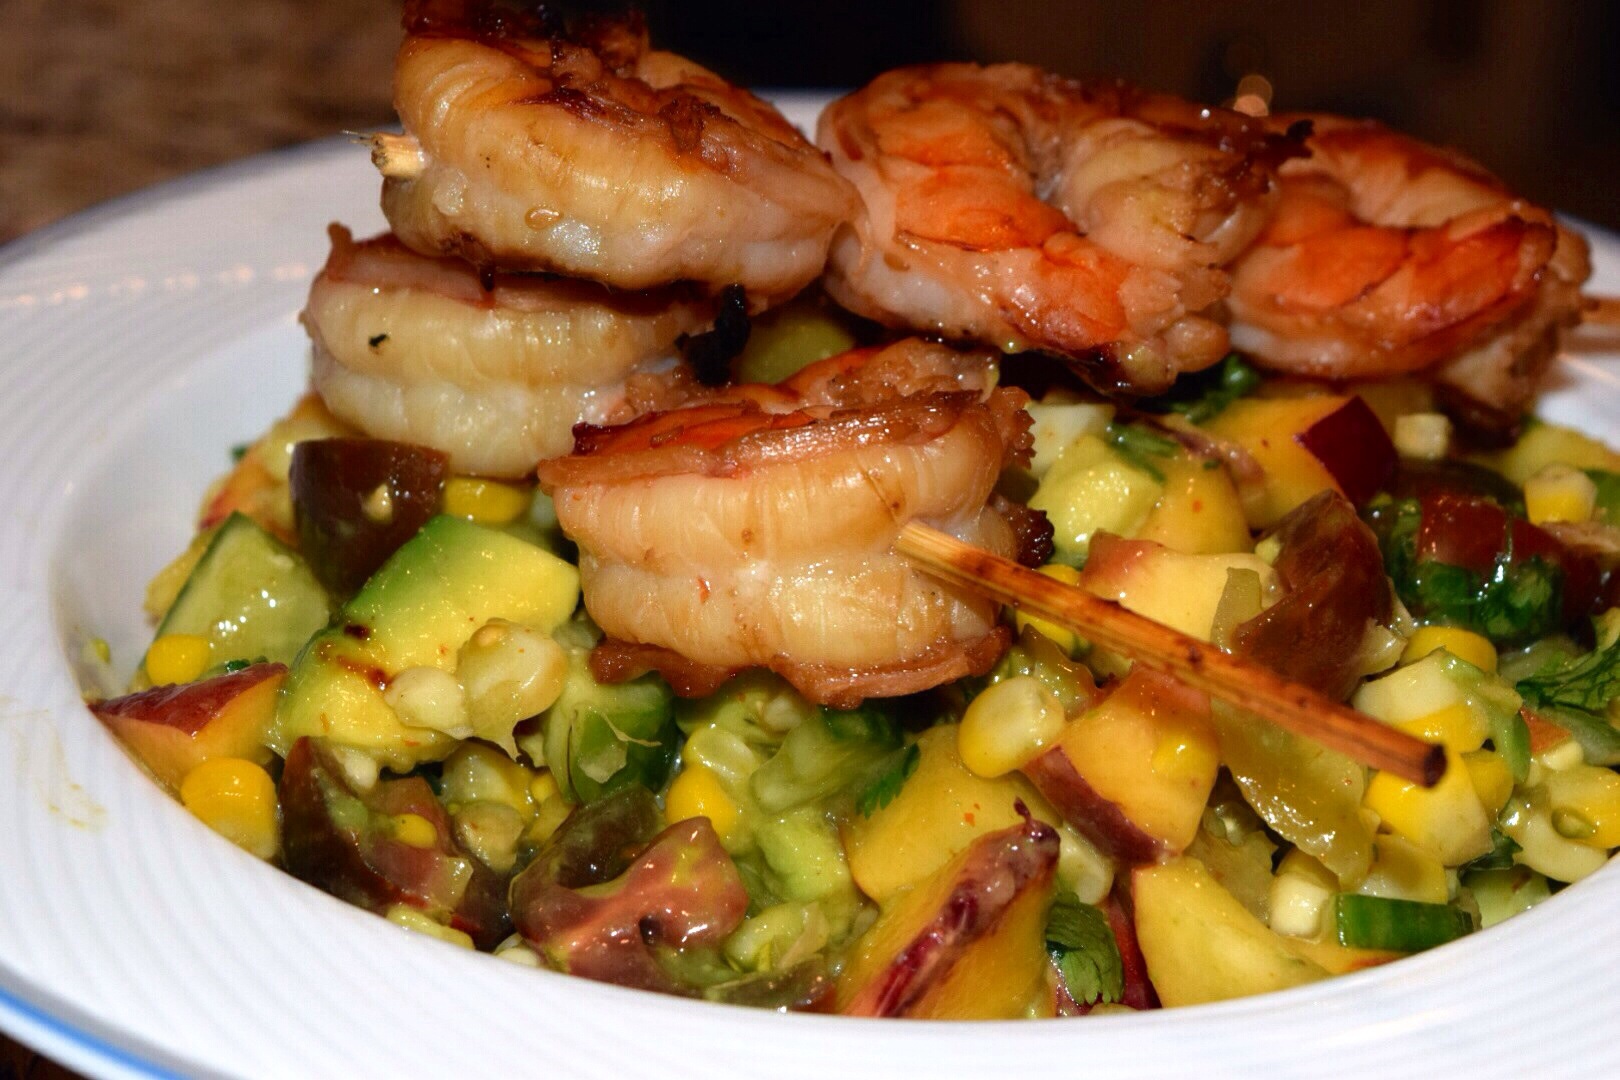
 In need of a healthy, fresh and scrumptious dinner? Sick of your salads? Well T.W.O. has a receipt for you. It is a corn salad that bursts of flavor – lemon, cilantro, avocado and peaches. The baja fresh of California!?! We guarantee that if you like shrimp, you will definitely like this recipe!
Ingredients:
– Shrimp
– 2 cups Trader Joe’s Island Soyaki Marinade
– 3 ears of corn
– 1 avocado
– 2 cups heirloom cherry tomatoes, halved
– 4 Persian cucumbers
– 2 yellow peaches
– 1 1/2 cups hearts of palm, sliced
– 2 Tablespoons olive oil
– ¼ cup lemon juice
– 5 Tablespoons fresh cilantro, chopped
– Salt
– Pepper
Directions:
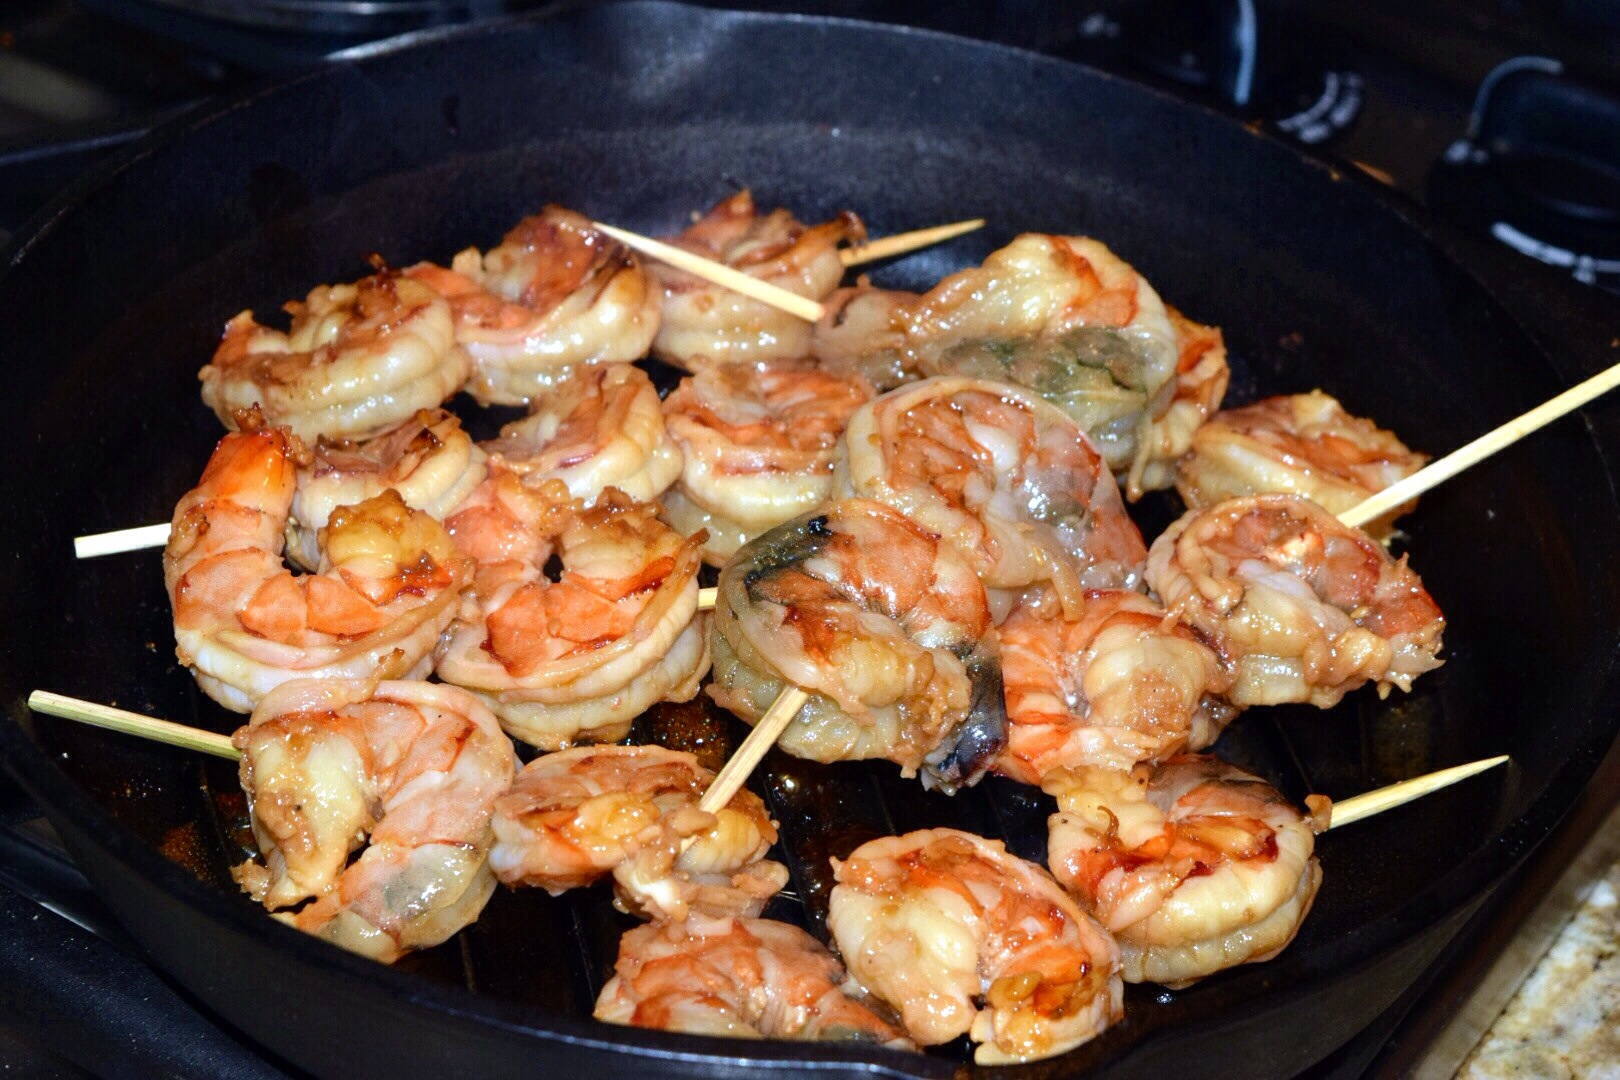
1. Marinate the shrimp in the Trader Joe’s Island Soyaki Marinade for at least two hours in the refrigerator.
2. About 20 minutes prior to cooking, remove the shrimp from the refrigerator to bring to room temp. Place shrimp on kebab sticks.
3. Preheat the bbq or cast iron skillet*
4. While the oven or bbq is getting hot, prep the corn. Rub 1 Tablespoon of olive oil on the corn. Season with salt and pepper and wrap with foil.
4. Chop the avocado, peaches, tomatoes, cucumbers, hearts of palm and cilantro.
5. Once the grill is ready, add the corn. Cook for about 20 minutes and then add your shrimp kebabs. The shrimp should only take about 6-8 minutes depending on your heat.
6. While the shrimp and corn are cooking, drizzle the lemon juice and remaining olive oil over the vegetables.
7. Remove the corn from the grill and let cool for 5 minutes. Slice the kernels off the core. Add to the vegetables and mix.
8. Plate the corn salad and top with the grilled shrimp.
*T.W.O. ran out of propaine while they were cooking this meal so we went to Plan B….cast iron skillet. Same great taste as the bbq!


Enjoy!

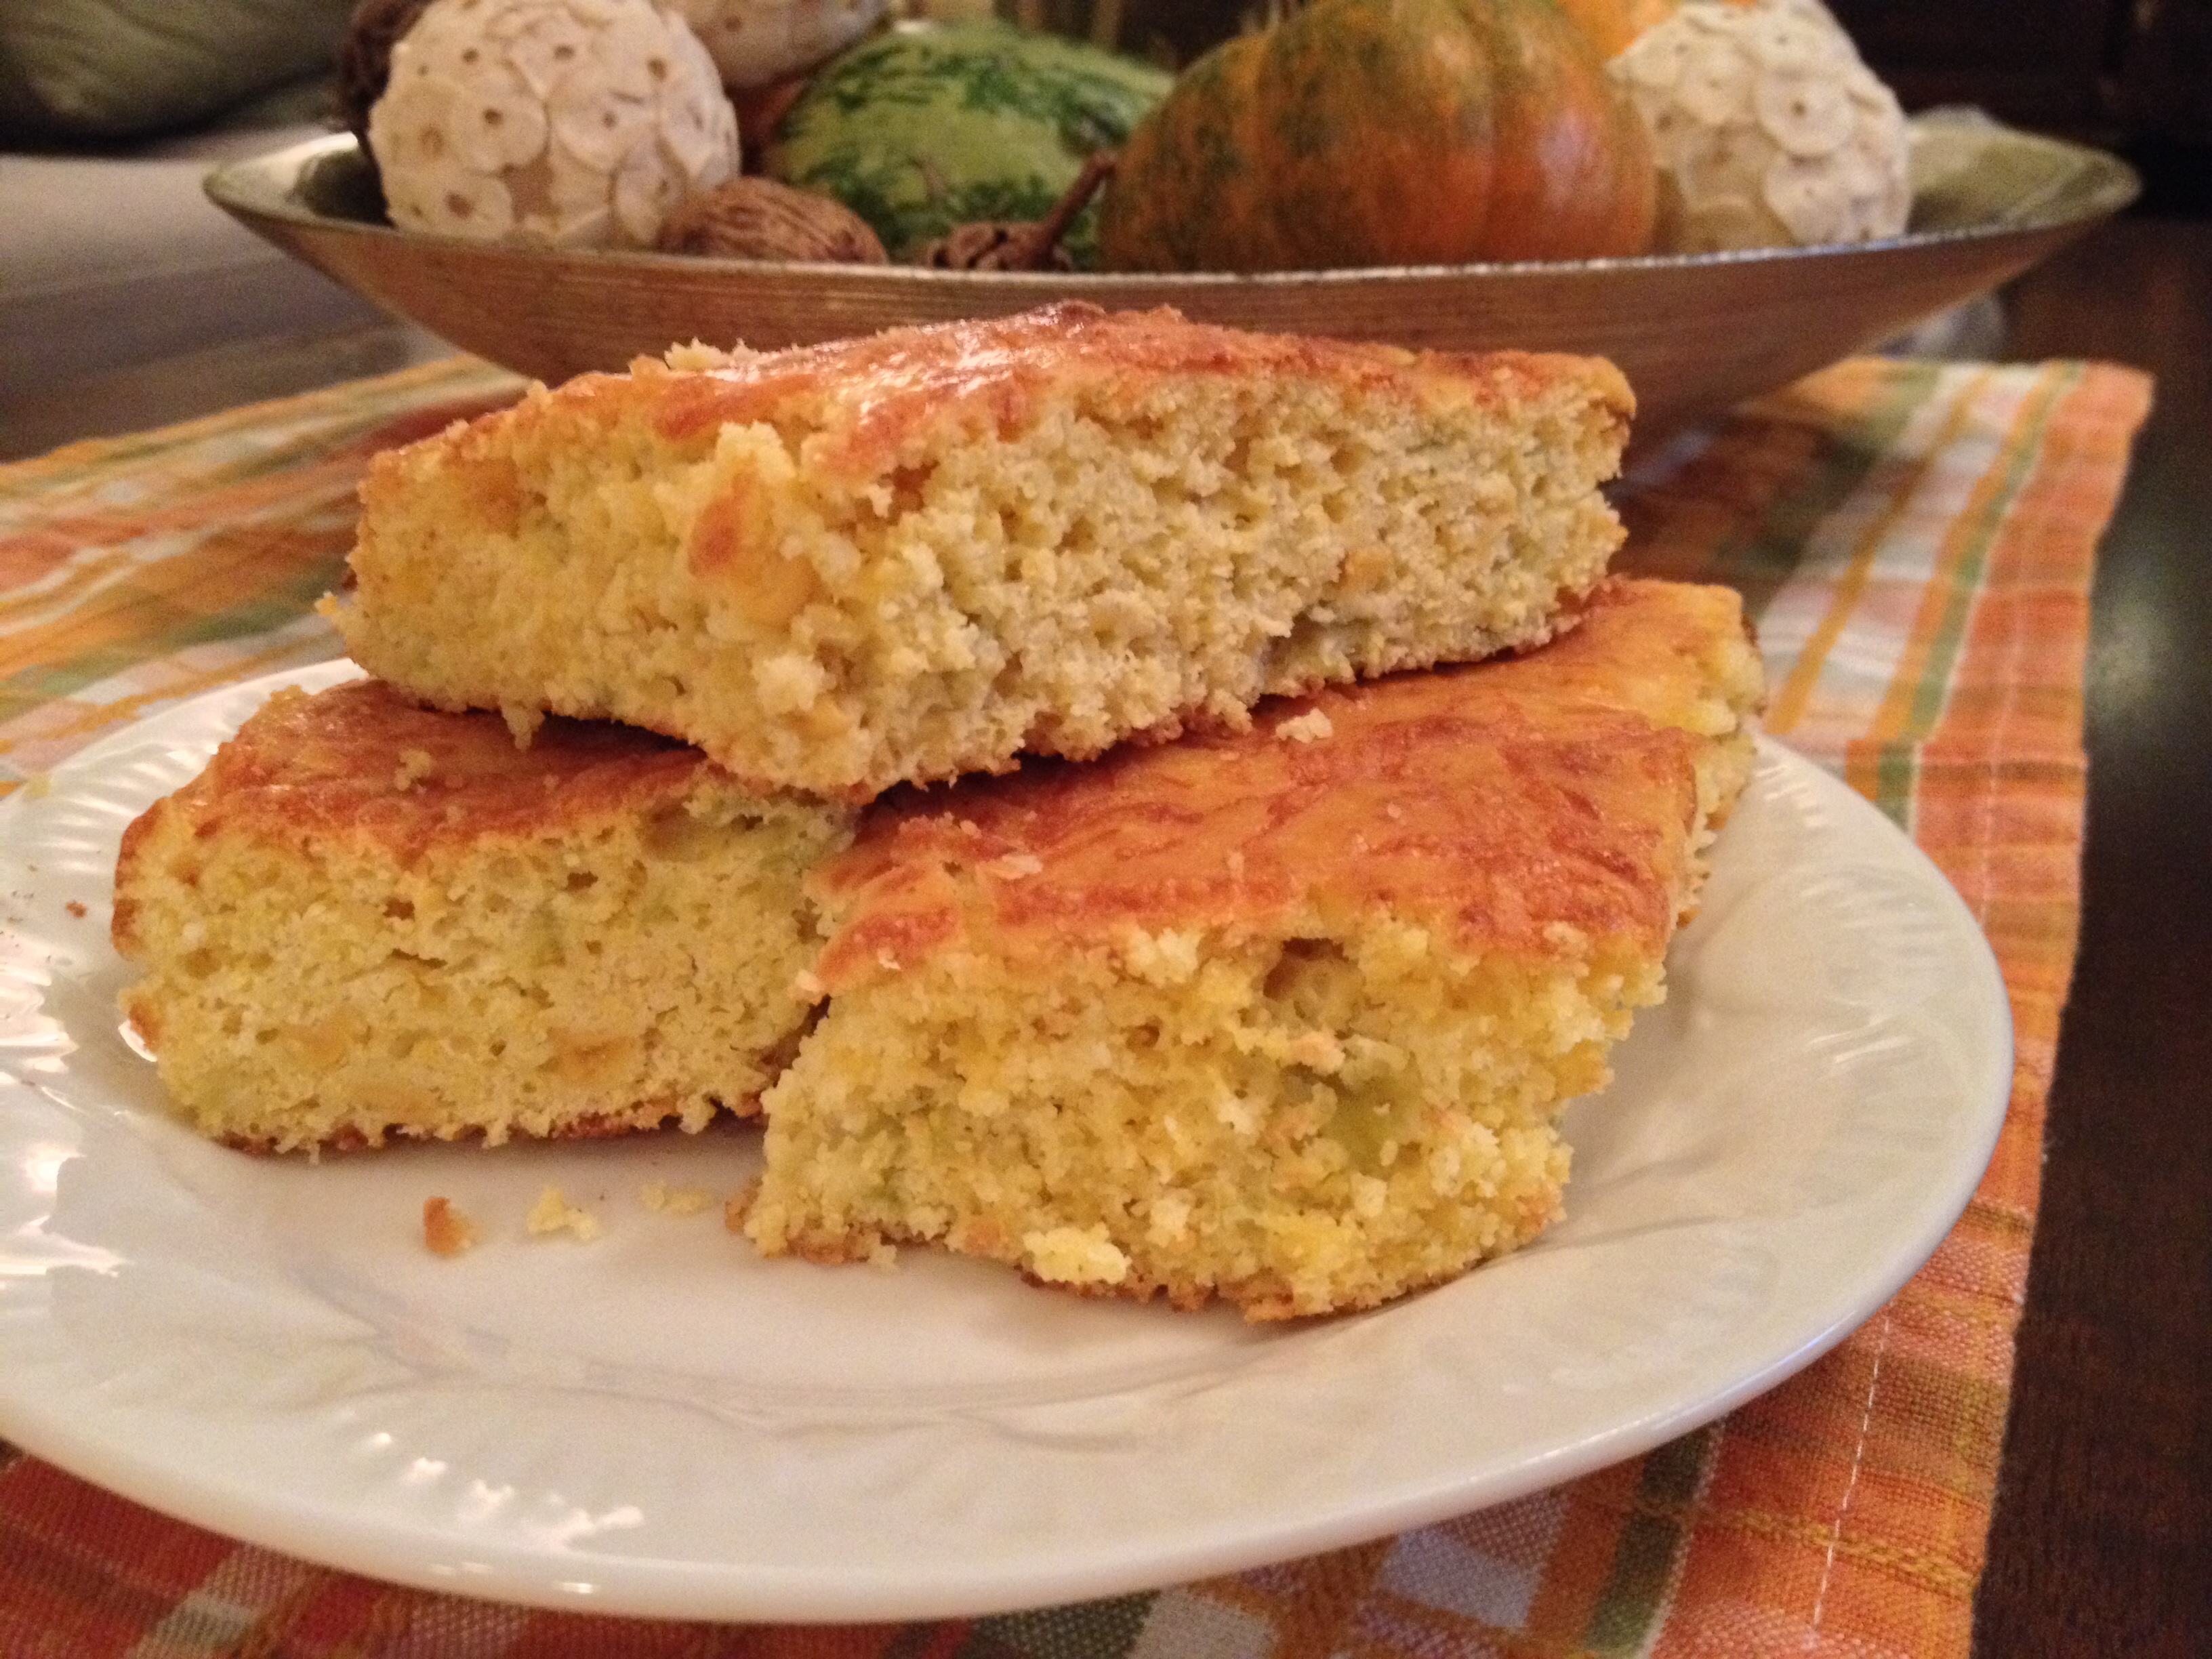
Fall is in full swing at T.W.O.’s house and that means cornbread and chili are on the menu. Learn how to make a chili-cornbread that is a great addition to your chili supper.
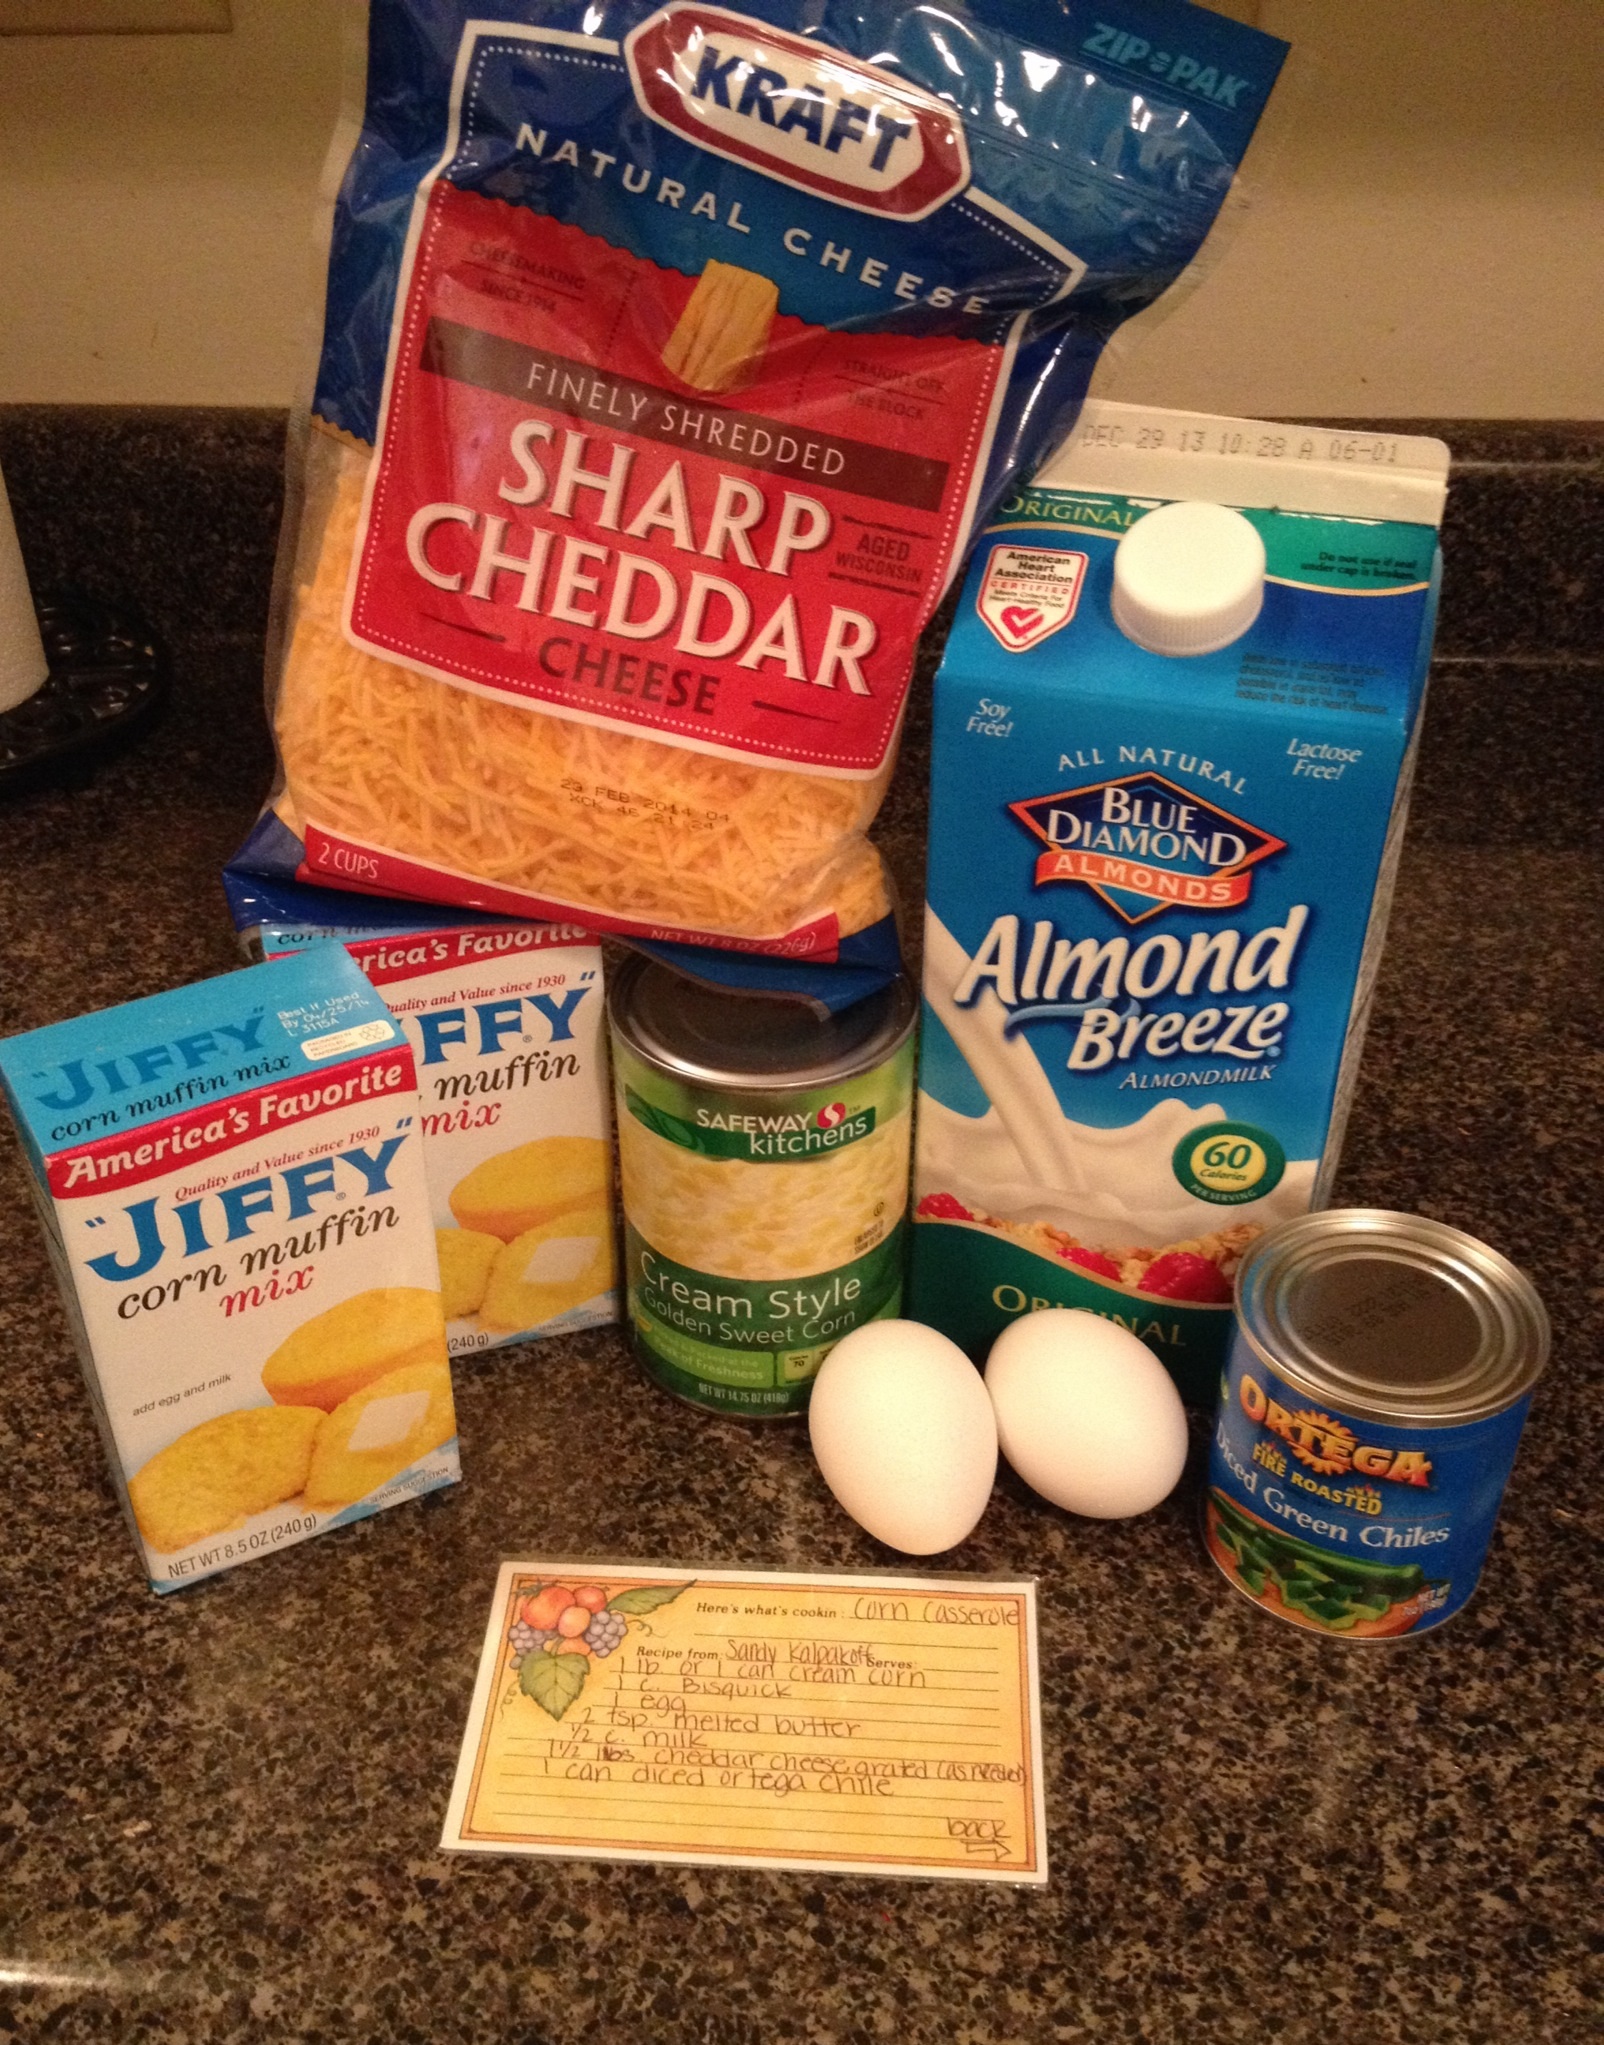
Ingredients:
– 2 boxes Jiffy Cornbread Mix
– 2 eggs
– 2/3 cup milk (T.W.O. used almond milk)
– 1 cup cheddar cheese, shredded
– 1 can cream of corn, 14.75 oz can
– 1 can diced Ortega chili, 7 oz can
Preheat oven to 400°. In a bowl, mix cornbread mix, egg and milk until creamy. Slowly add in ¾ cup cheese, cream of corn and Ortega chili. Once mixed, pour batter into a greased 8.5 x 11 pyrex dish. Sprinkle ¼ cup of cheese on top of the cornbread before putting in the oven.


Cook for 20-25 minutes. Once done, take the cornbread out and serve immediately. Add some honey if desired and your chili night will be complete! Later this week, T.W.O. will be featuring their chili recipe, so stay tuned!

Happy Baking!
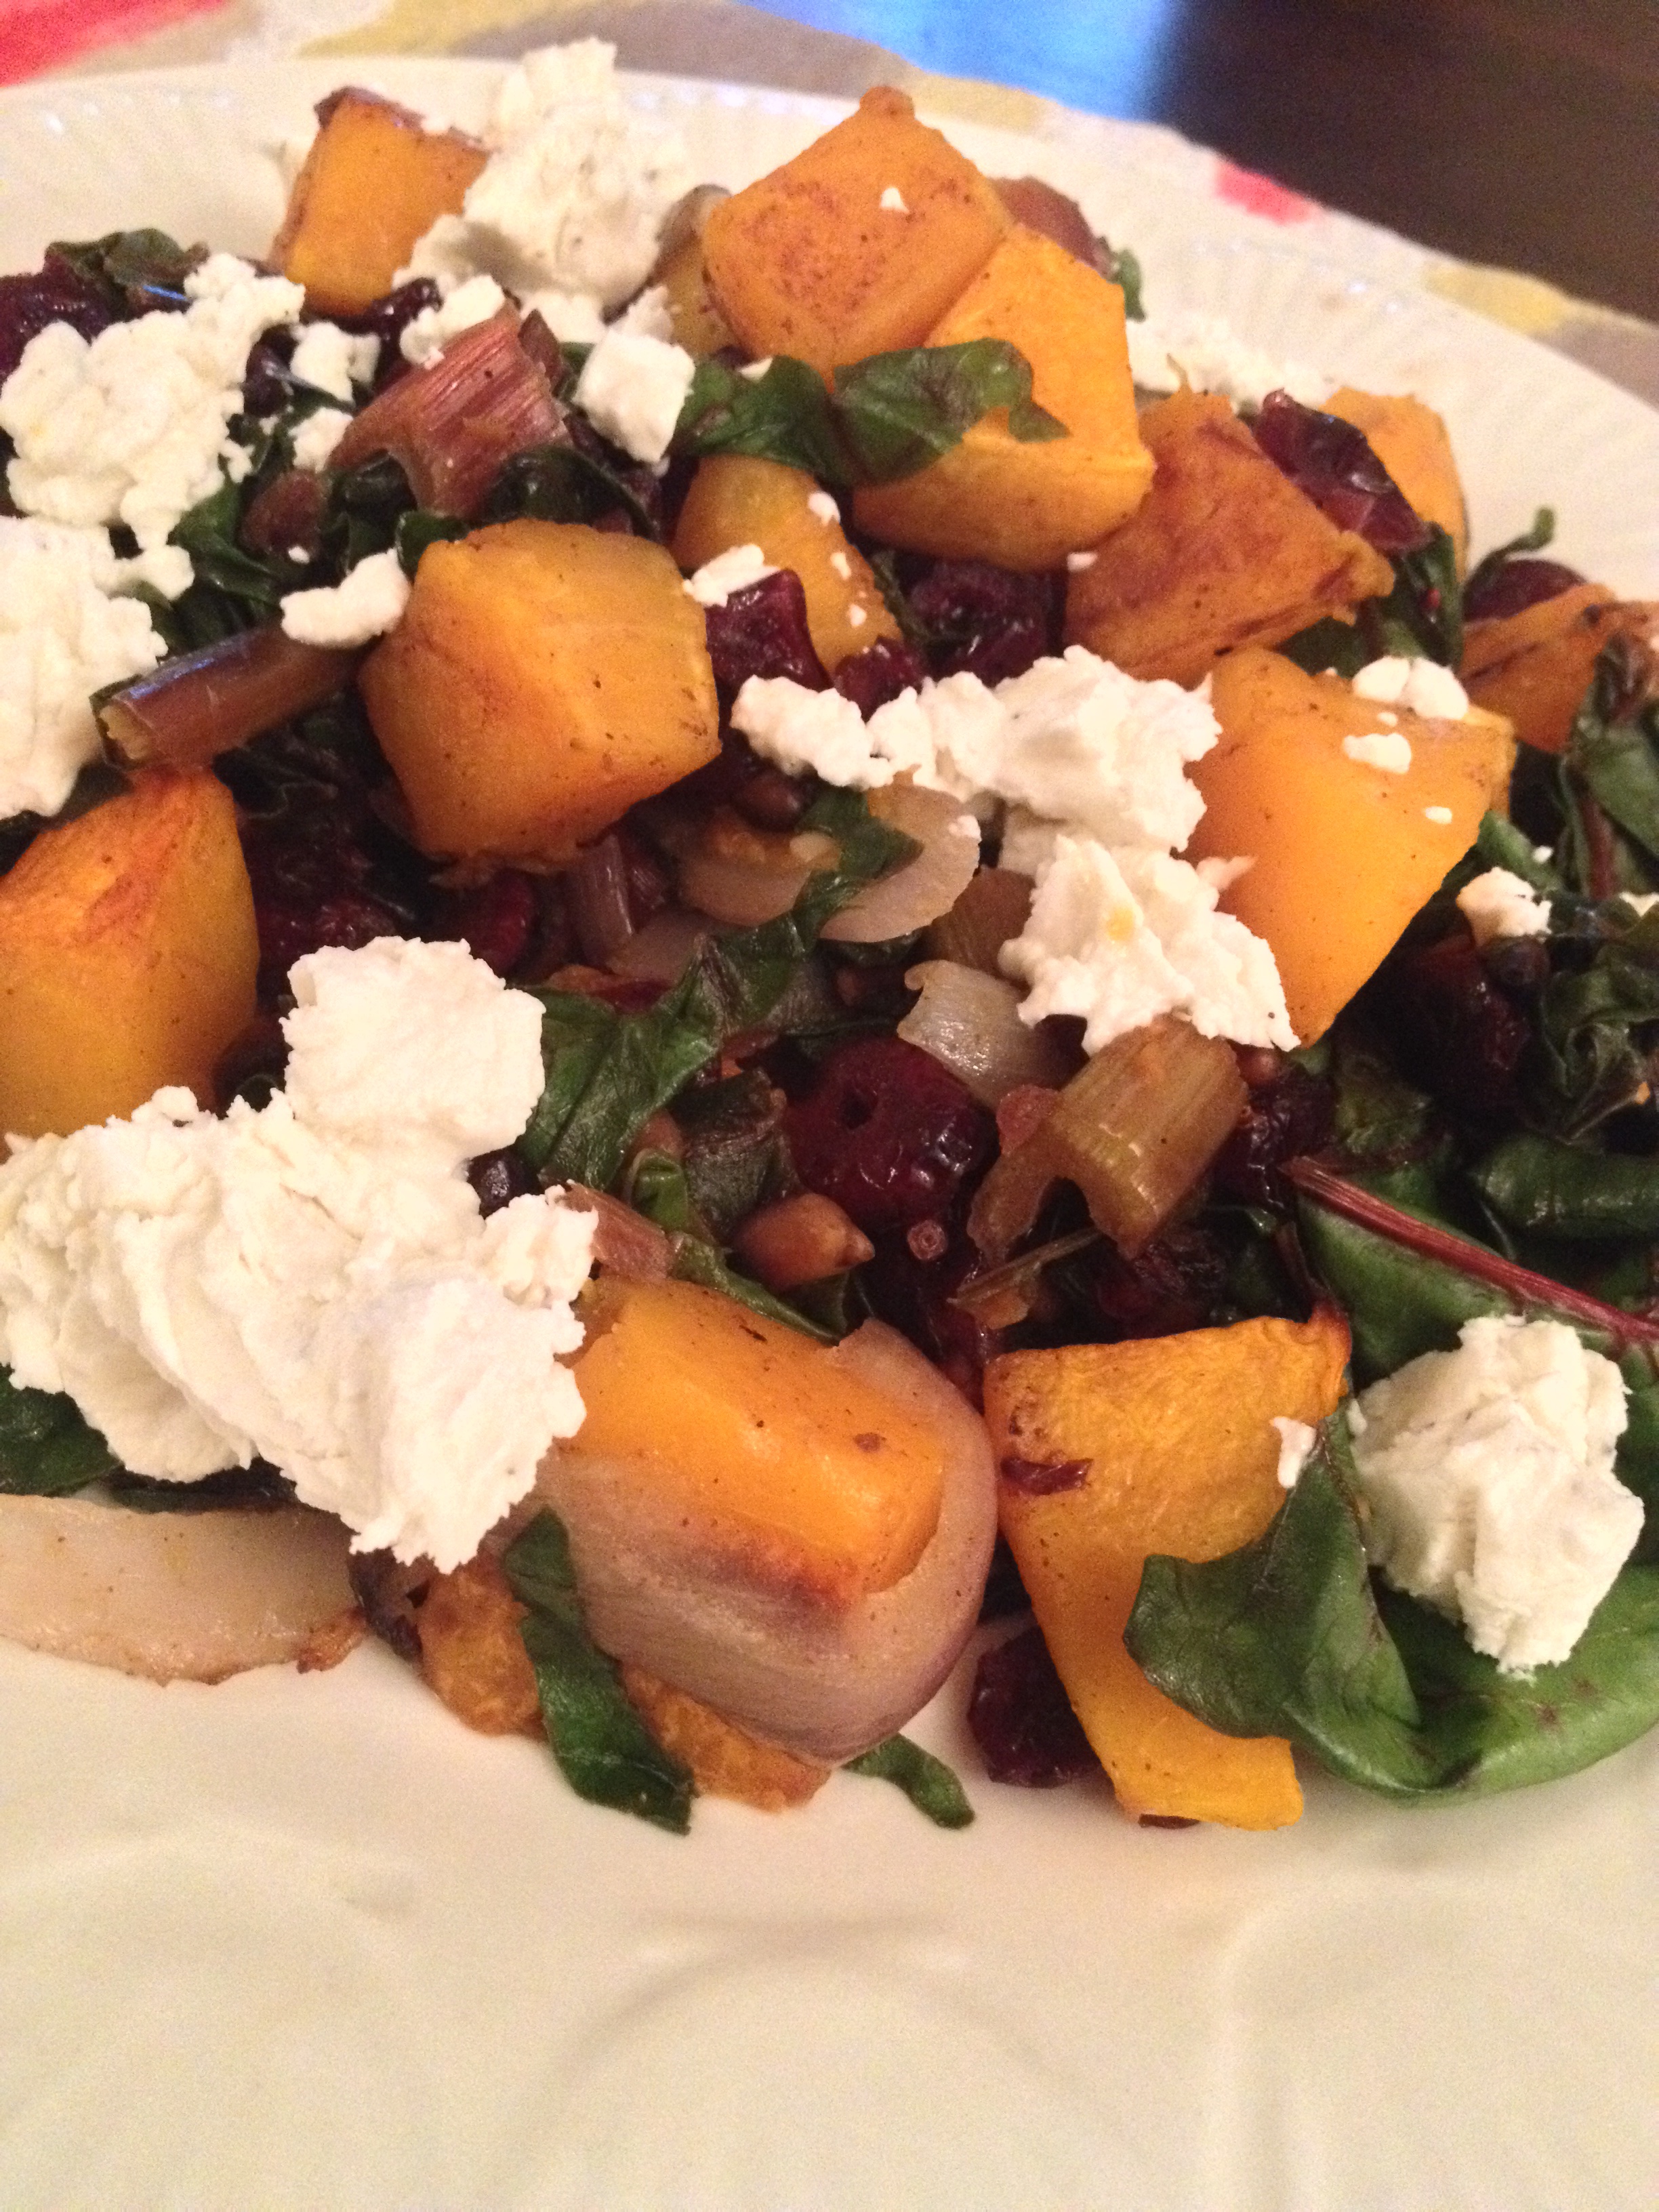
Picture this: A cold autumn’s night with green vegetables, toasted pine nuts, butternut squash and goat cheese. Sounds T.W.O. perfect, right? Well it is! Check out how to make this dish below.
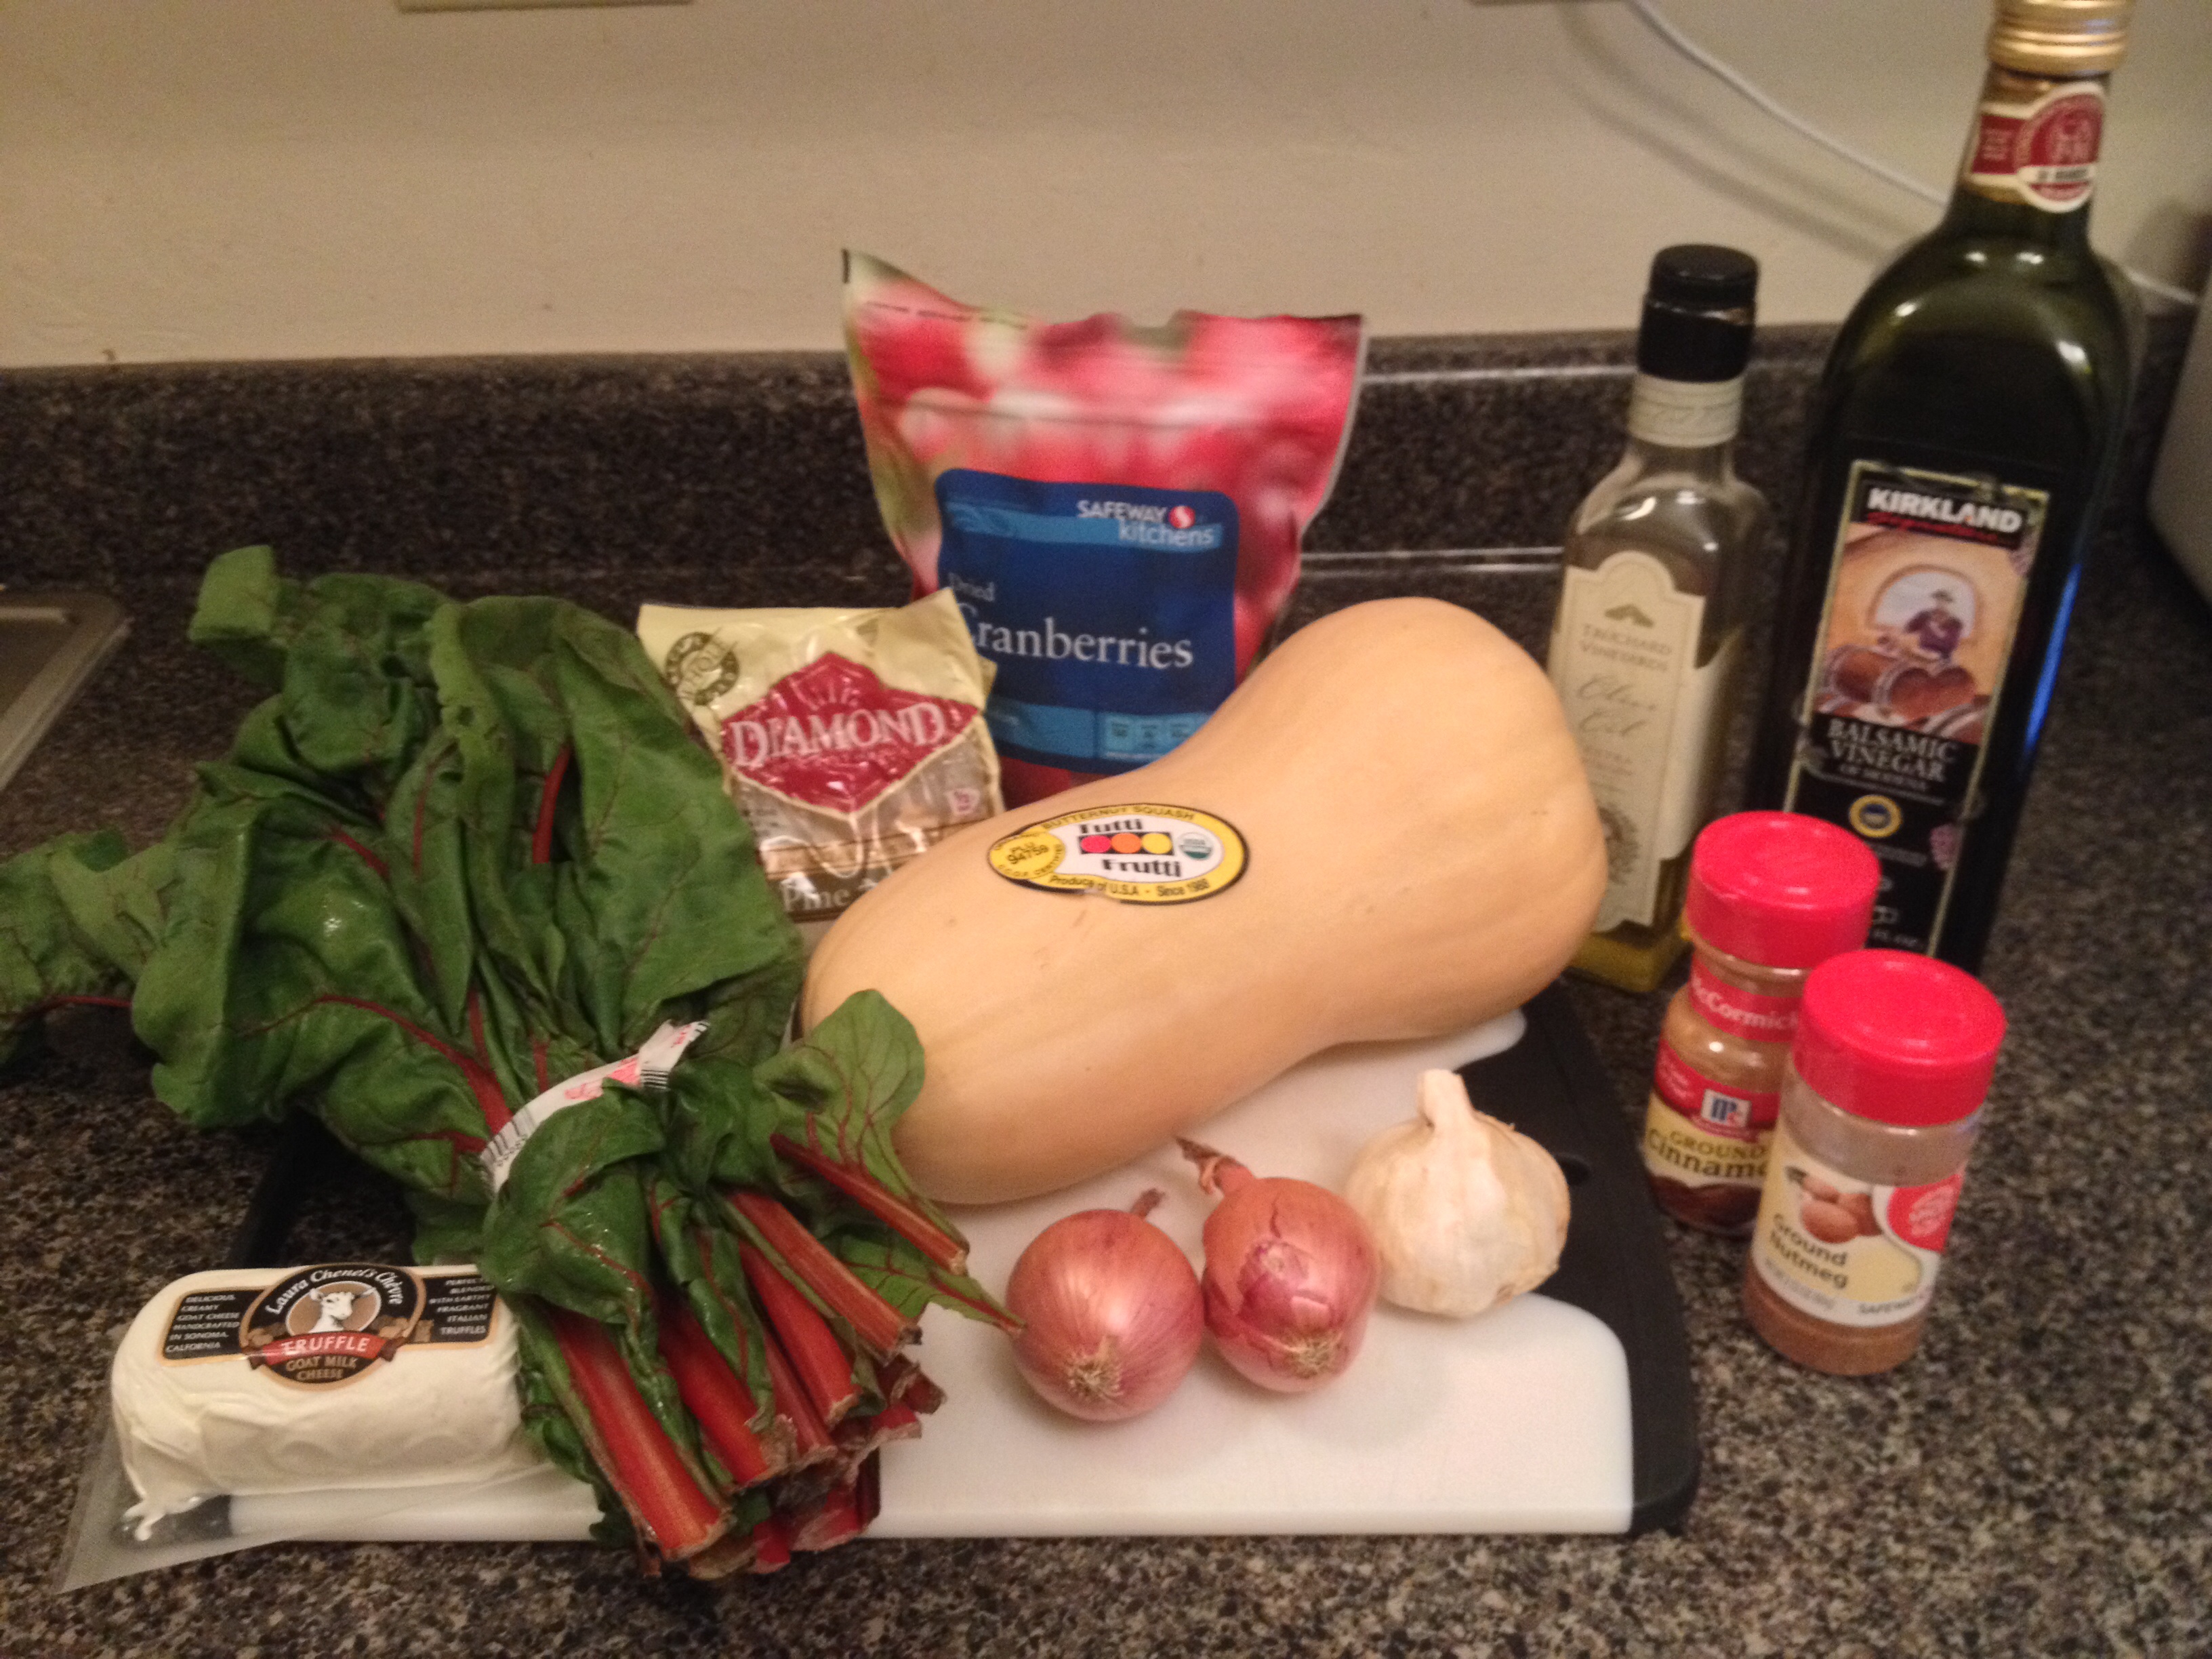
Ingredients:
– 1 large butternut squash
– 2 large shallots, quartered
-4 gloves of garlic, skinned and halved
– 1 ½ Tablespoon cinnamon
– 1 ½ Tablespoon nutmeg
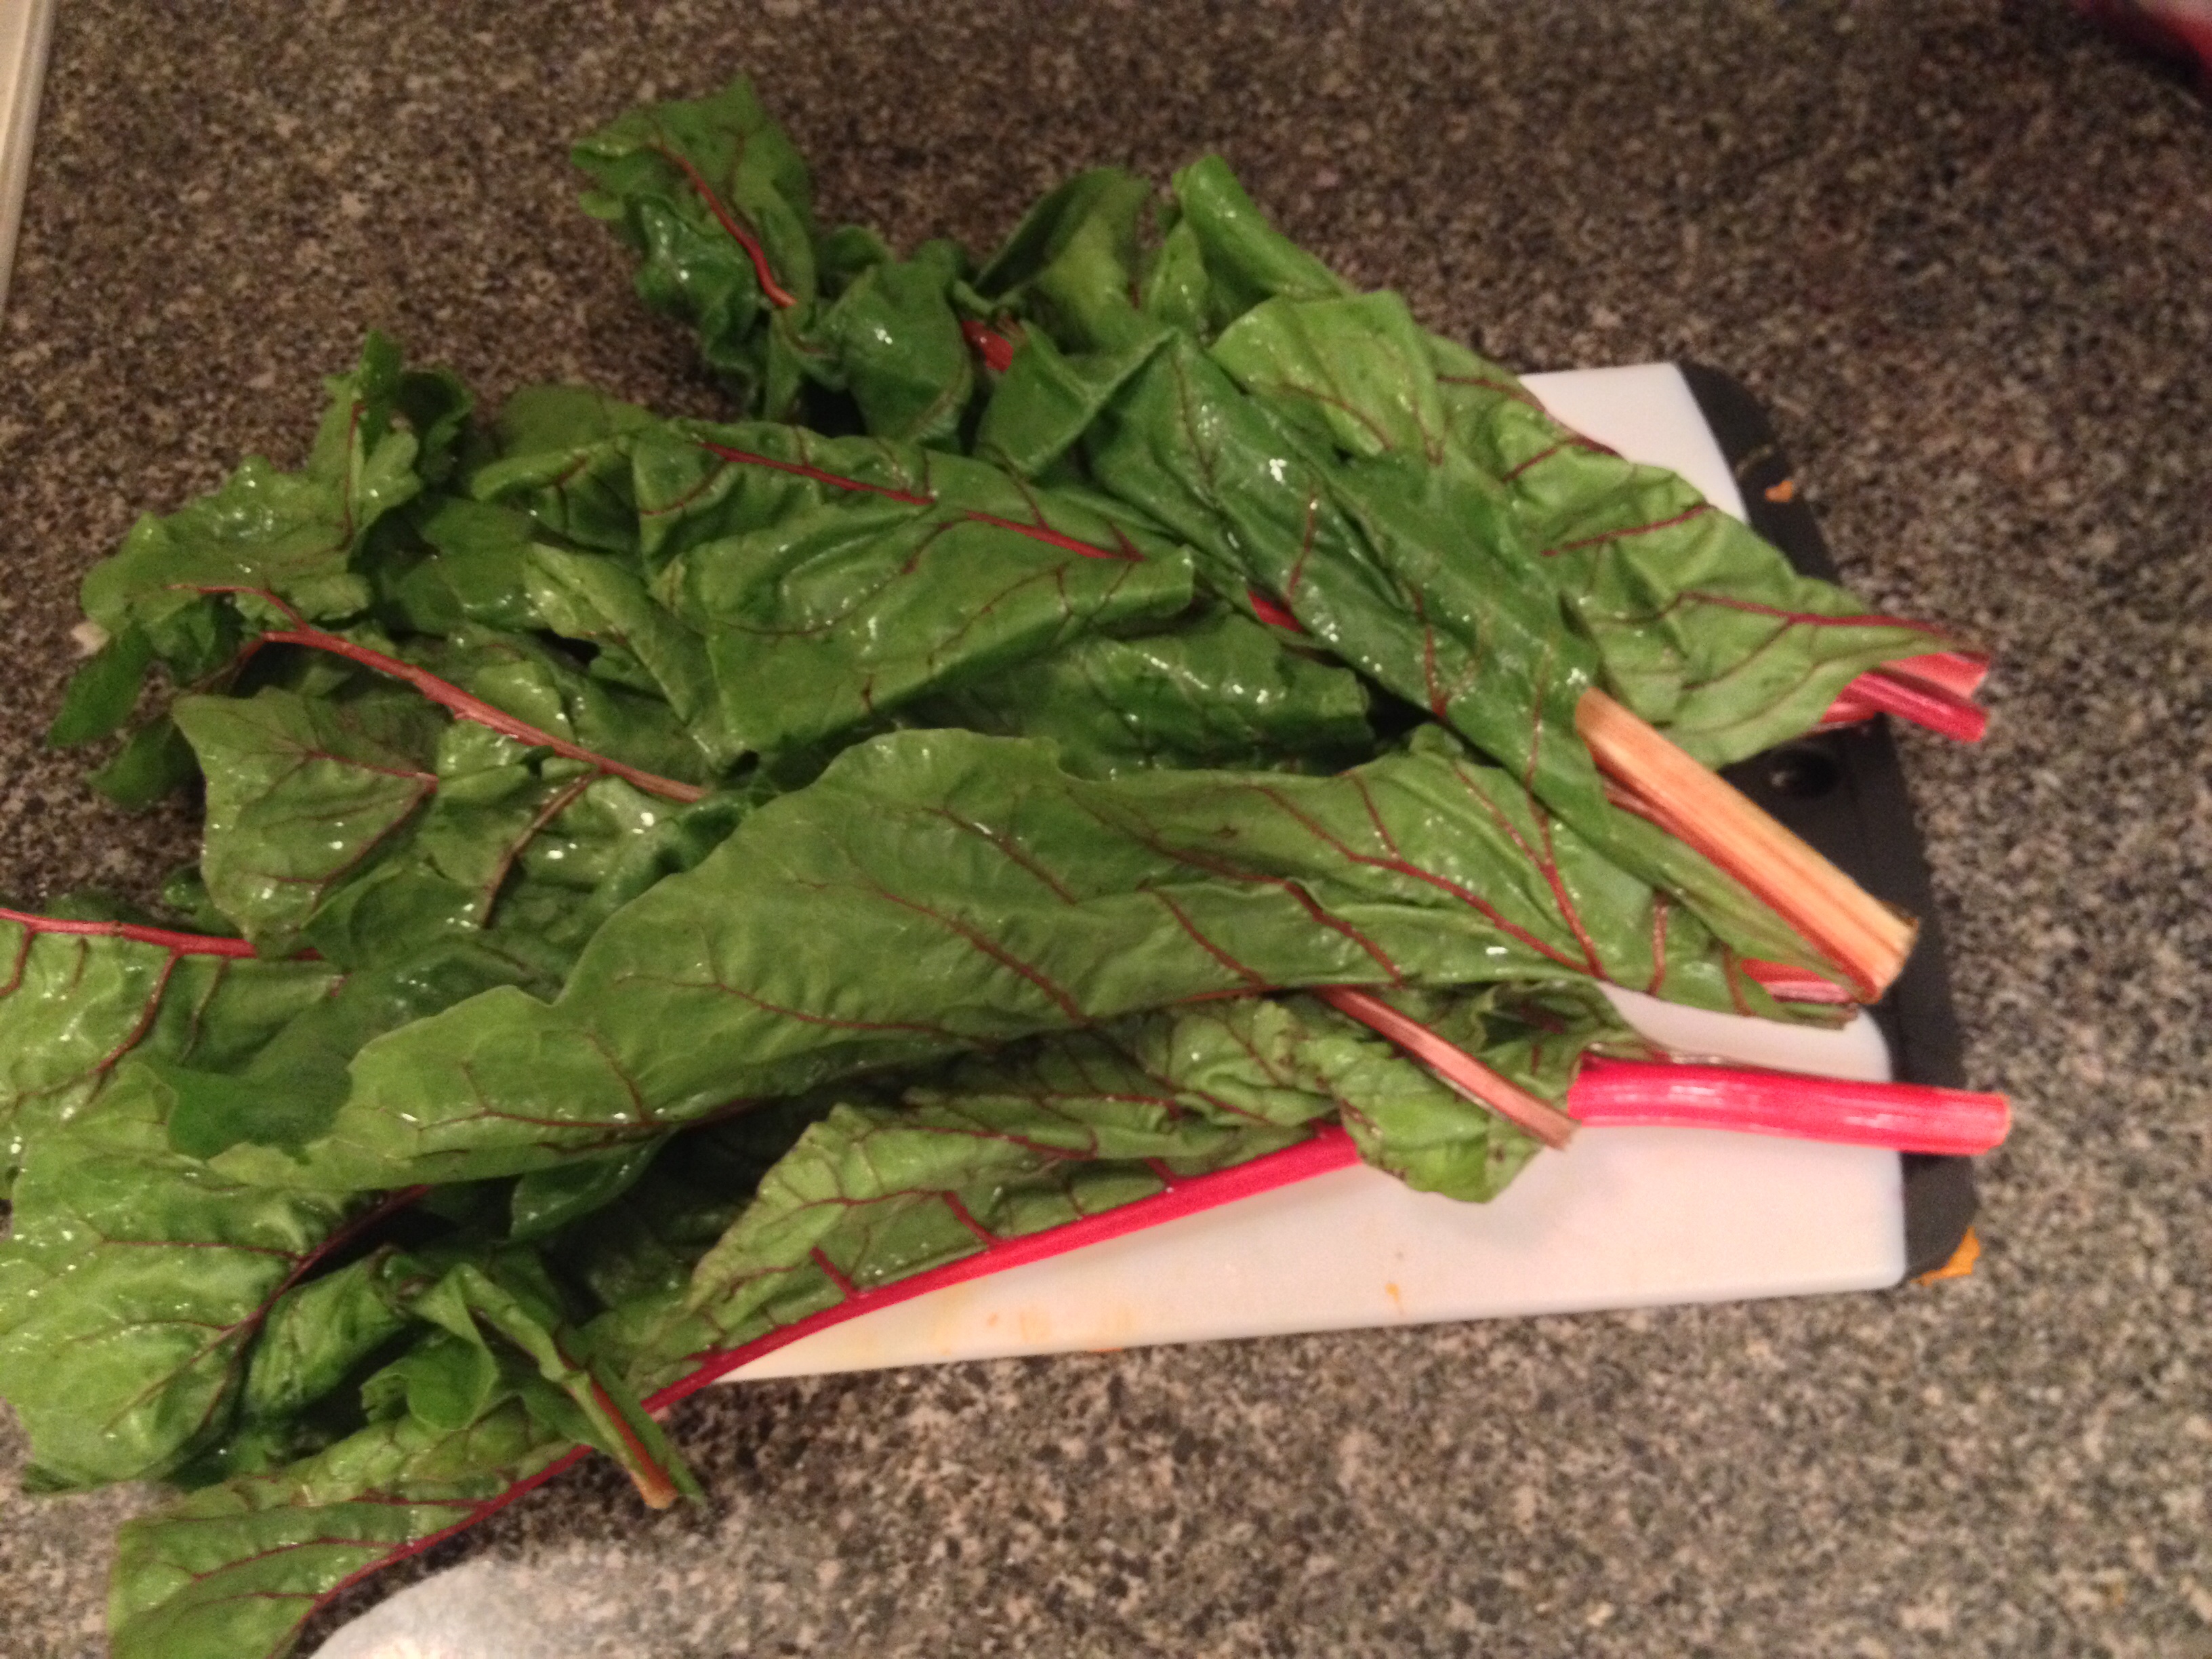
-1 large head Swiss chard, stems and leaves chopped separately
-¼ cup pine nuts, toasted
-¾ cups dried cranberries
– ¼ cup honey goat cheese, crumbled
– balsamic vinegar, to drizzle
Preheat oven to 375ᴼ. Peel the squash and cut in half lengthwise. Seed the squash and cut into bite-size cubes. Spray/brush the squash with olive oil and mix in cinnamon and nutmeg. Once the squash is coated, place on a baking sheet and cook for about 30-40 minutes until soft. Check the squash periodically and mix.


At the 20 minute mark, add the garlic and the shallots to the butternut squash on the baking pan in the oven.
While the squash medley is cooking, chop the Swish chard stems and sauté in a fry pan for 3 minutes with a drixzle of balsamic vinegar. After 2 minutes, add the Swish chard leaves.
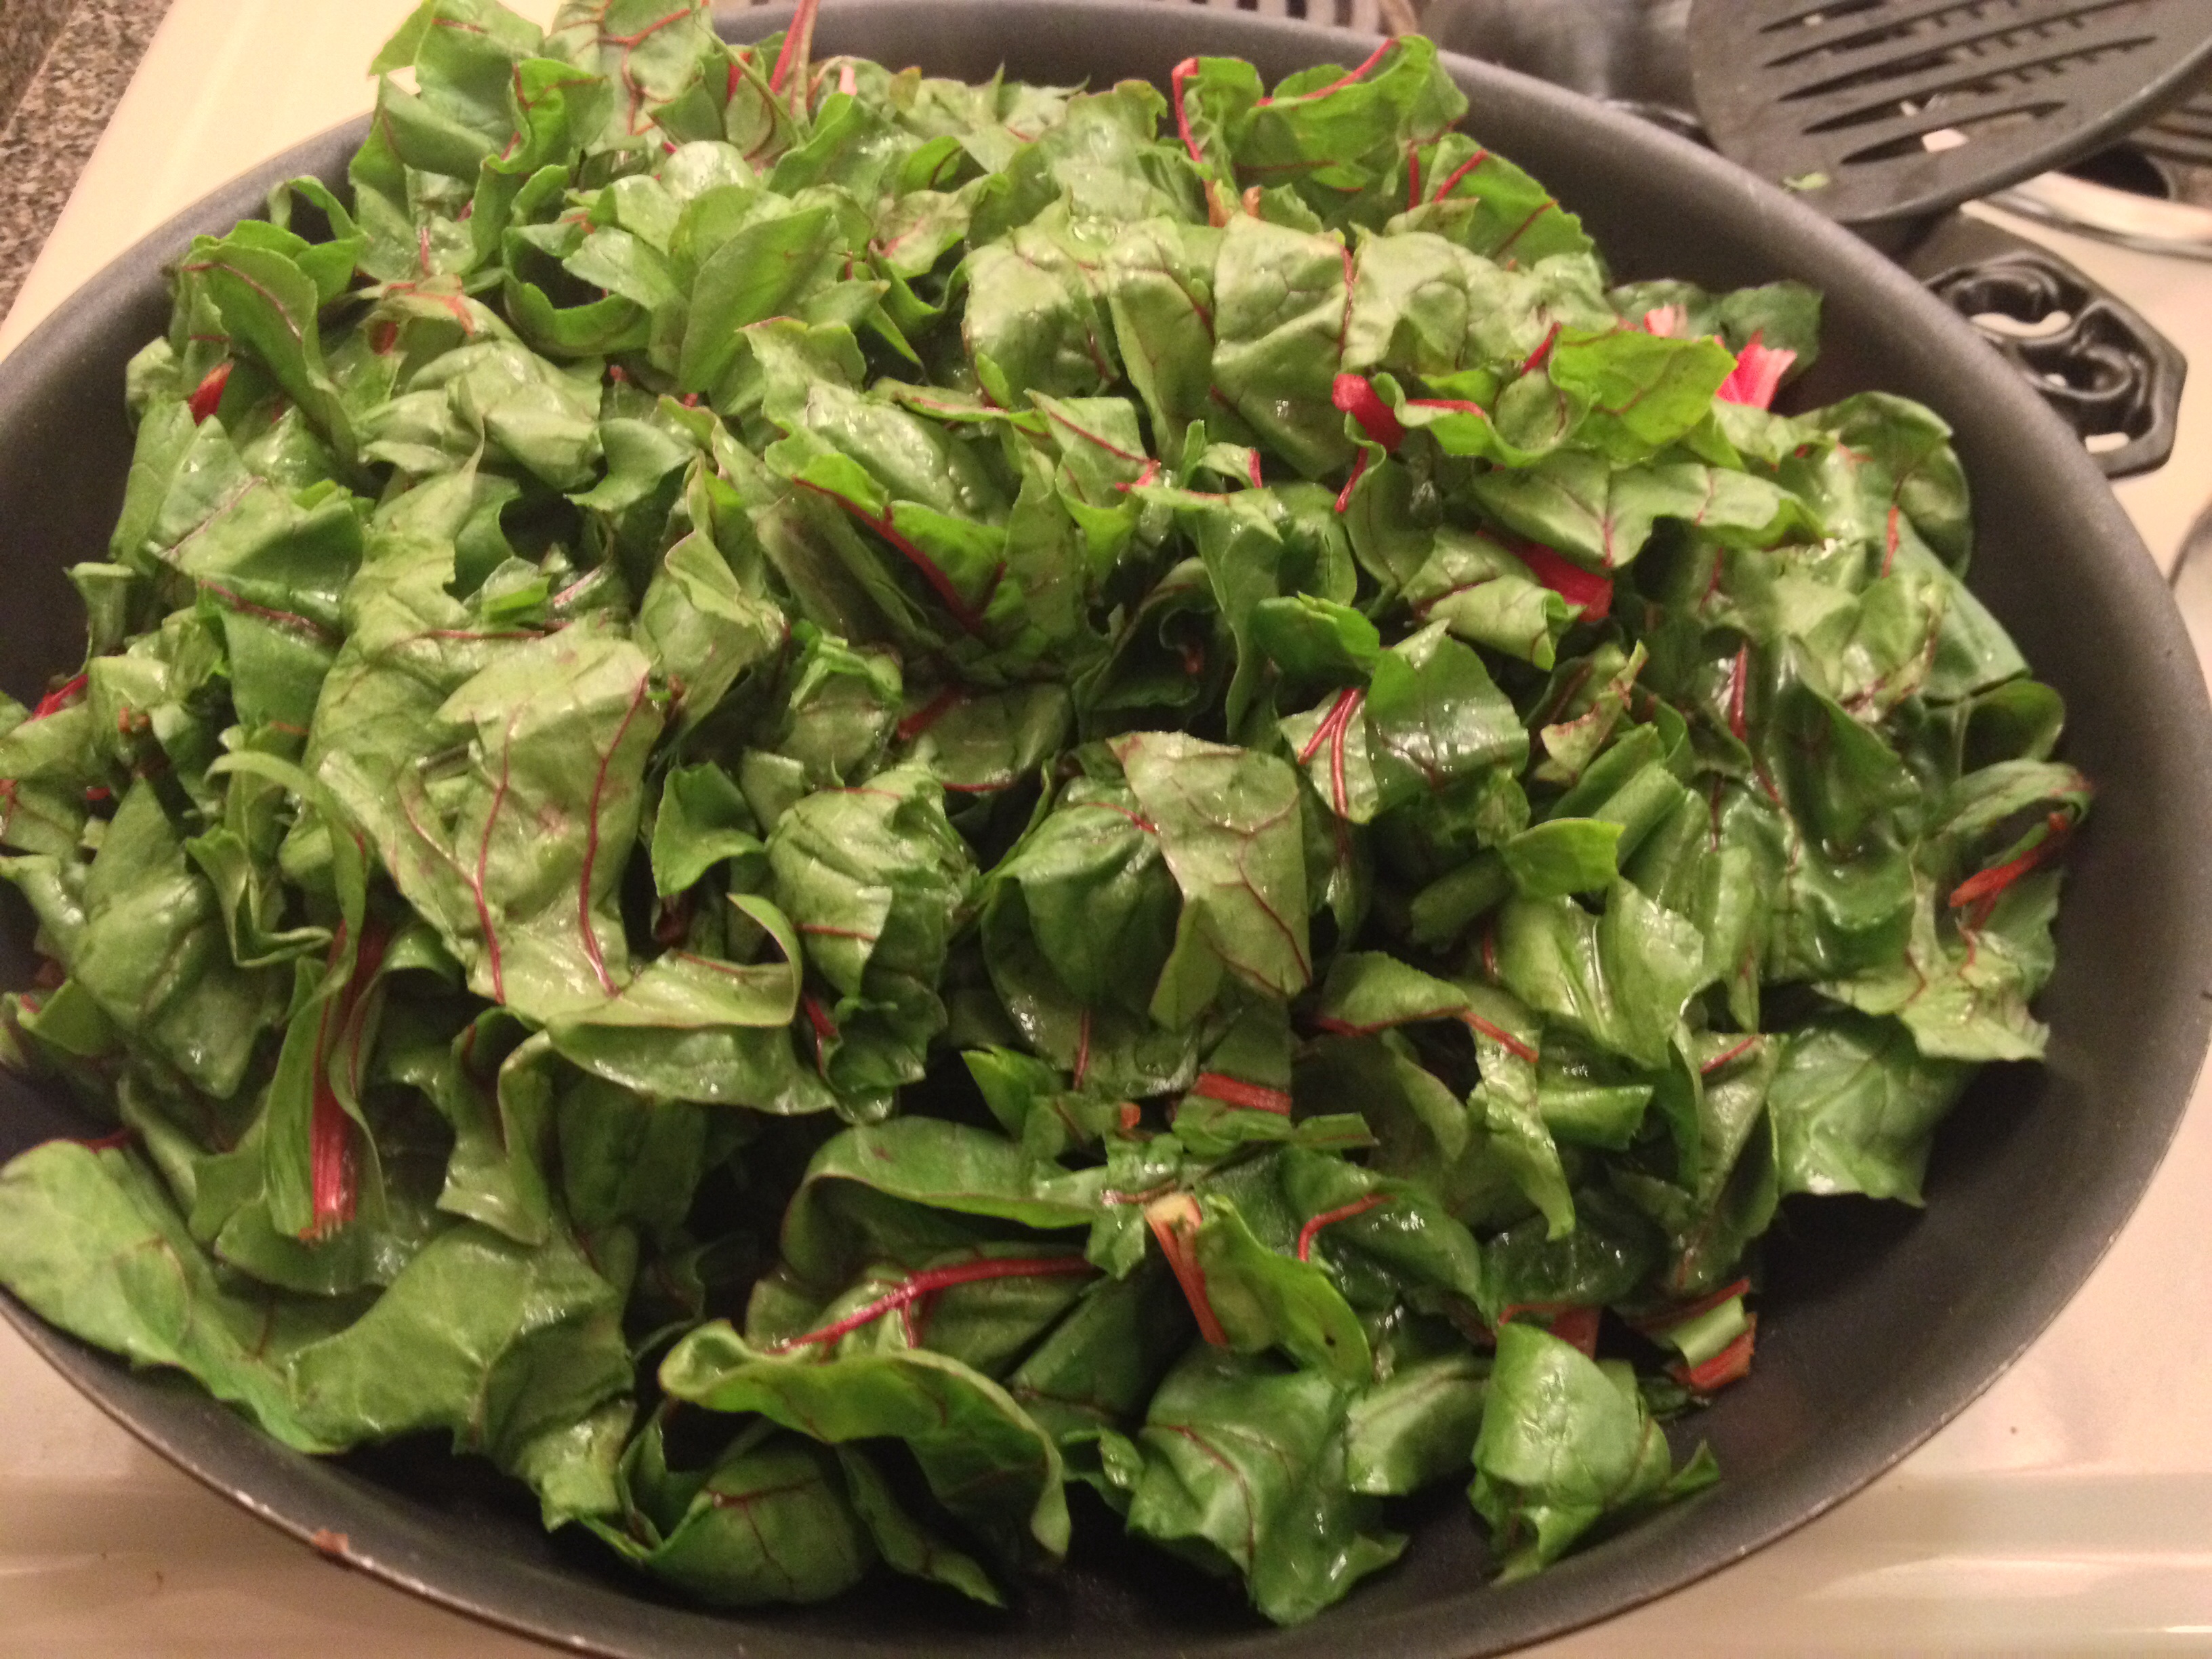
Mix in the cranberries and the roasted pine nuts.

Remove the squash, shallots and garlic from the oven and add to the Swish chard mixture. Once mixed, remove from stove and plate the ingredients. Add the goat cheese to the top for garnish. Serve immediately.

T.W.O. enjoys having this for leftovers for lunch the next day. Just heat it up in the microwave or on the stove and you will have another tasty meal!
Happy cooking!!!
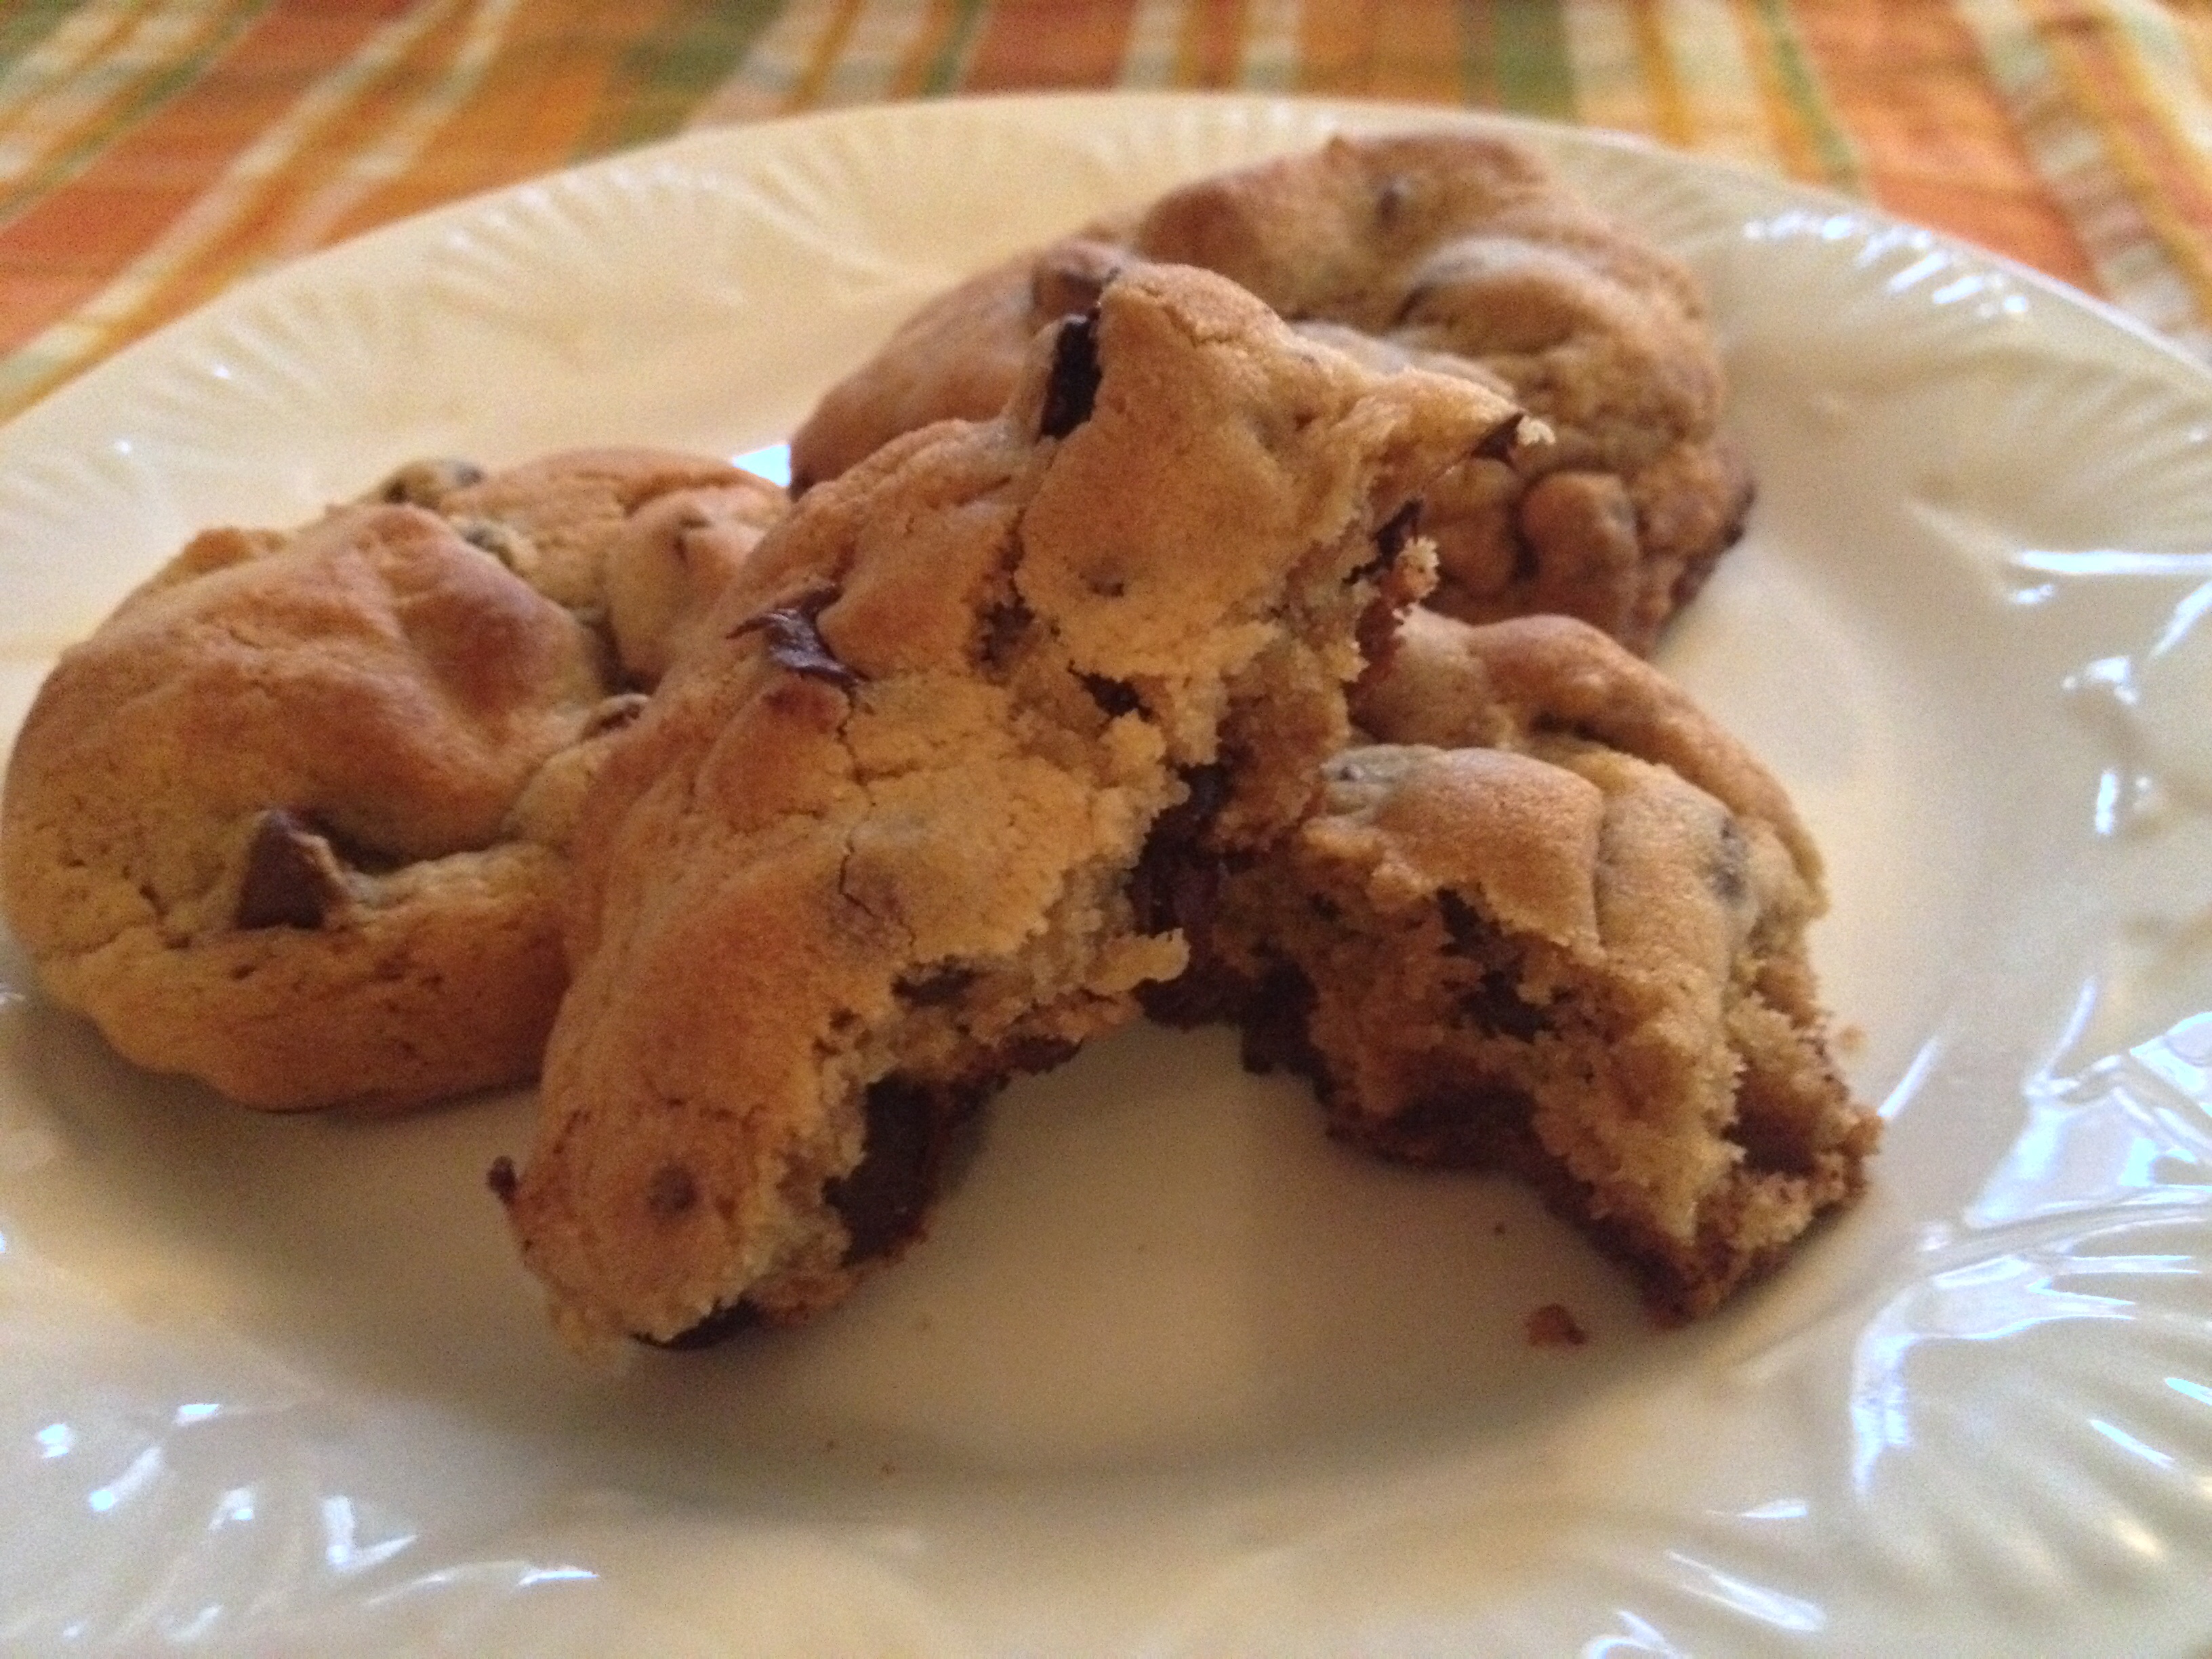
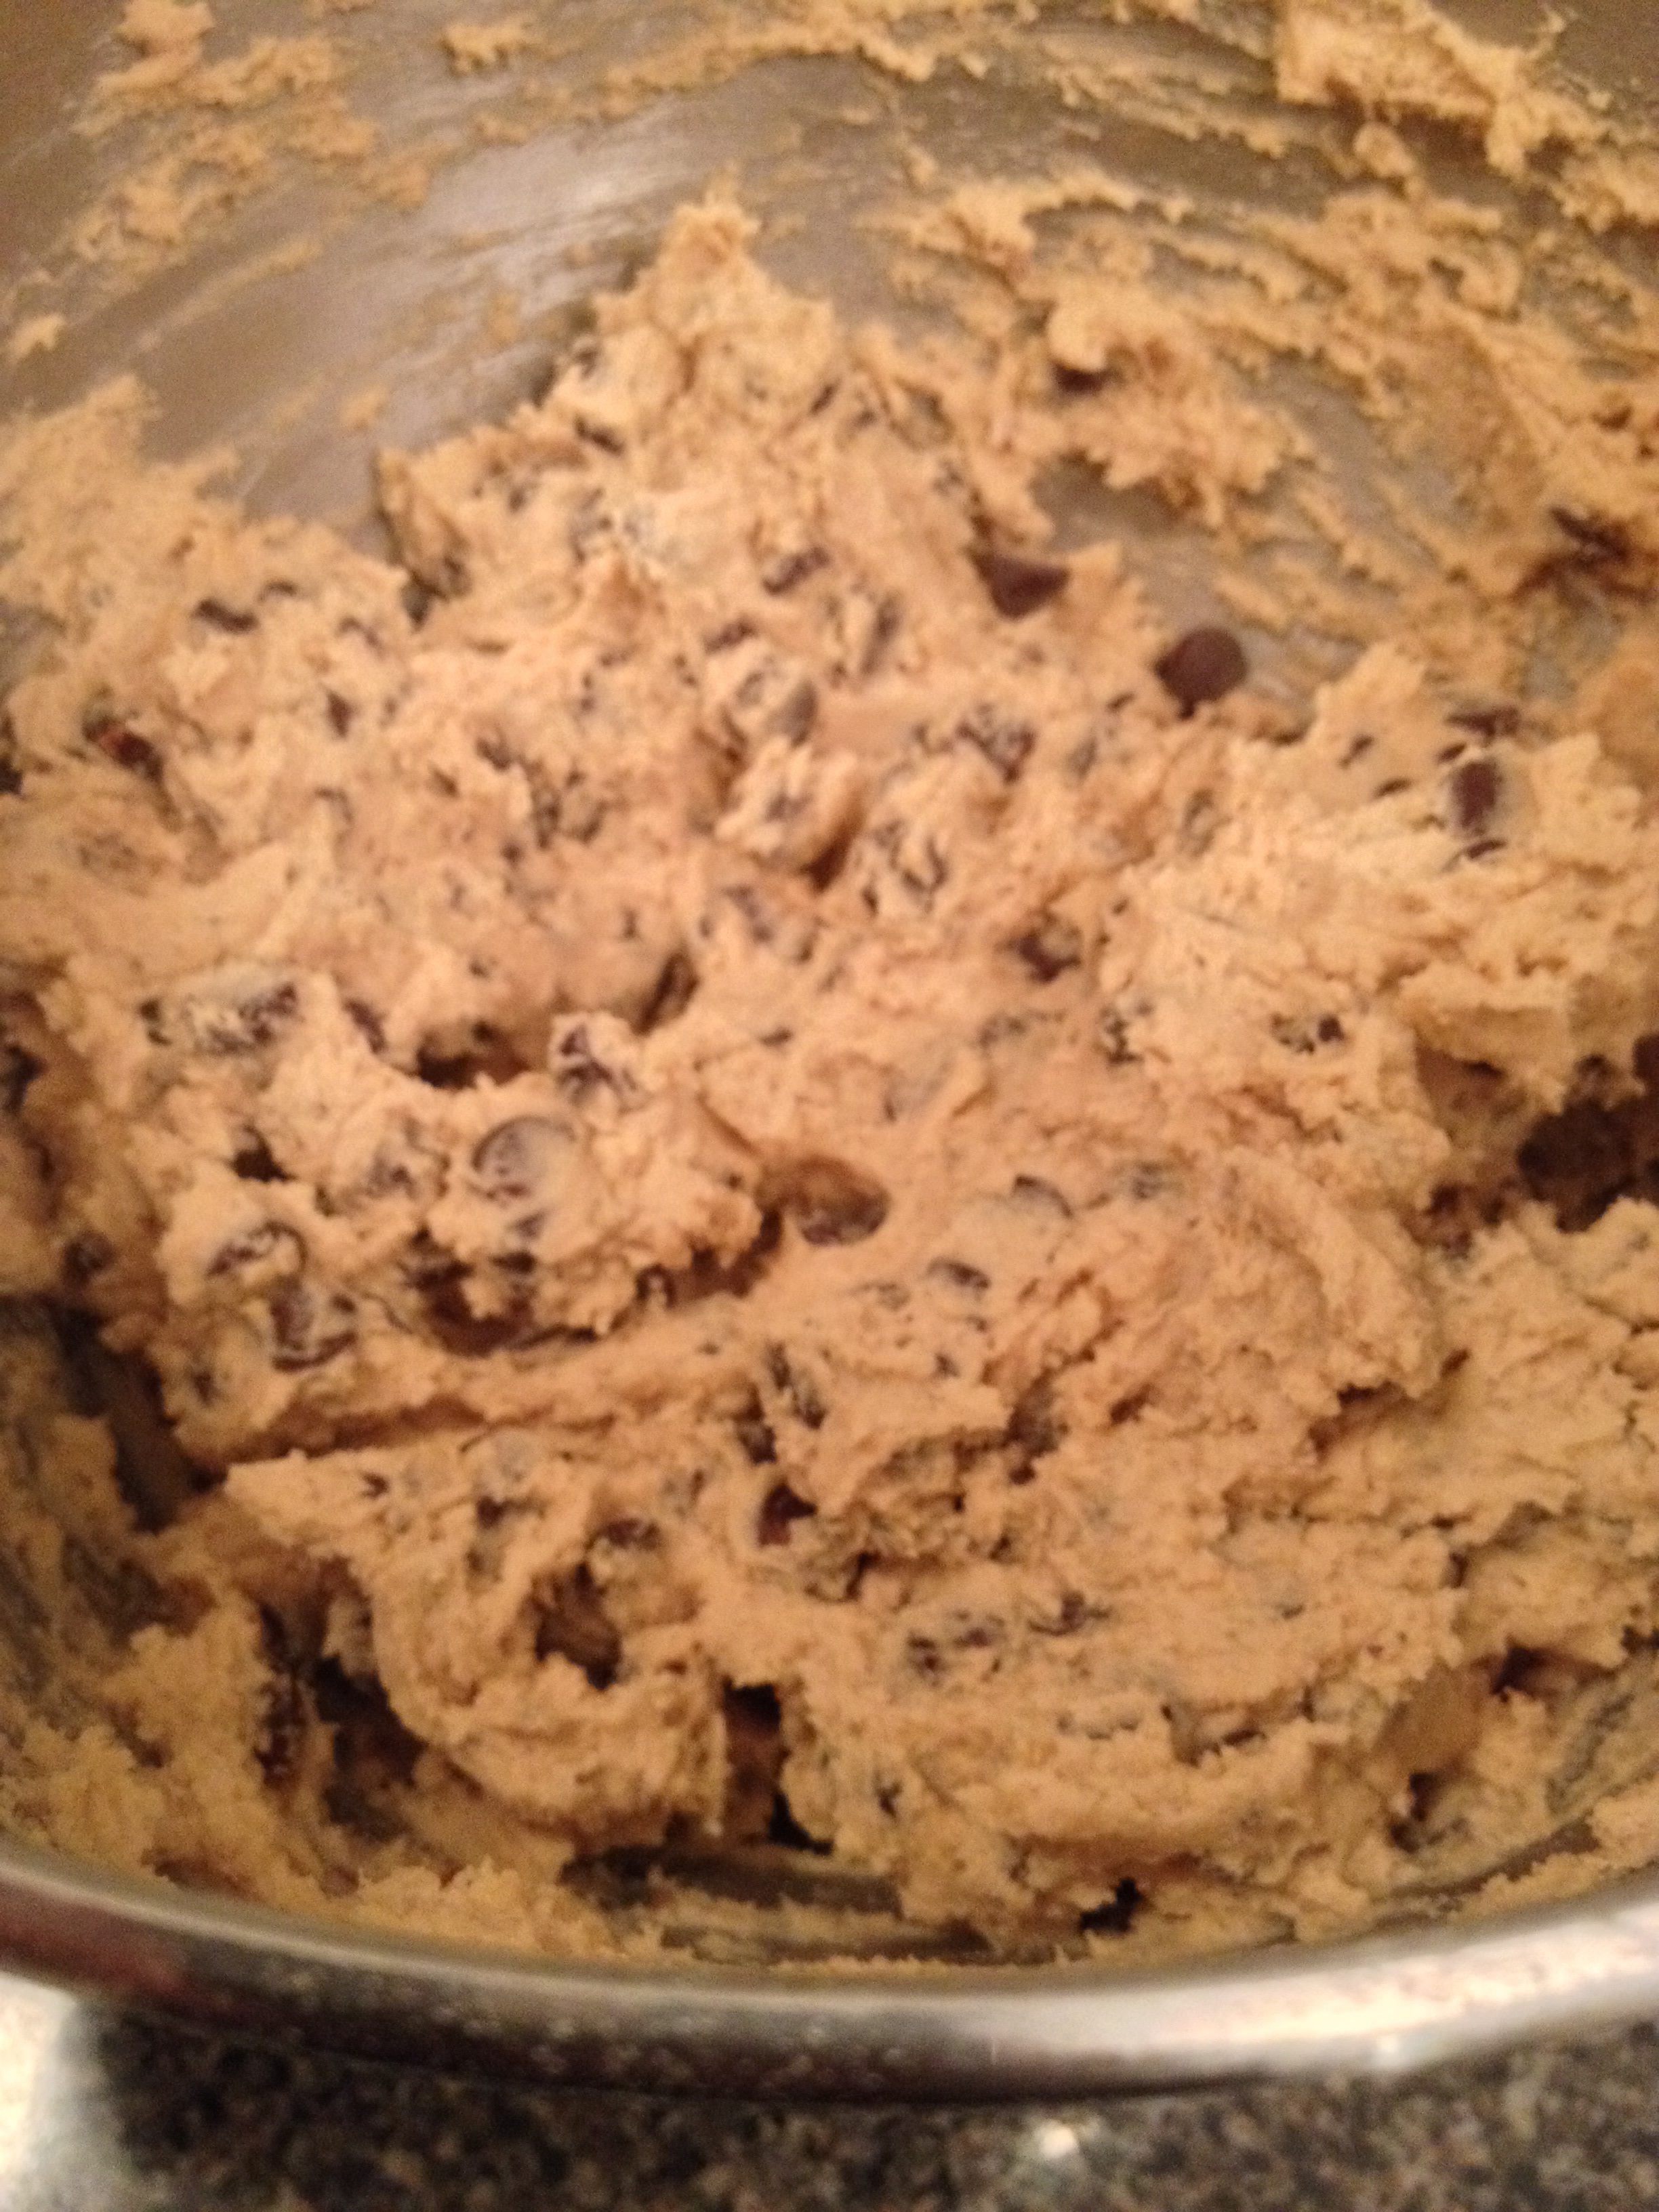
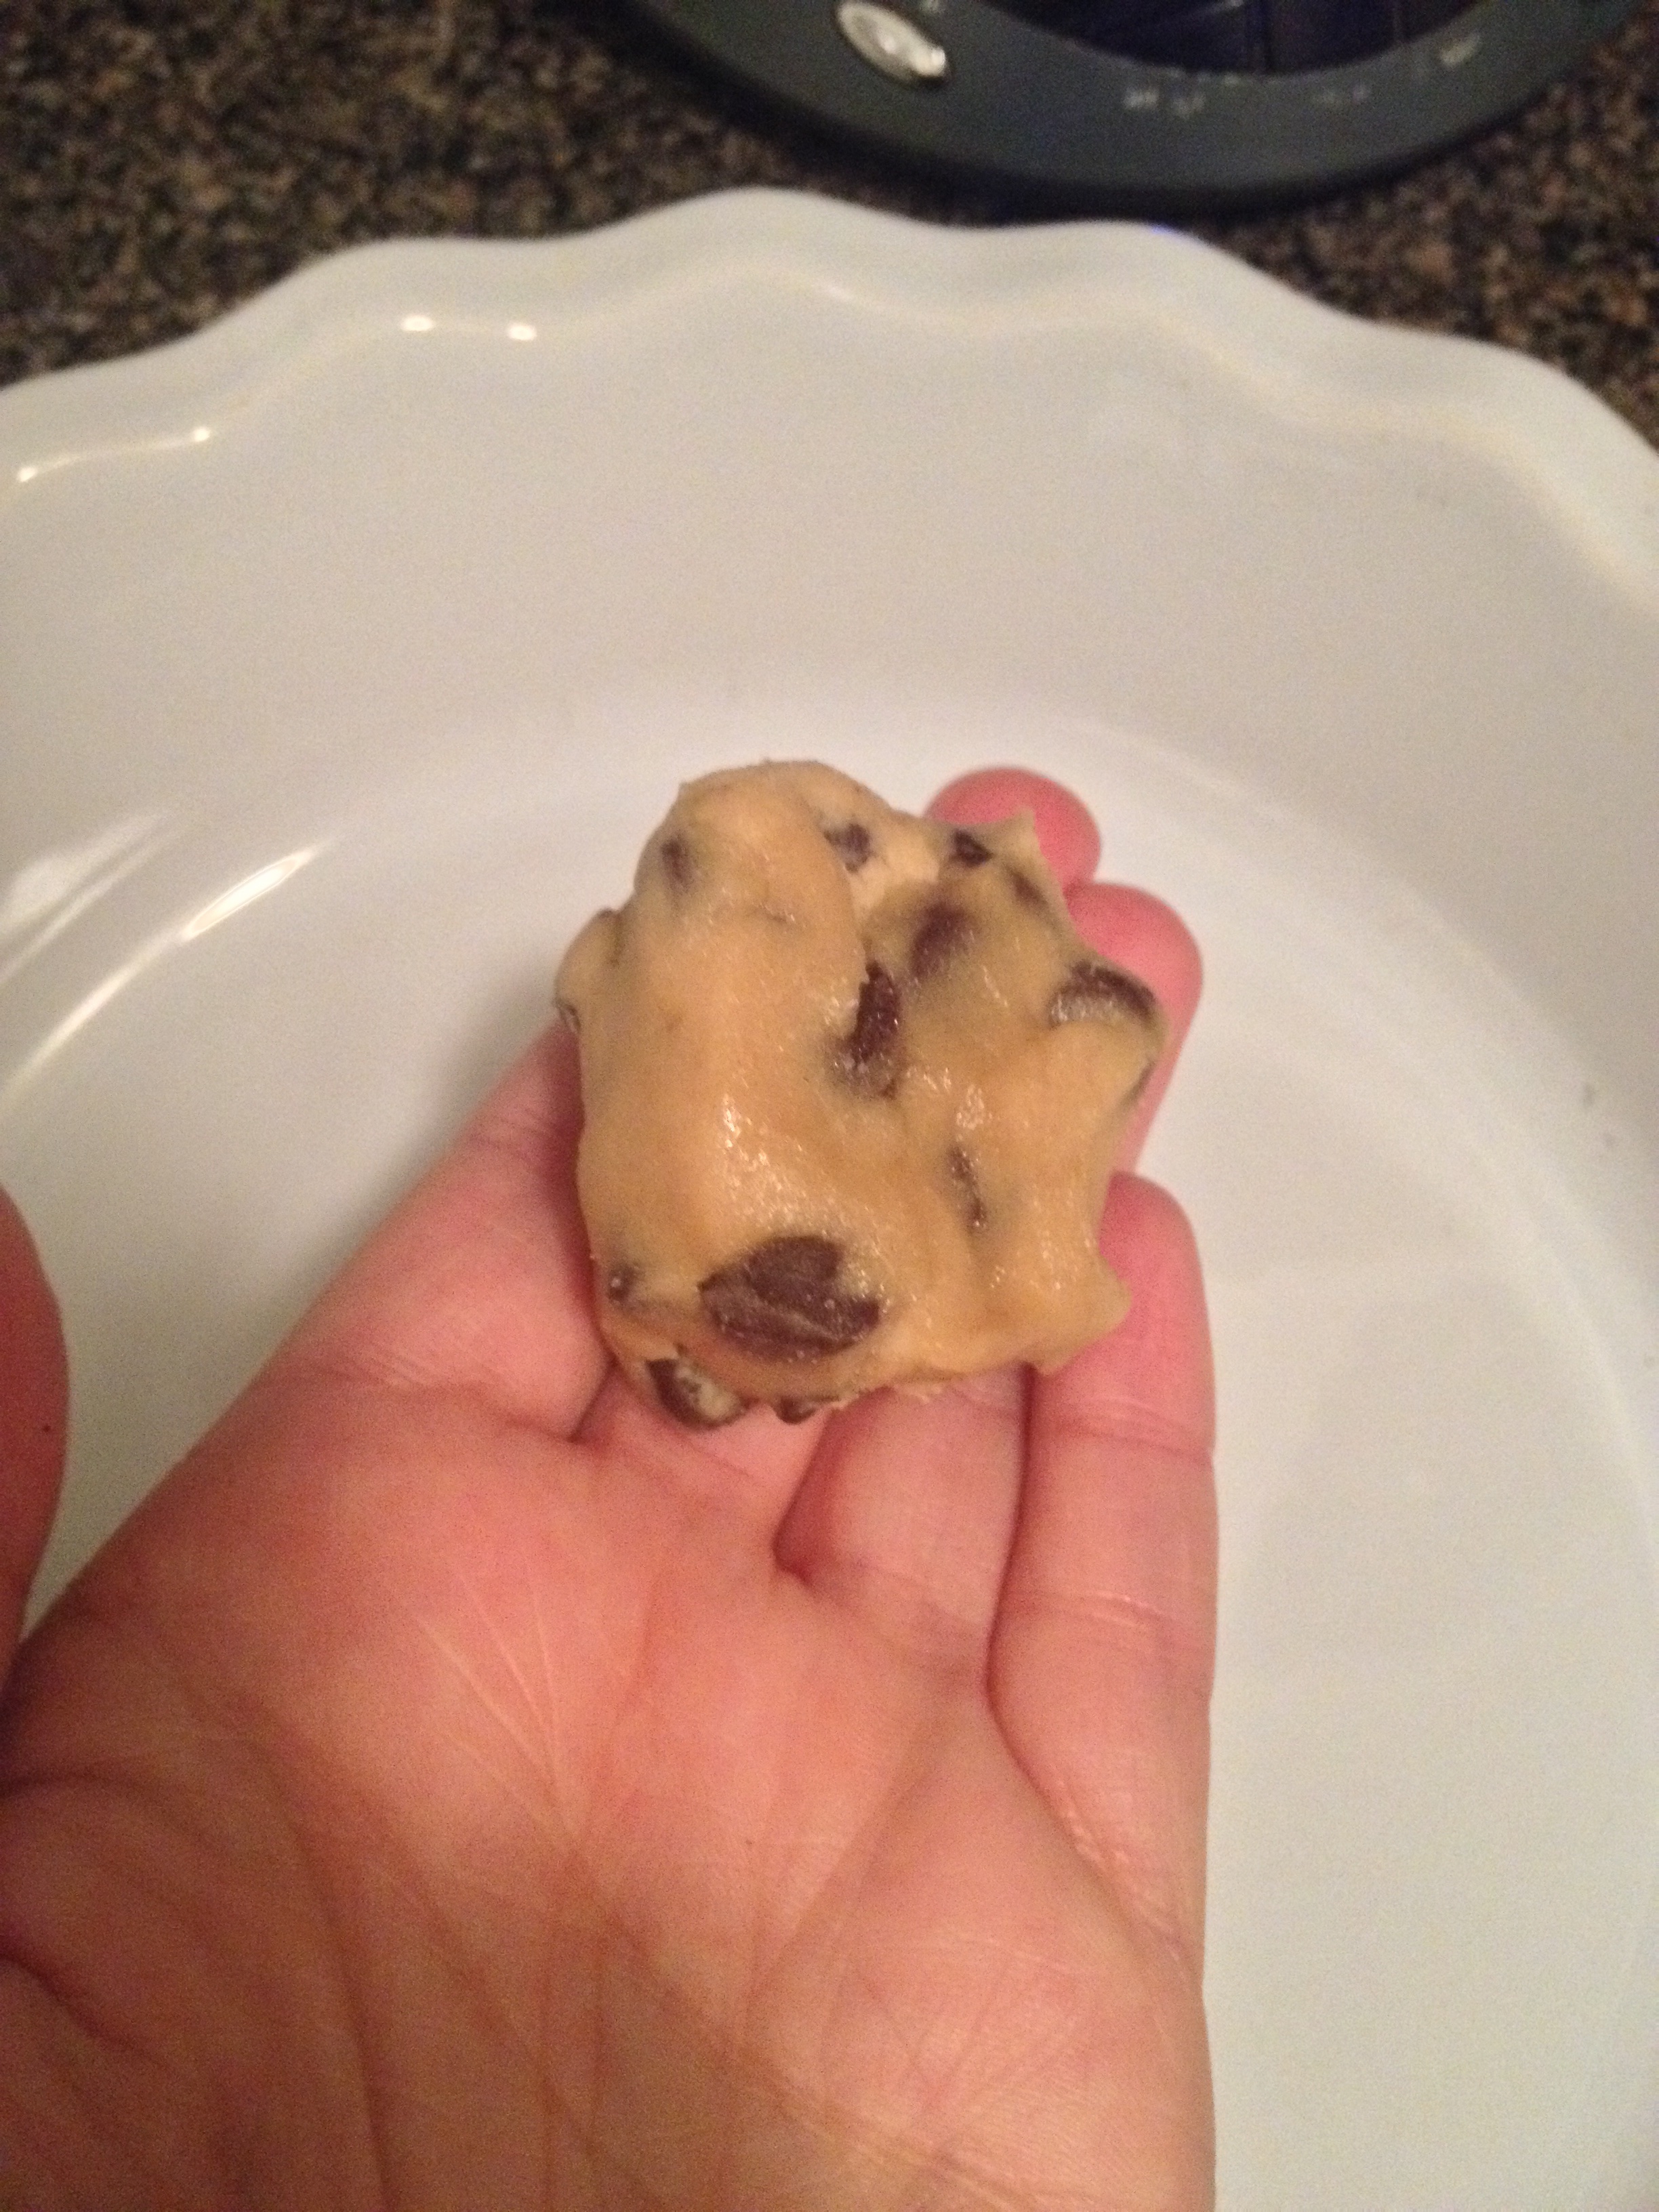
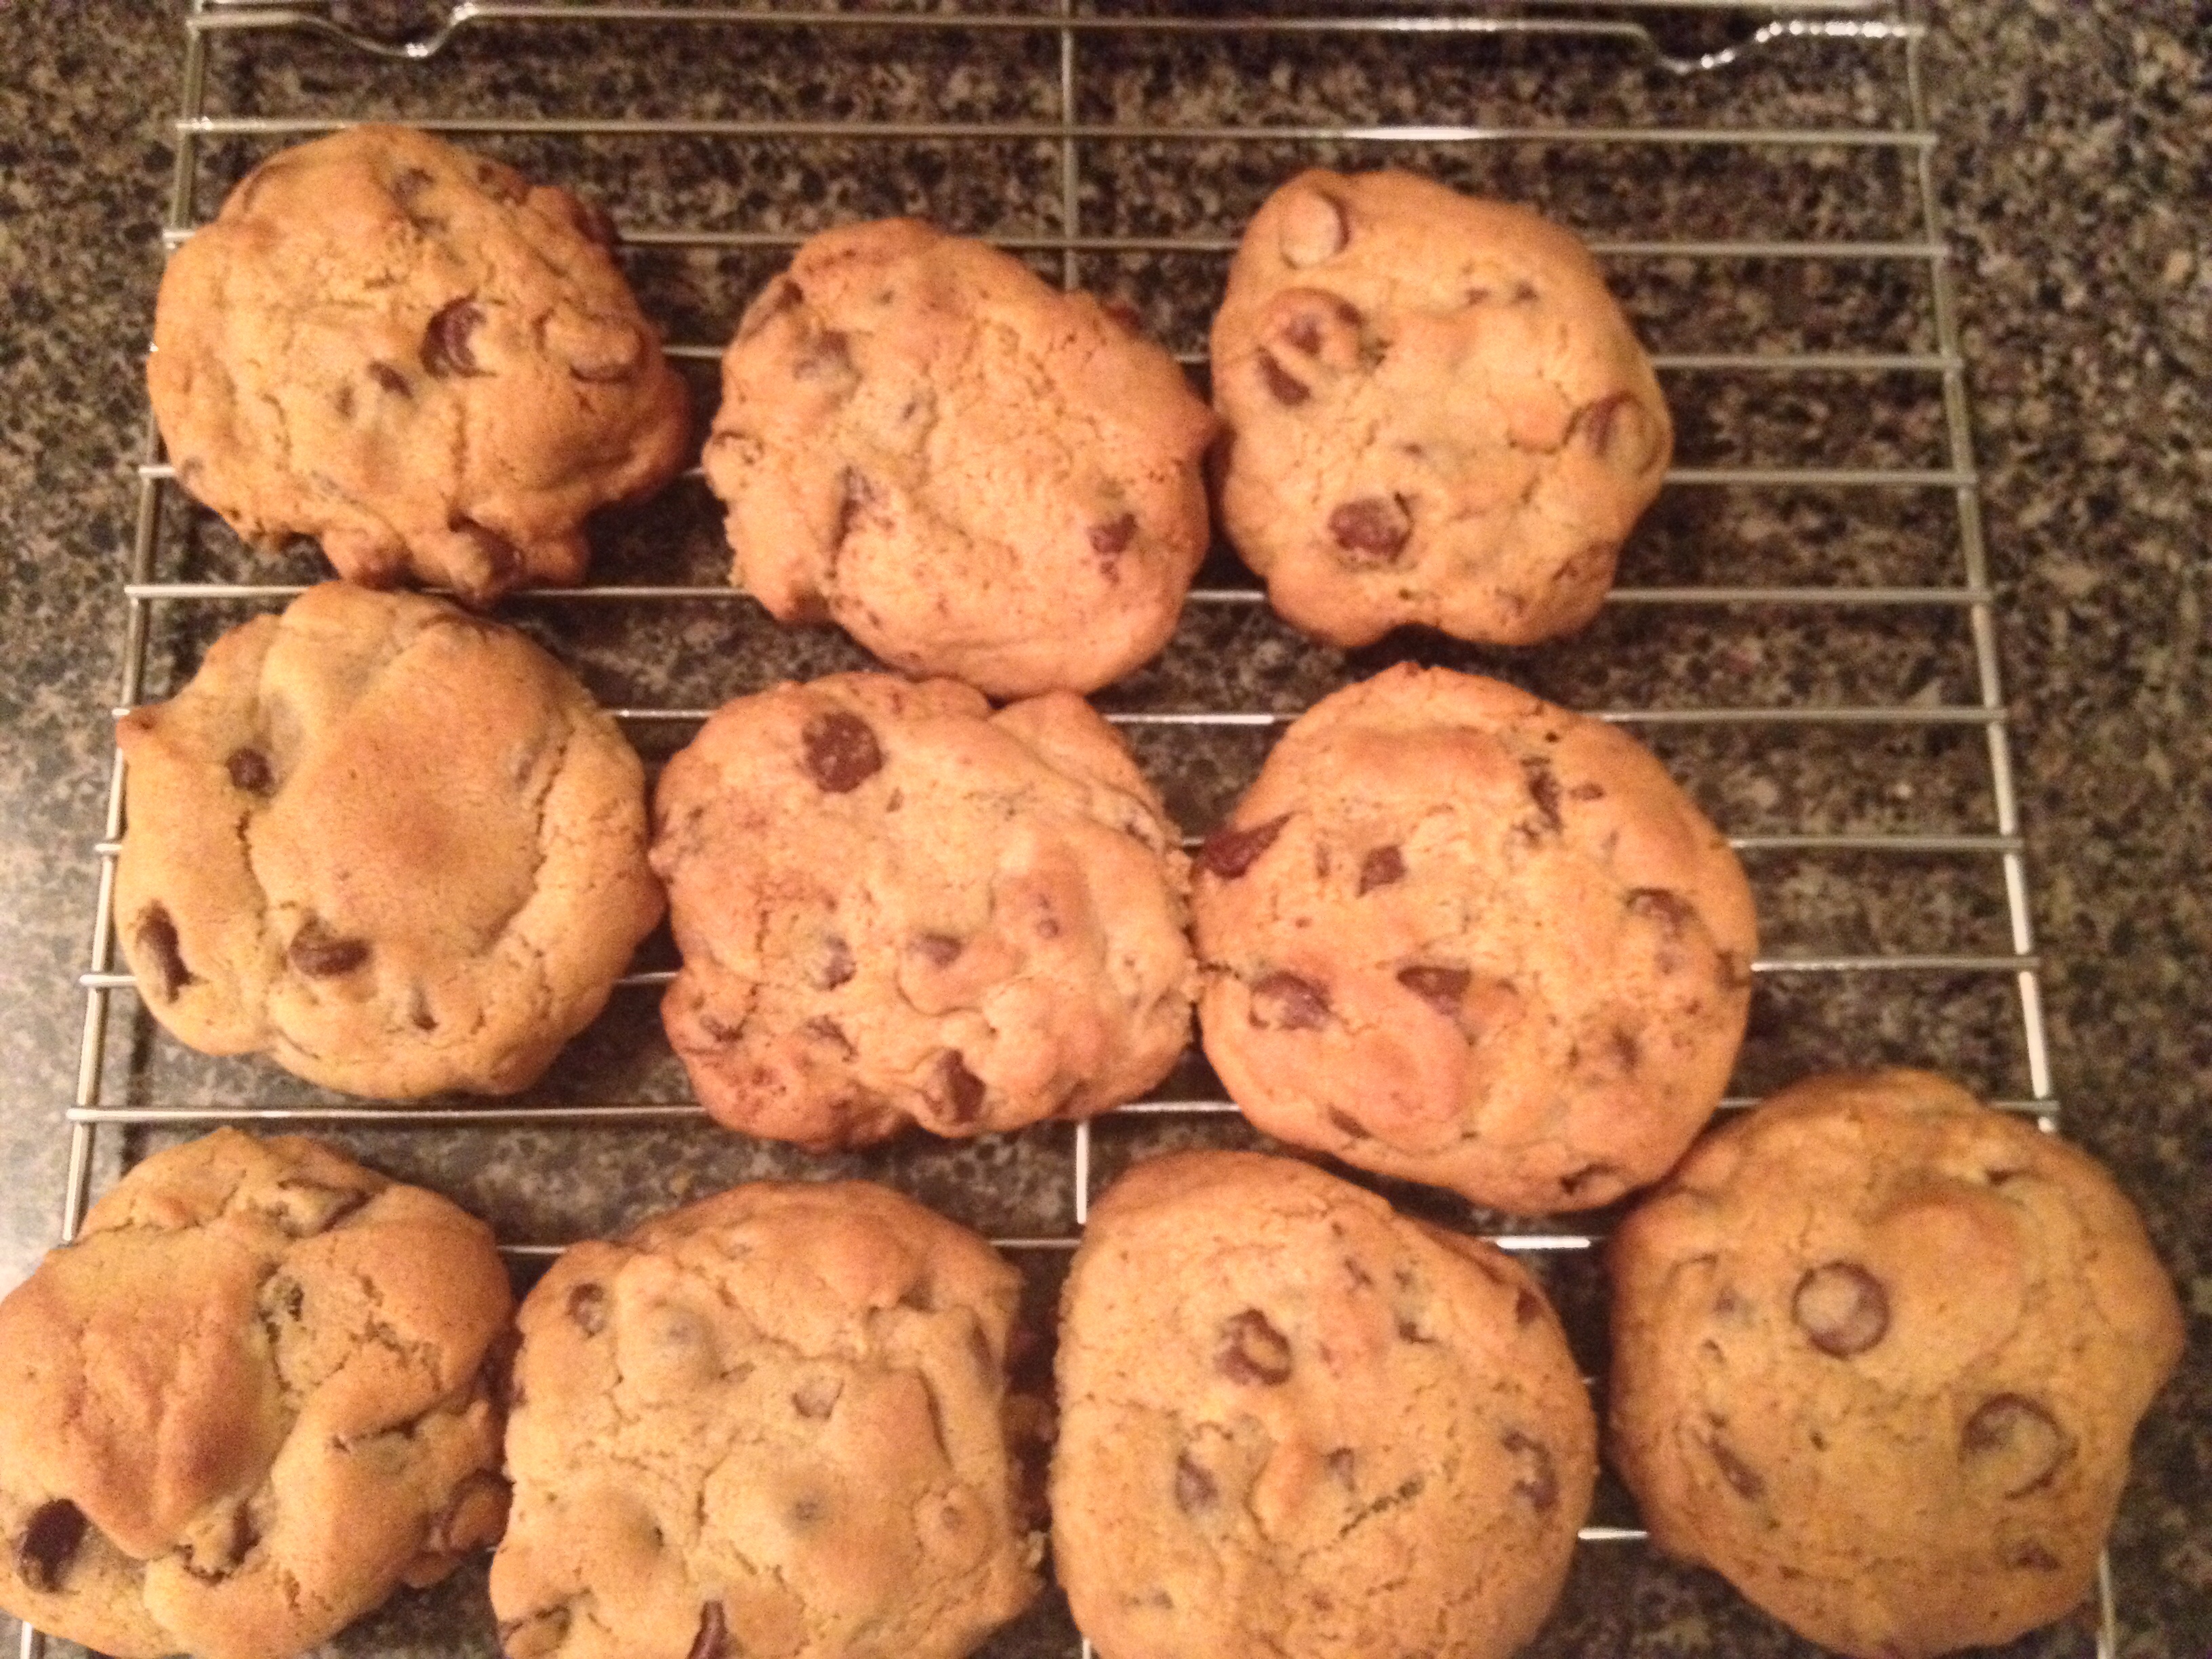
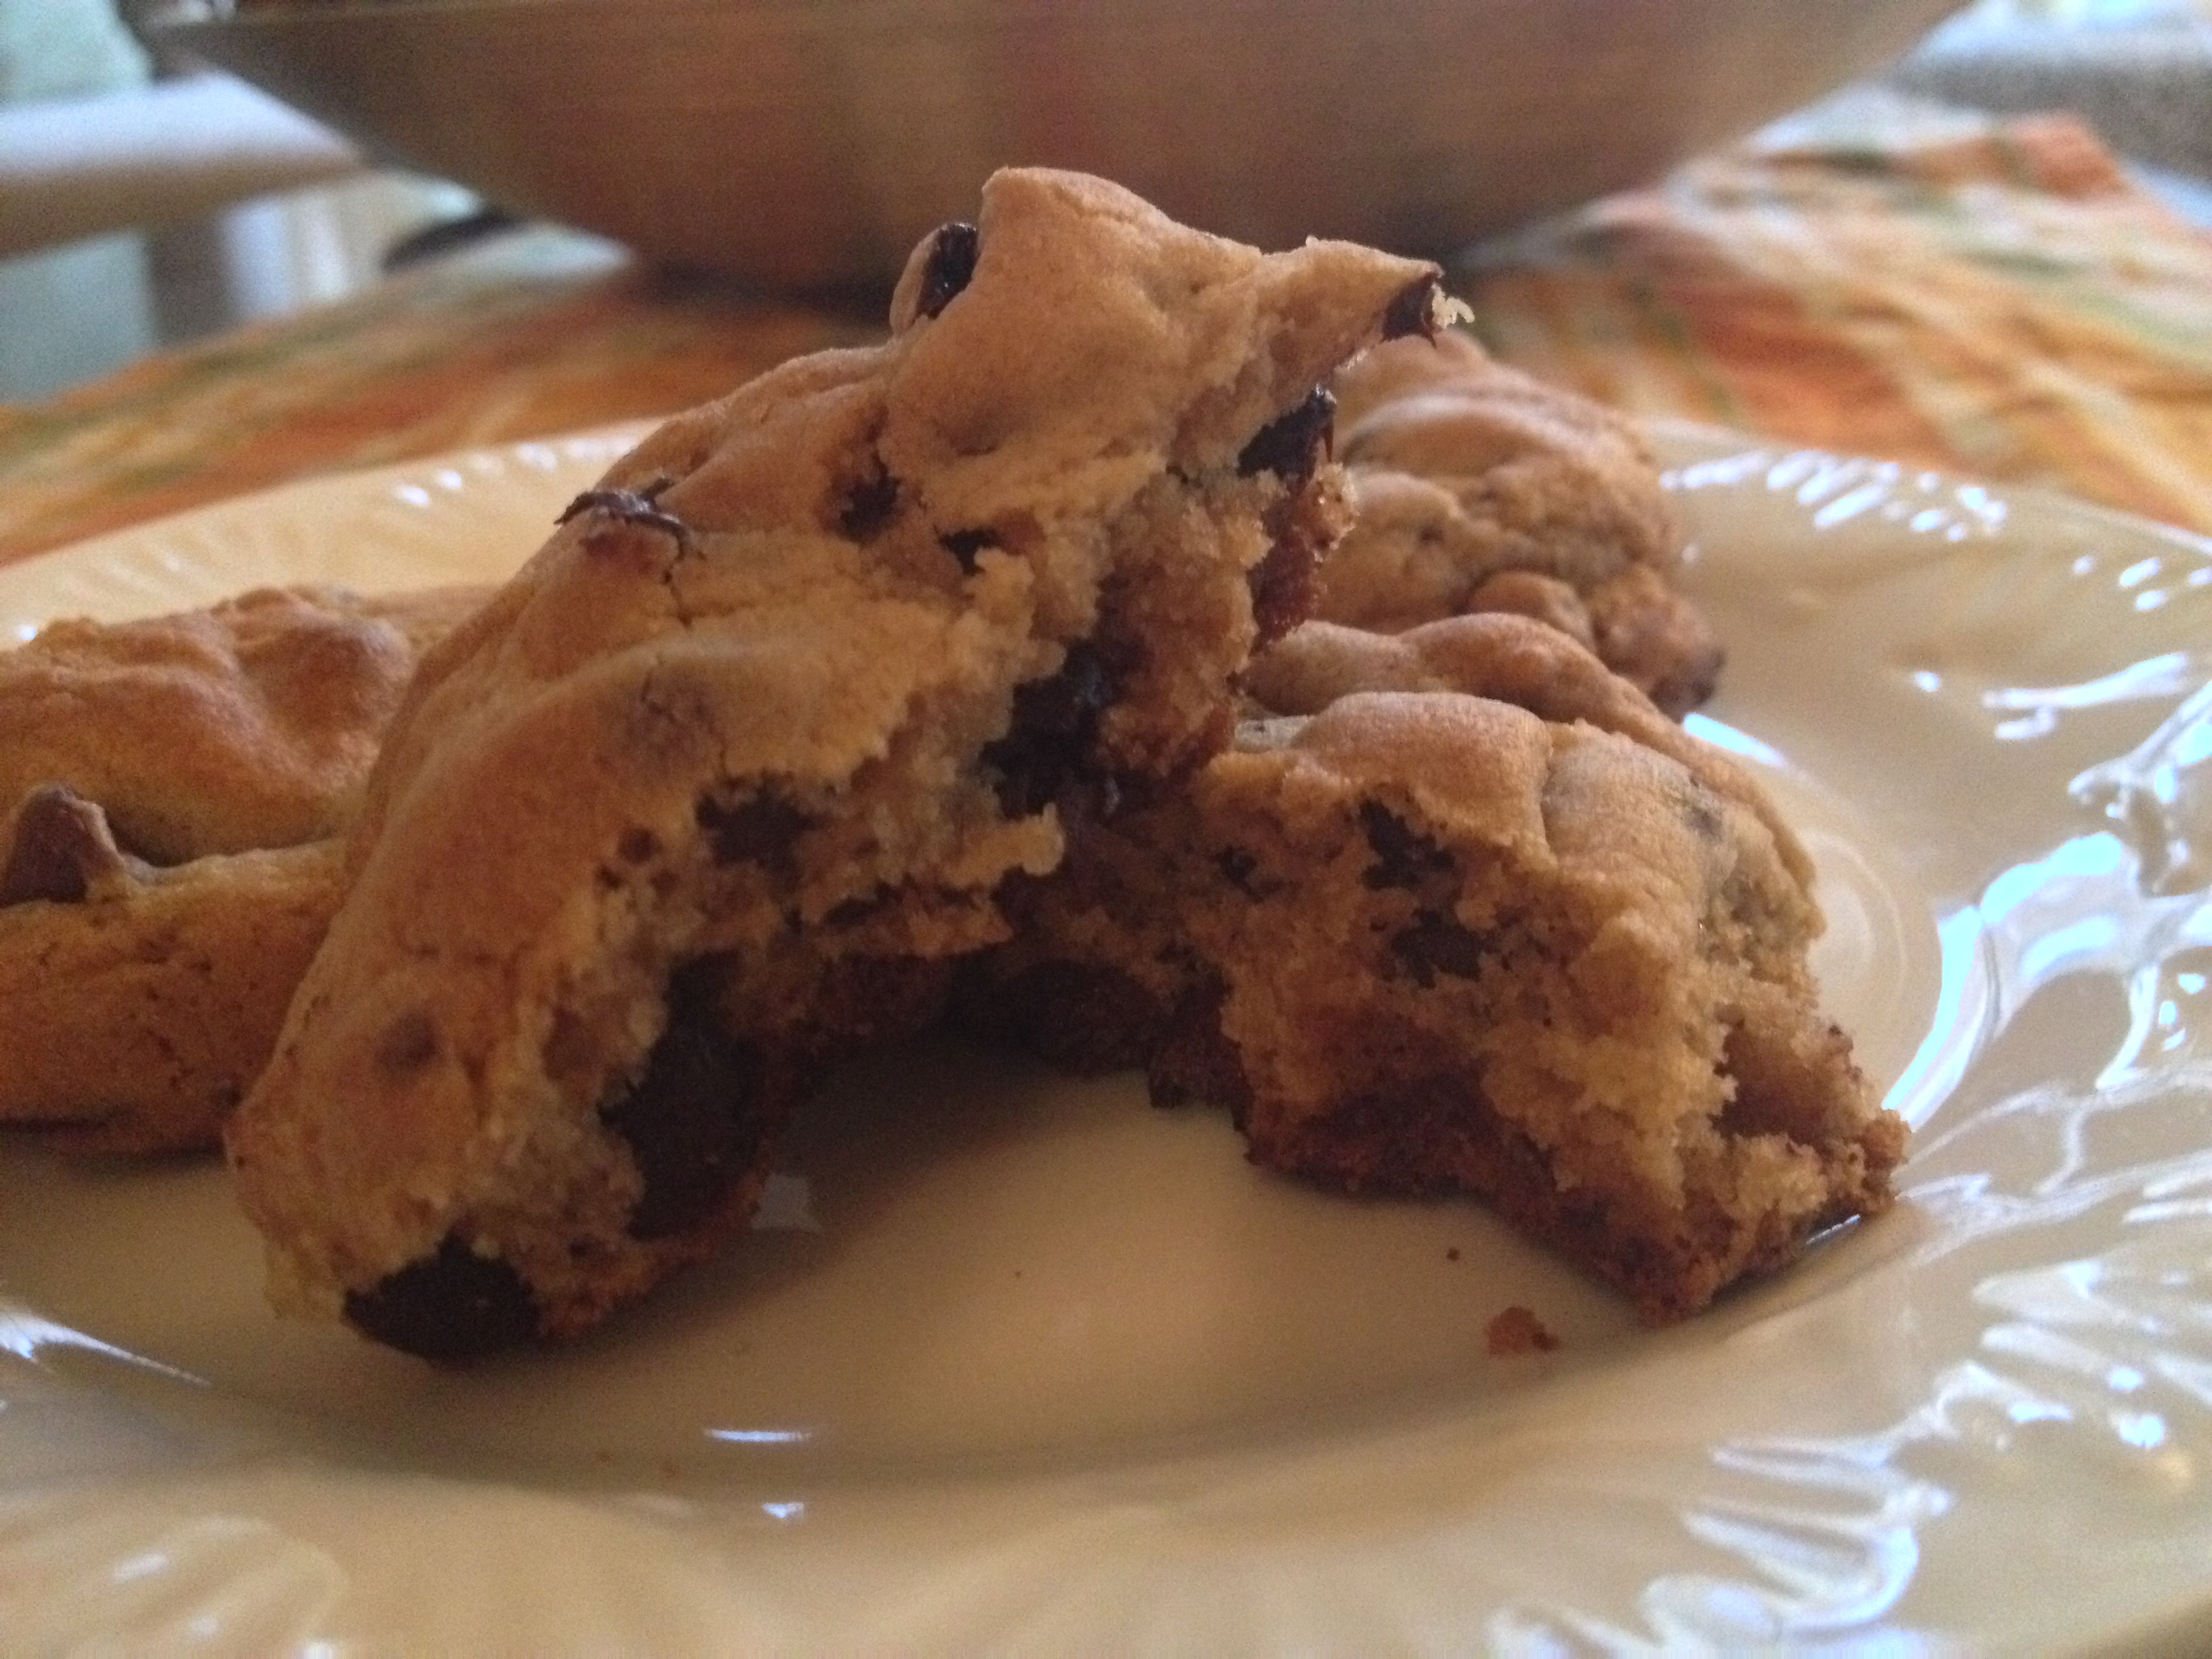
T.W.O. has made a ton of chocolate chip cookies in their lifetime and we discovered that throughout the years, new recipes are constantly evolving. Most recently, T.W.O. adapted this recipe that has a secret ingredient. Find out the trick to making the best chocolate chip cookie!

Ingredients:
– 2 1/4 cups unbleached flour
– 1 teaspoon baking soda
– 1 ½ teaspoons cornstarch
– 1.5 sticks unsalted butter, soften
– ¾ cups light brown sugar
– ½ cup sugar
– 1 egg + 1 egg yolk
– 3 teaspoons vanilla
– 2 cups chocolate chips
In a bowl, mix butter, sugar, brown sugar, egg and yolk together. (T.W.O. uses a KitchenAid mixer!) Once mixed well, add the flour, baking soda and the secret ingredient CORNSTARCH! After 3 minutes, slowly add in the chocolate chips. Place the dough in the refrigerator overnight or for a minimum 3 hours.

Don’t forget to taste the dough!

When you are ready to bake the cookies, take the dough out of the refrigerator. Pre-heat 350ᴼF. Let the dough sit out on the counter for about 15 minutes while the oven is pre-heating. Roll the dough into balls and place them on an oil-sprayed cookie sheet. Next, place the cookies in the oven for 10-11 minutes depending on your oven.
Once they are finished, take the cookies out of the oven. Place the baked cooked on a cooling rack and grab yourself a glass of milk and enjoy!
Happy Baking!
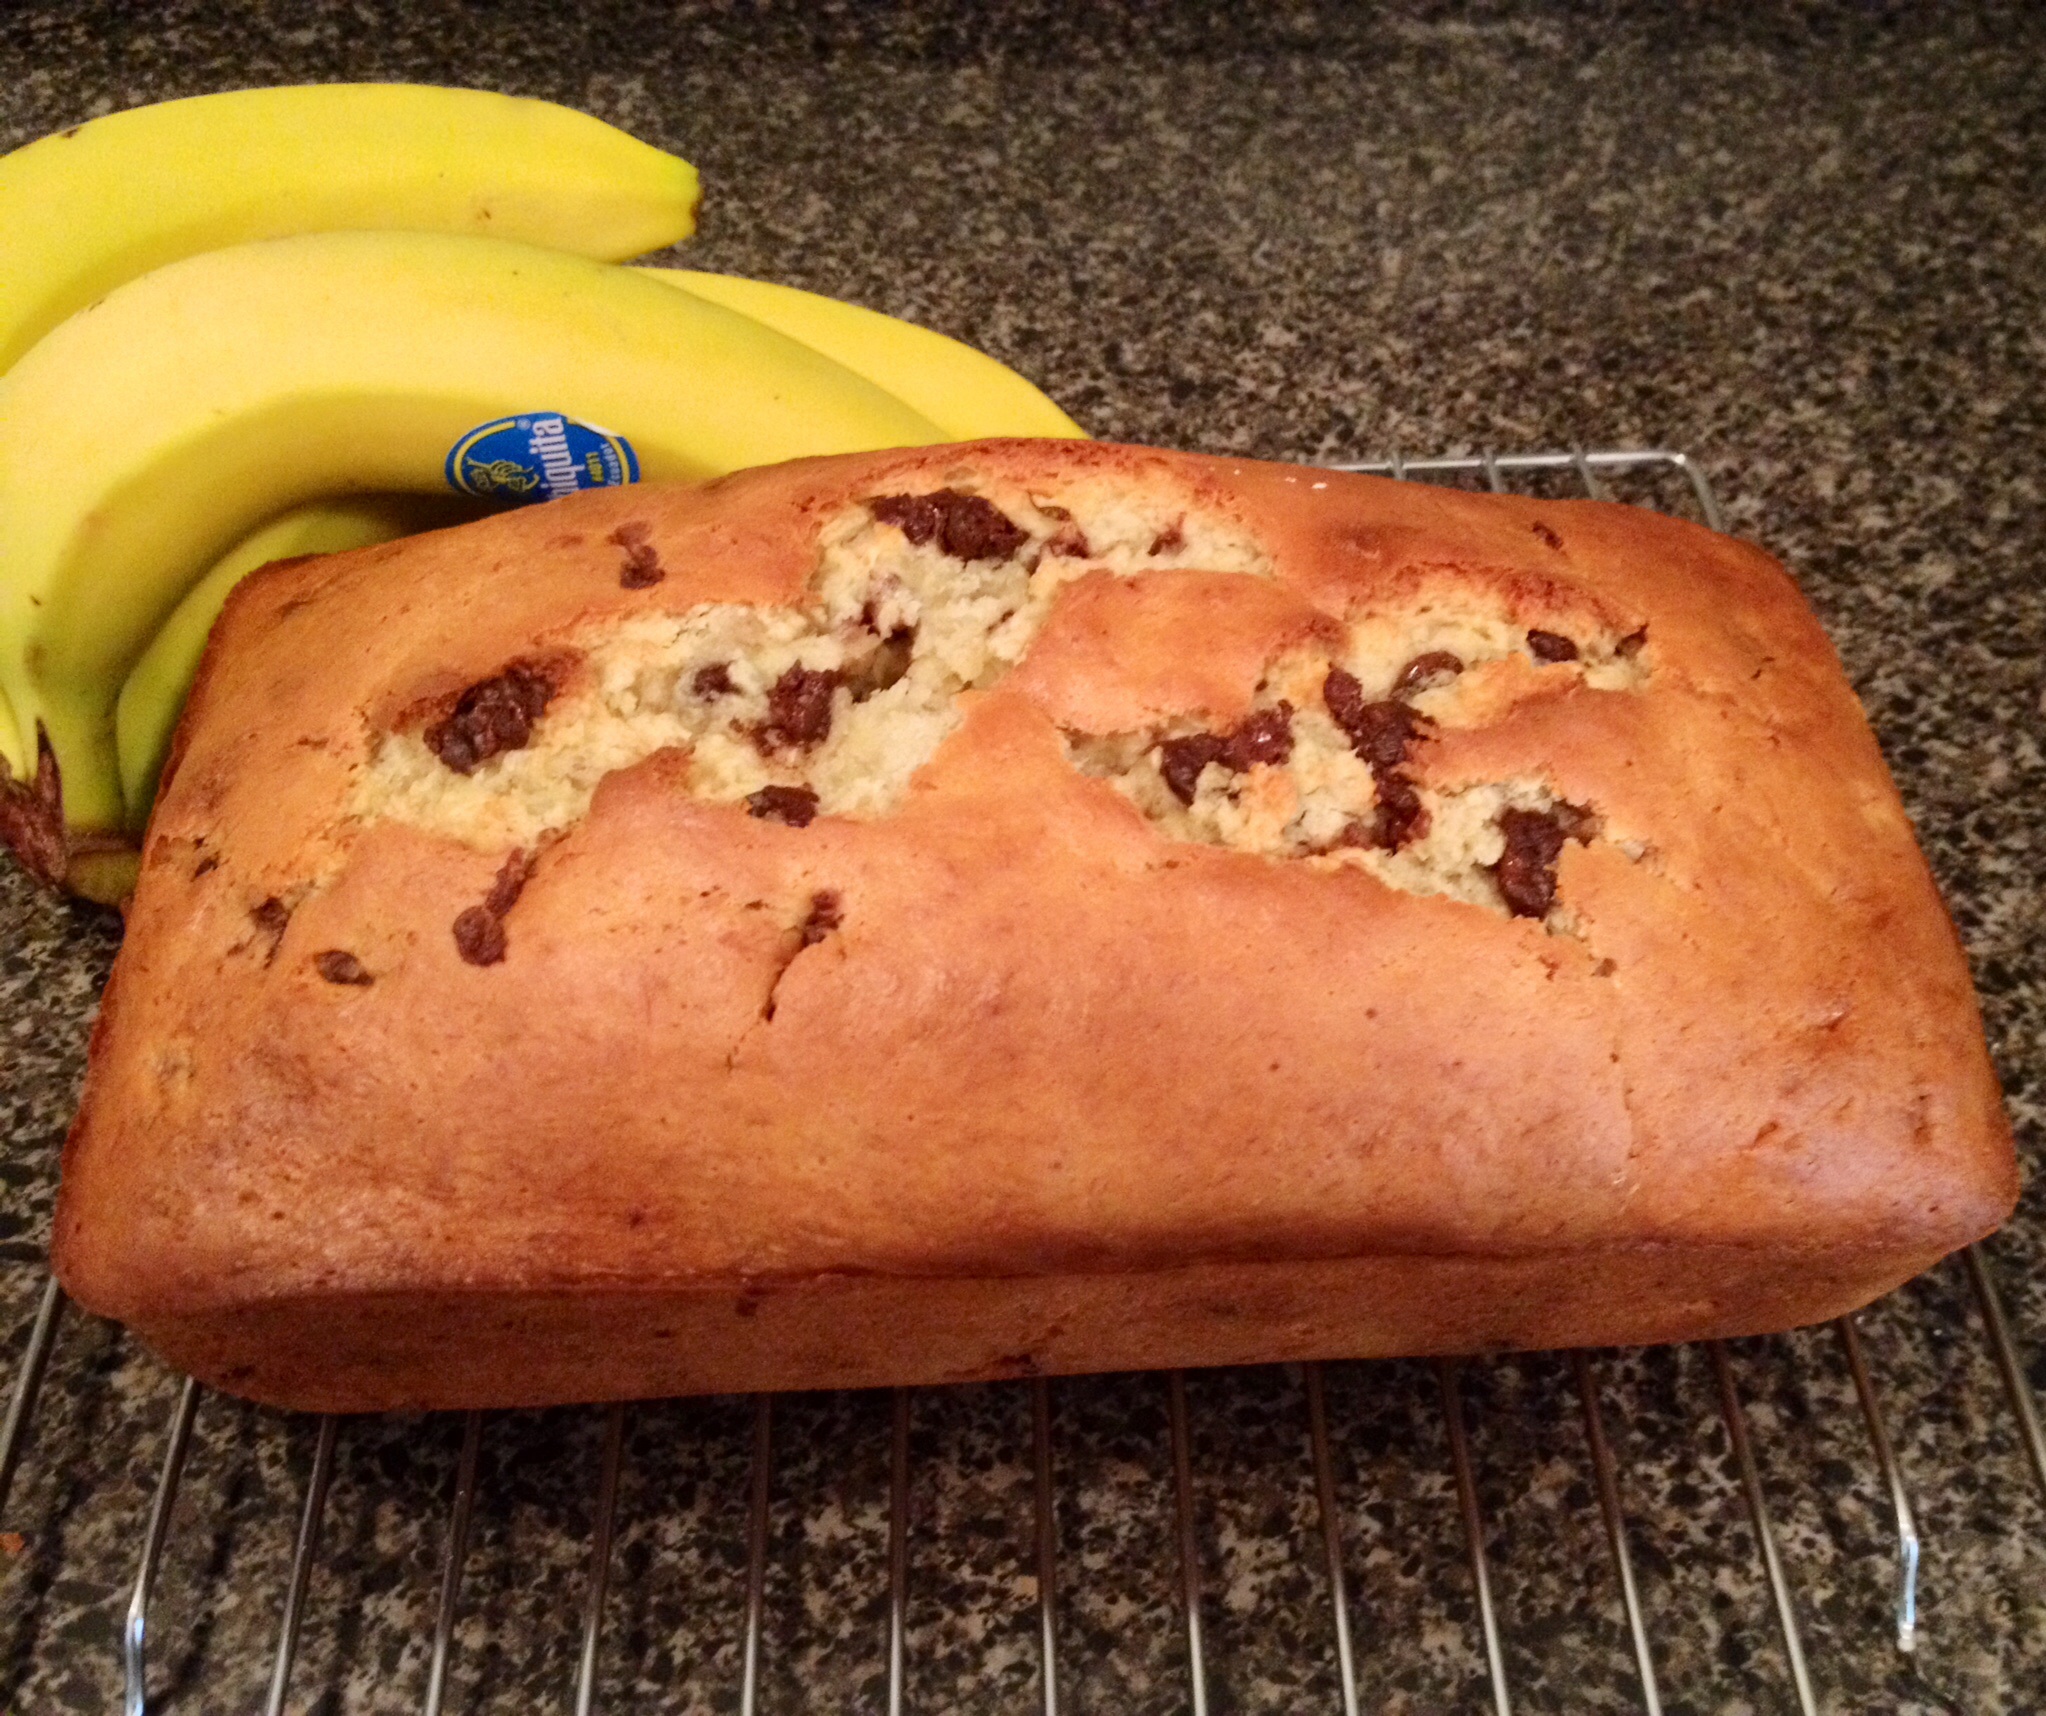
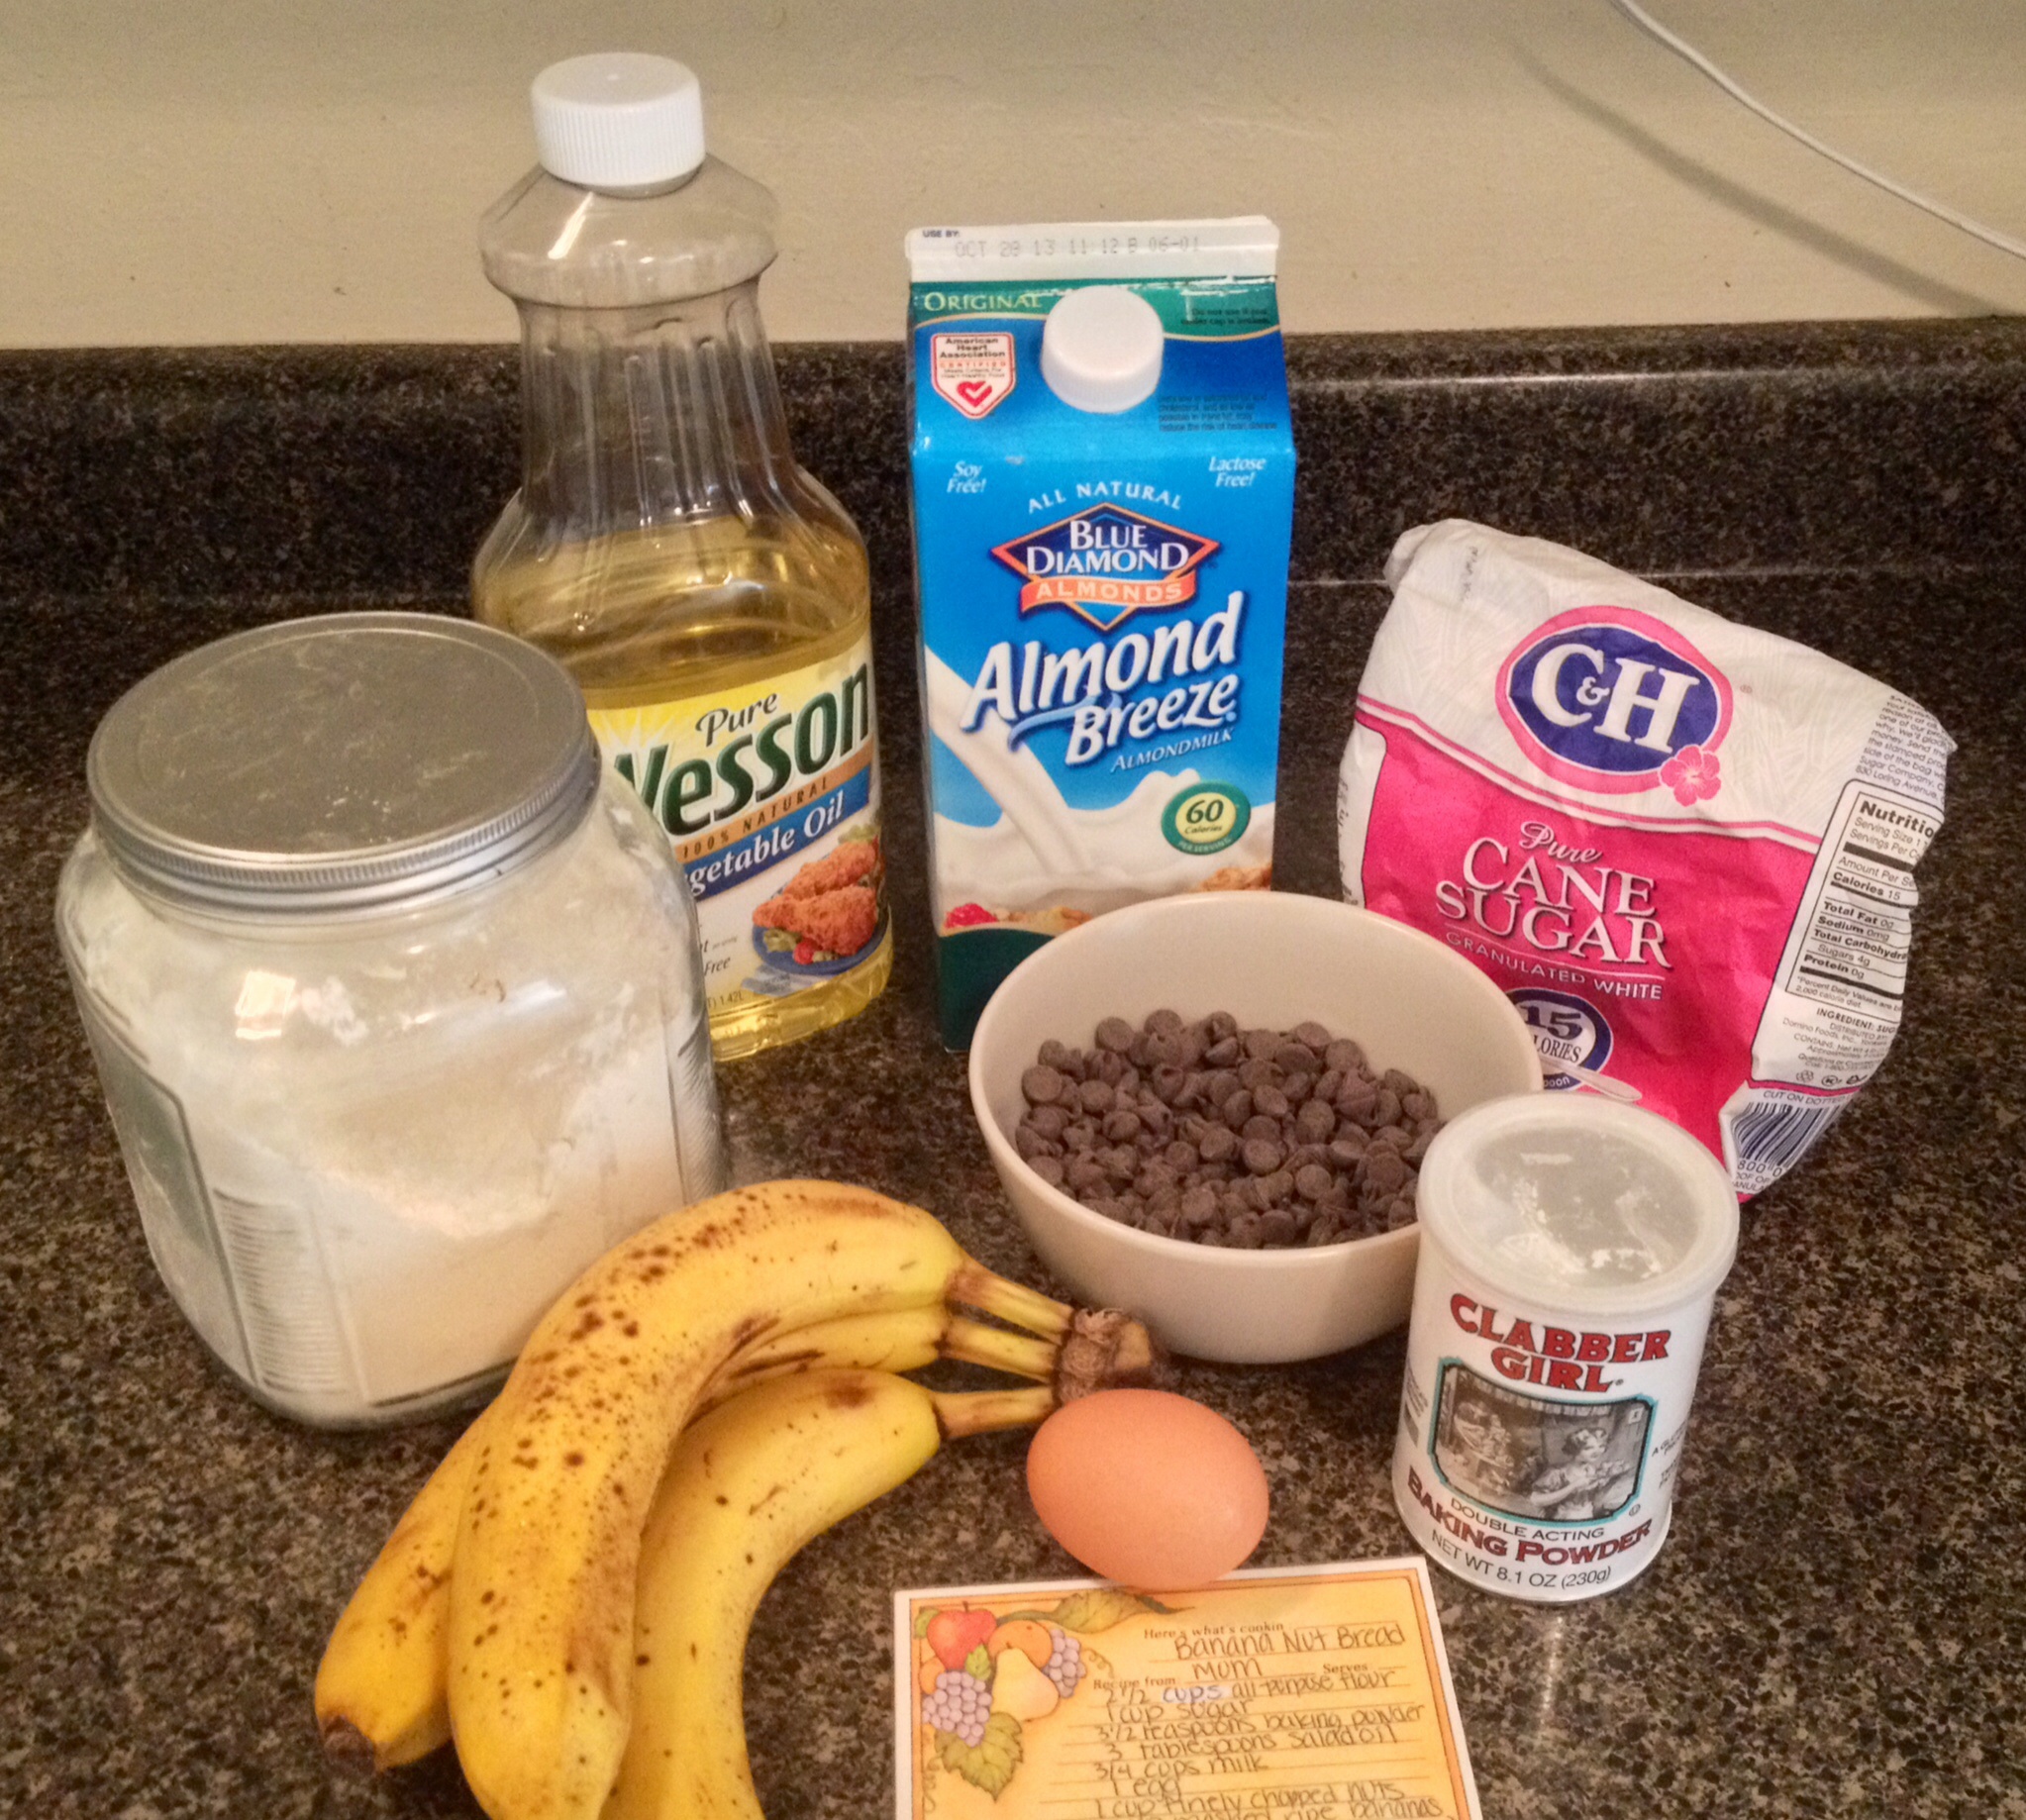
Don’t throw away those brown bananas you have sitting on the counter; instead make chocolate chip banana bread! And T.W.O. did that exact thing for a Sunday afternoon project. It’s a great recipe for breakfast, a snack or even a sweet tooth craving after dinner.
Ingredients
– 2 ½ cups flour
-1 cup sugar
-3 ½ teaspoons baking powder
– 3 tablespoons vegetable oil
-¾ cups milk (or almond milk)
-1 egg
-1 cup mashed bananas, ripe (~2 to 3 medium bananas)
-2-3 cups Chocolate Chips
Preheat oven to 350º. In a mixer (T.W.O. uses a KitchenAid), cream the oil, sugar and egg. Once mixed, add the mashed bananas and milk.

Next, slowly add the flour and the baking powder. The batter should be thick, but not sticky. After about 4 minutes, stop the mixer. Slowly fold in (or on low speed in the mixer) the chocolate chips. Depending on your love for chocolate, feel free to add more or less!

Put in the oven and bake for 30-40 minutes. You know the bread is ready, when you poke the loaf with a butter knife and it comes out clean!


Happy Baking!

Burrata. Basil. Marinara Sauce. Balsamic.
Happy Friday Night Pizza Night!!
T.W.O. decided to cook a lighter pizza for this Friday Night Pizza Night. Burrata looks a lot like fresh buffalo mozzarella, but it much softer and has a cream-like filling. And it makes for a great cheese to use for a pizza! This Burrata Margarita pizza is easy to whip up for yourself, date or family night. Has T.W.O. convince you to make this pizza yet?
Ingredients
1 – Roll of pizza dough
-12 ounces Marinara Sauce*
-8 ounces Burrata**
-1 Small package fresh, basil leaves
-2 Cloves garlic, chopped
Balsamic Vinegar
Salt
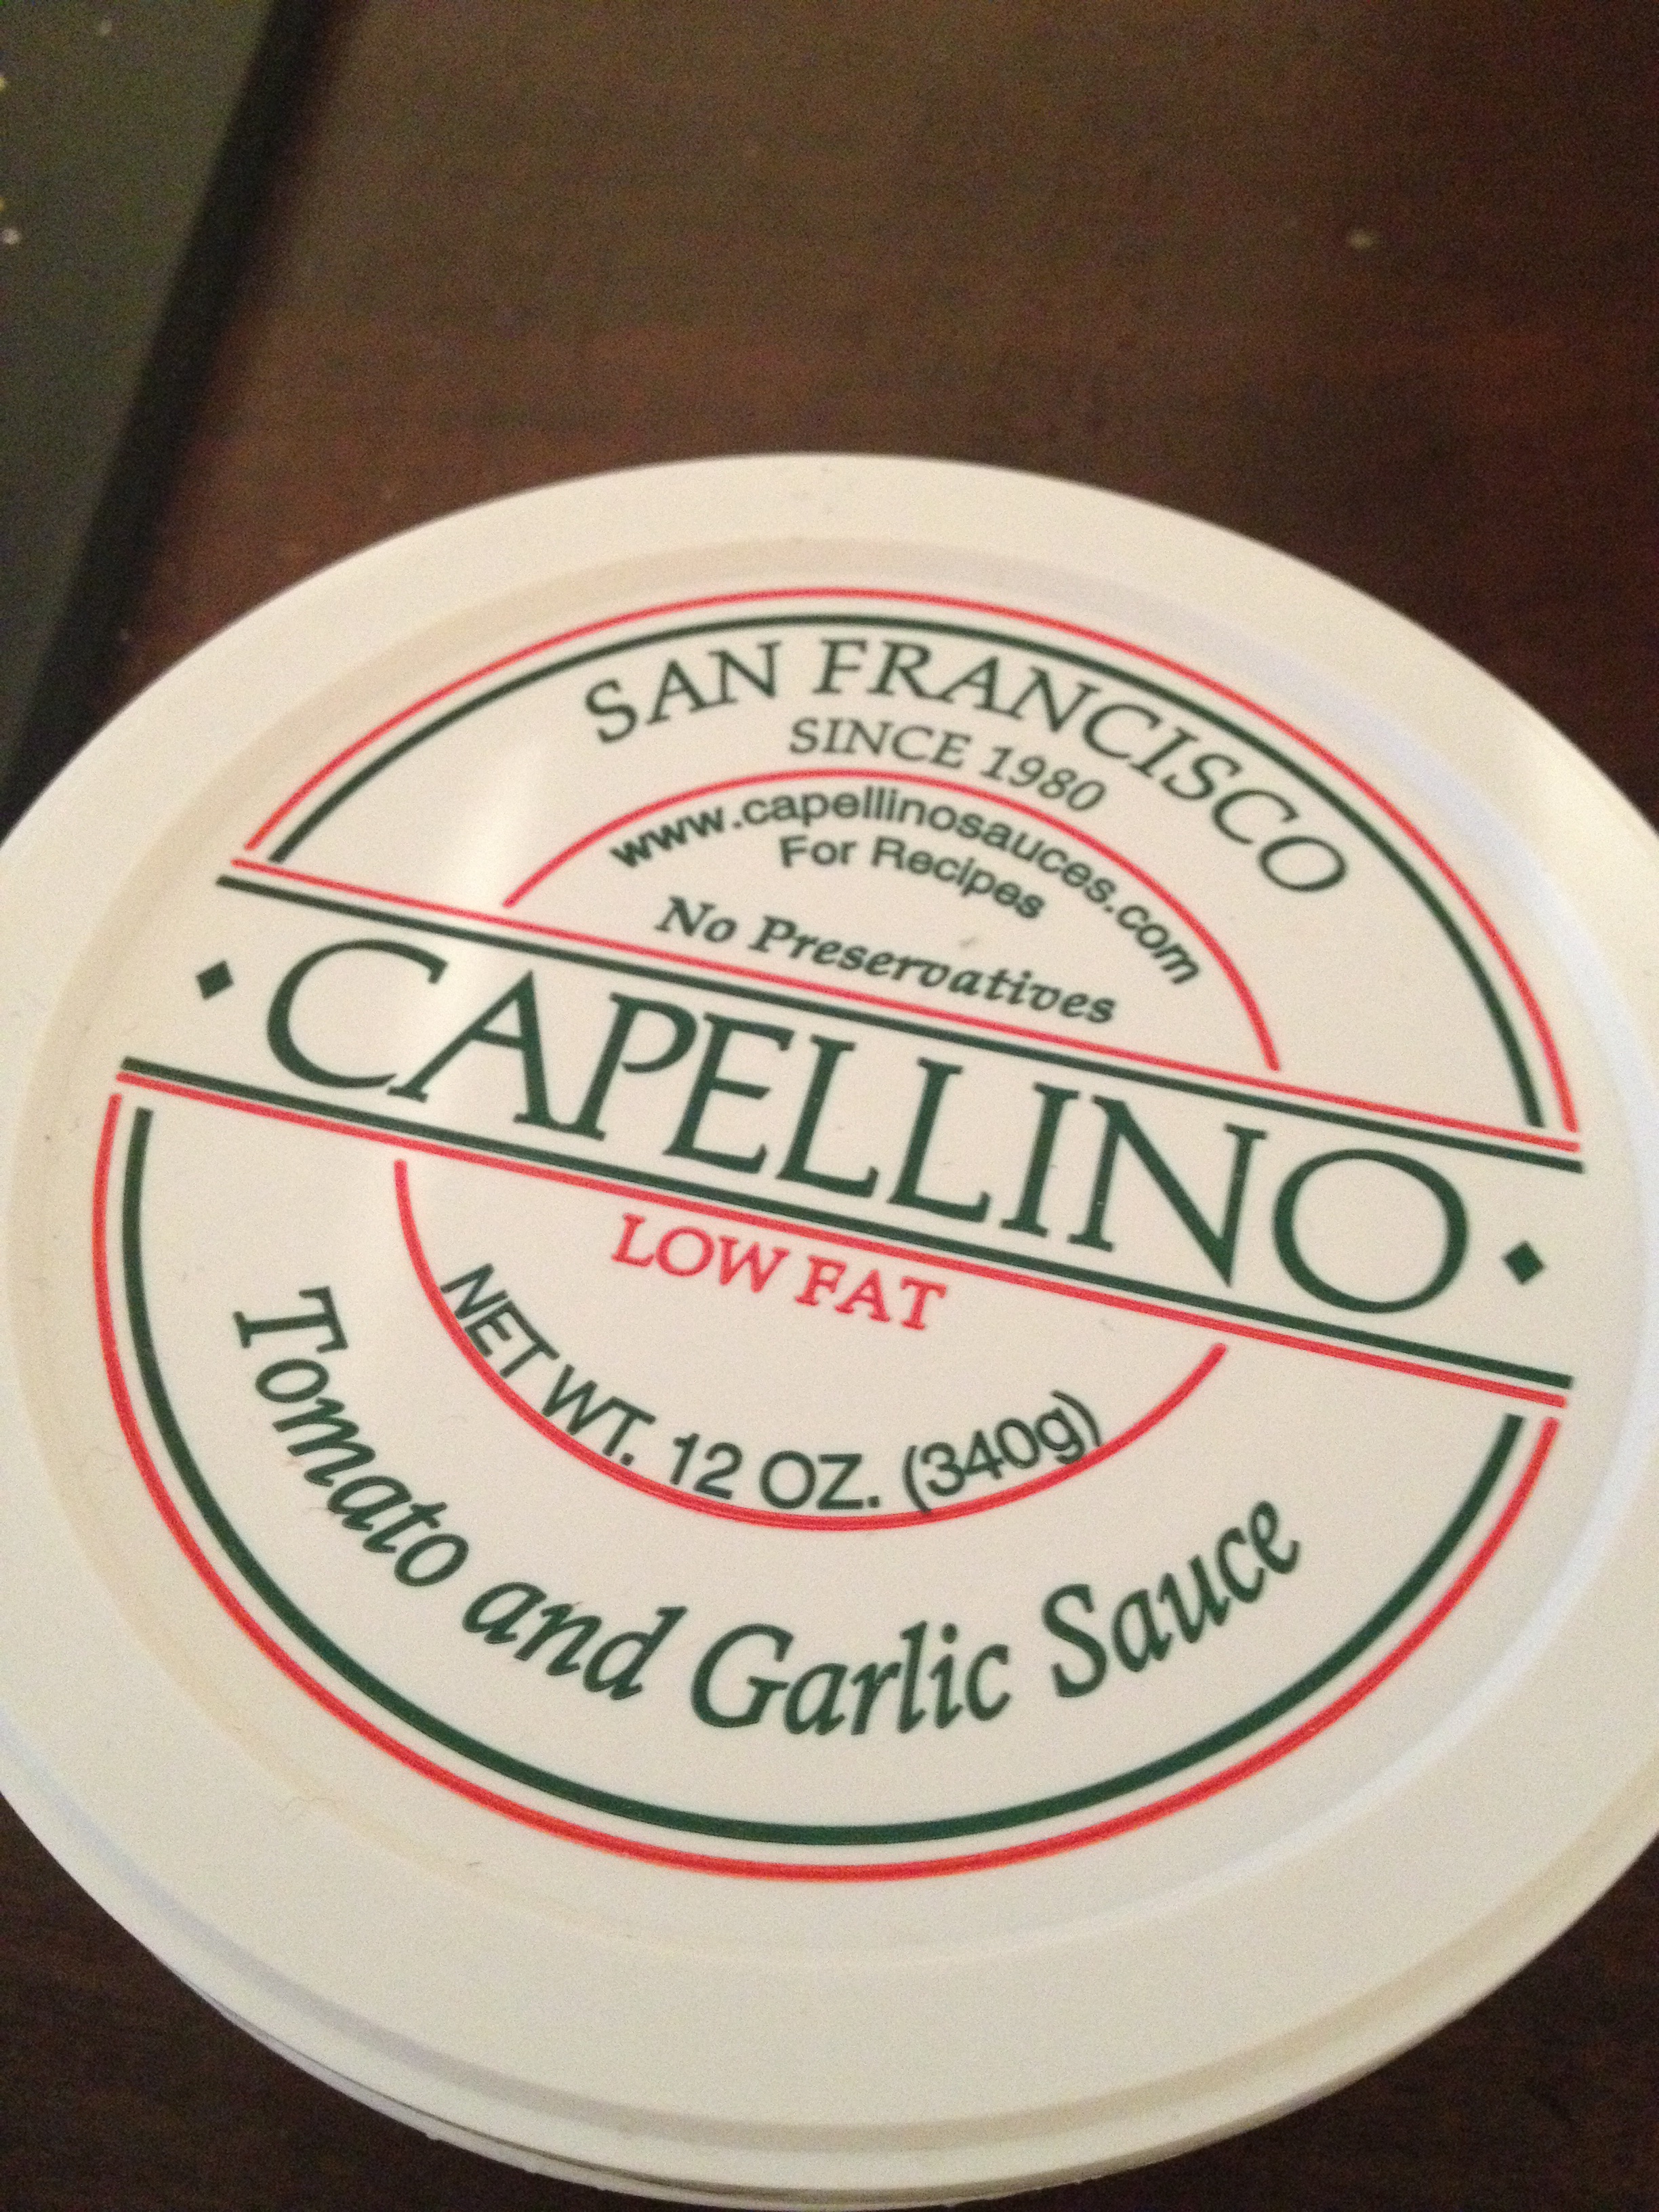
*T.W.O. uses SF Capellino Low-Fat Tomato and Garlic Sauce from Molinaris Deli…don’t let the “low-fat” scare you- the texture and flavor is still there!
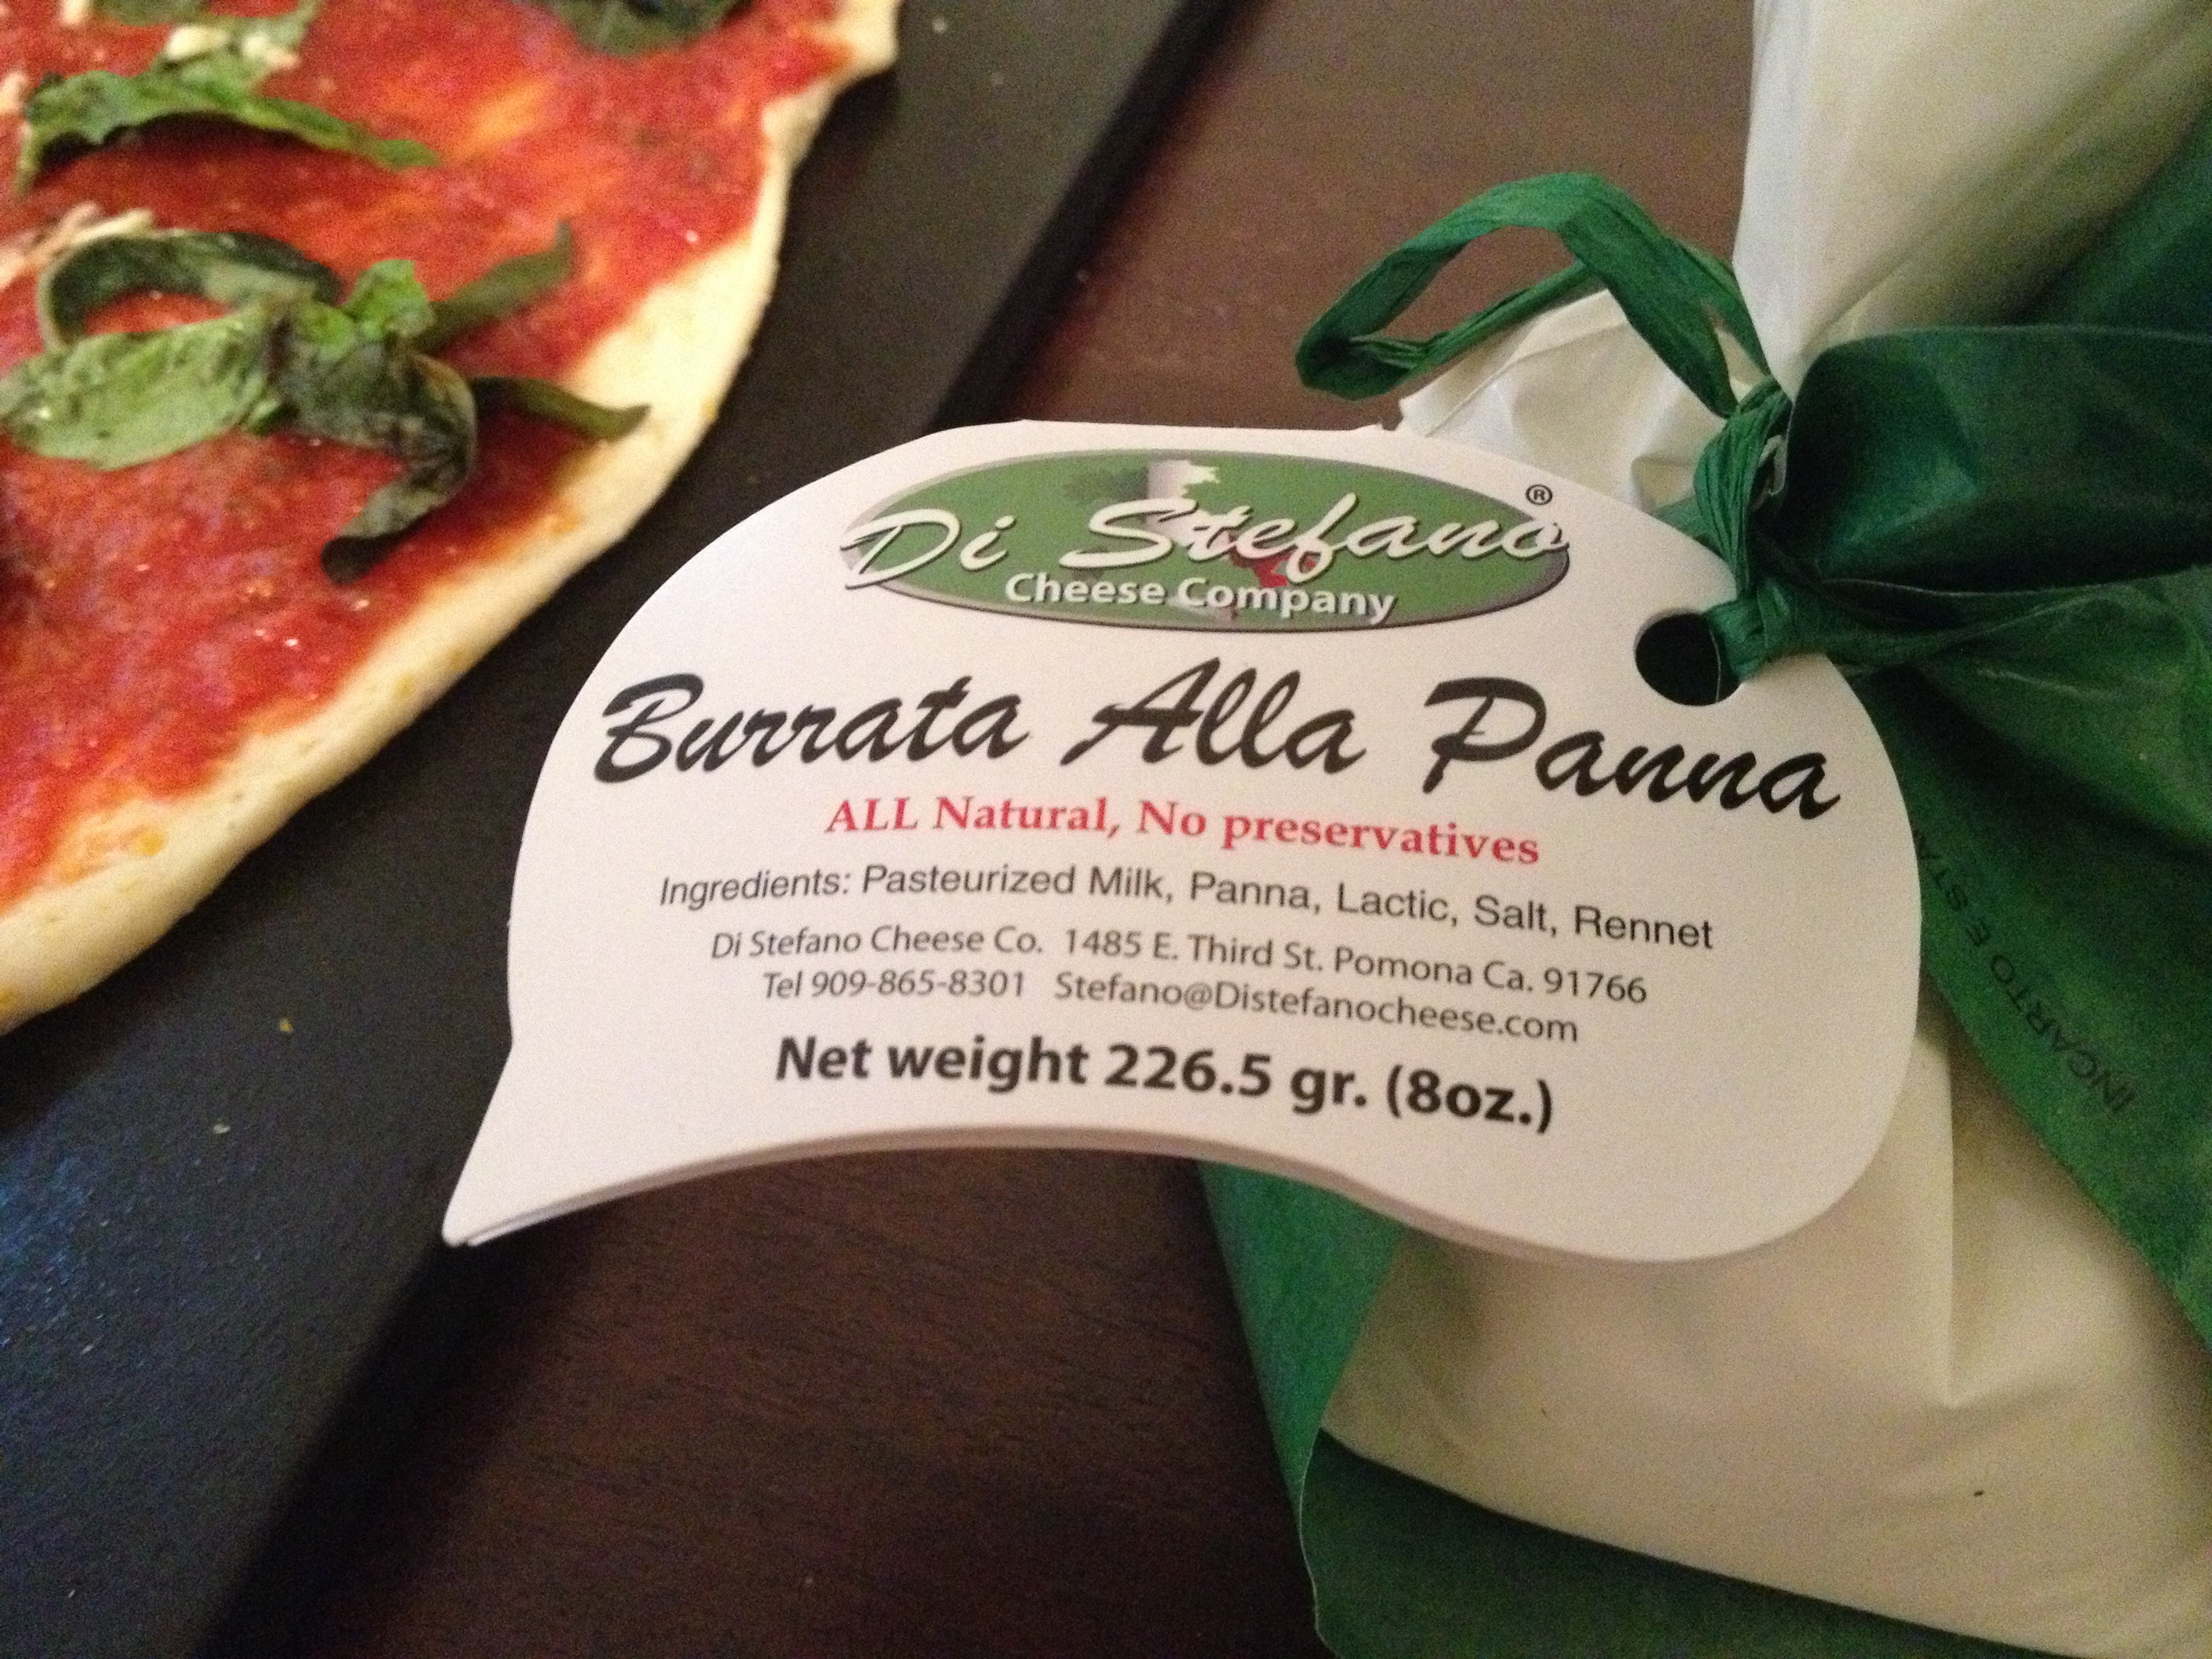
**T.W.O. suggests using Di Stefano – Burrata Alla Panna
Roll out your pizza dough on a floured/ cornmeal surface. Once evenly rolled out, place dough on a pizza stone. Spread the marinara sauce on the dough making sure you get the edges.

Next, cut the burrata into pieces and distribute evenly on the pizza dough. (See below) It’s okay that the marinara is showing; the cheese will melt. Next, place your basil leaves and chopped garlic on the pizza. Last step- drizzle balsamic vinegar over the pizza and add salt to taste.

Let the pizza rise for about 15 minutes while the BBQ is heating up. Note –you don’t want to put the stone on a cold BBQ. The temperature should reach a medium-high heat before placing the pizza on. Watch the pizza closely; you don’t want your crust to burn! It should take about 15-20 minutes, depending on your grill.
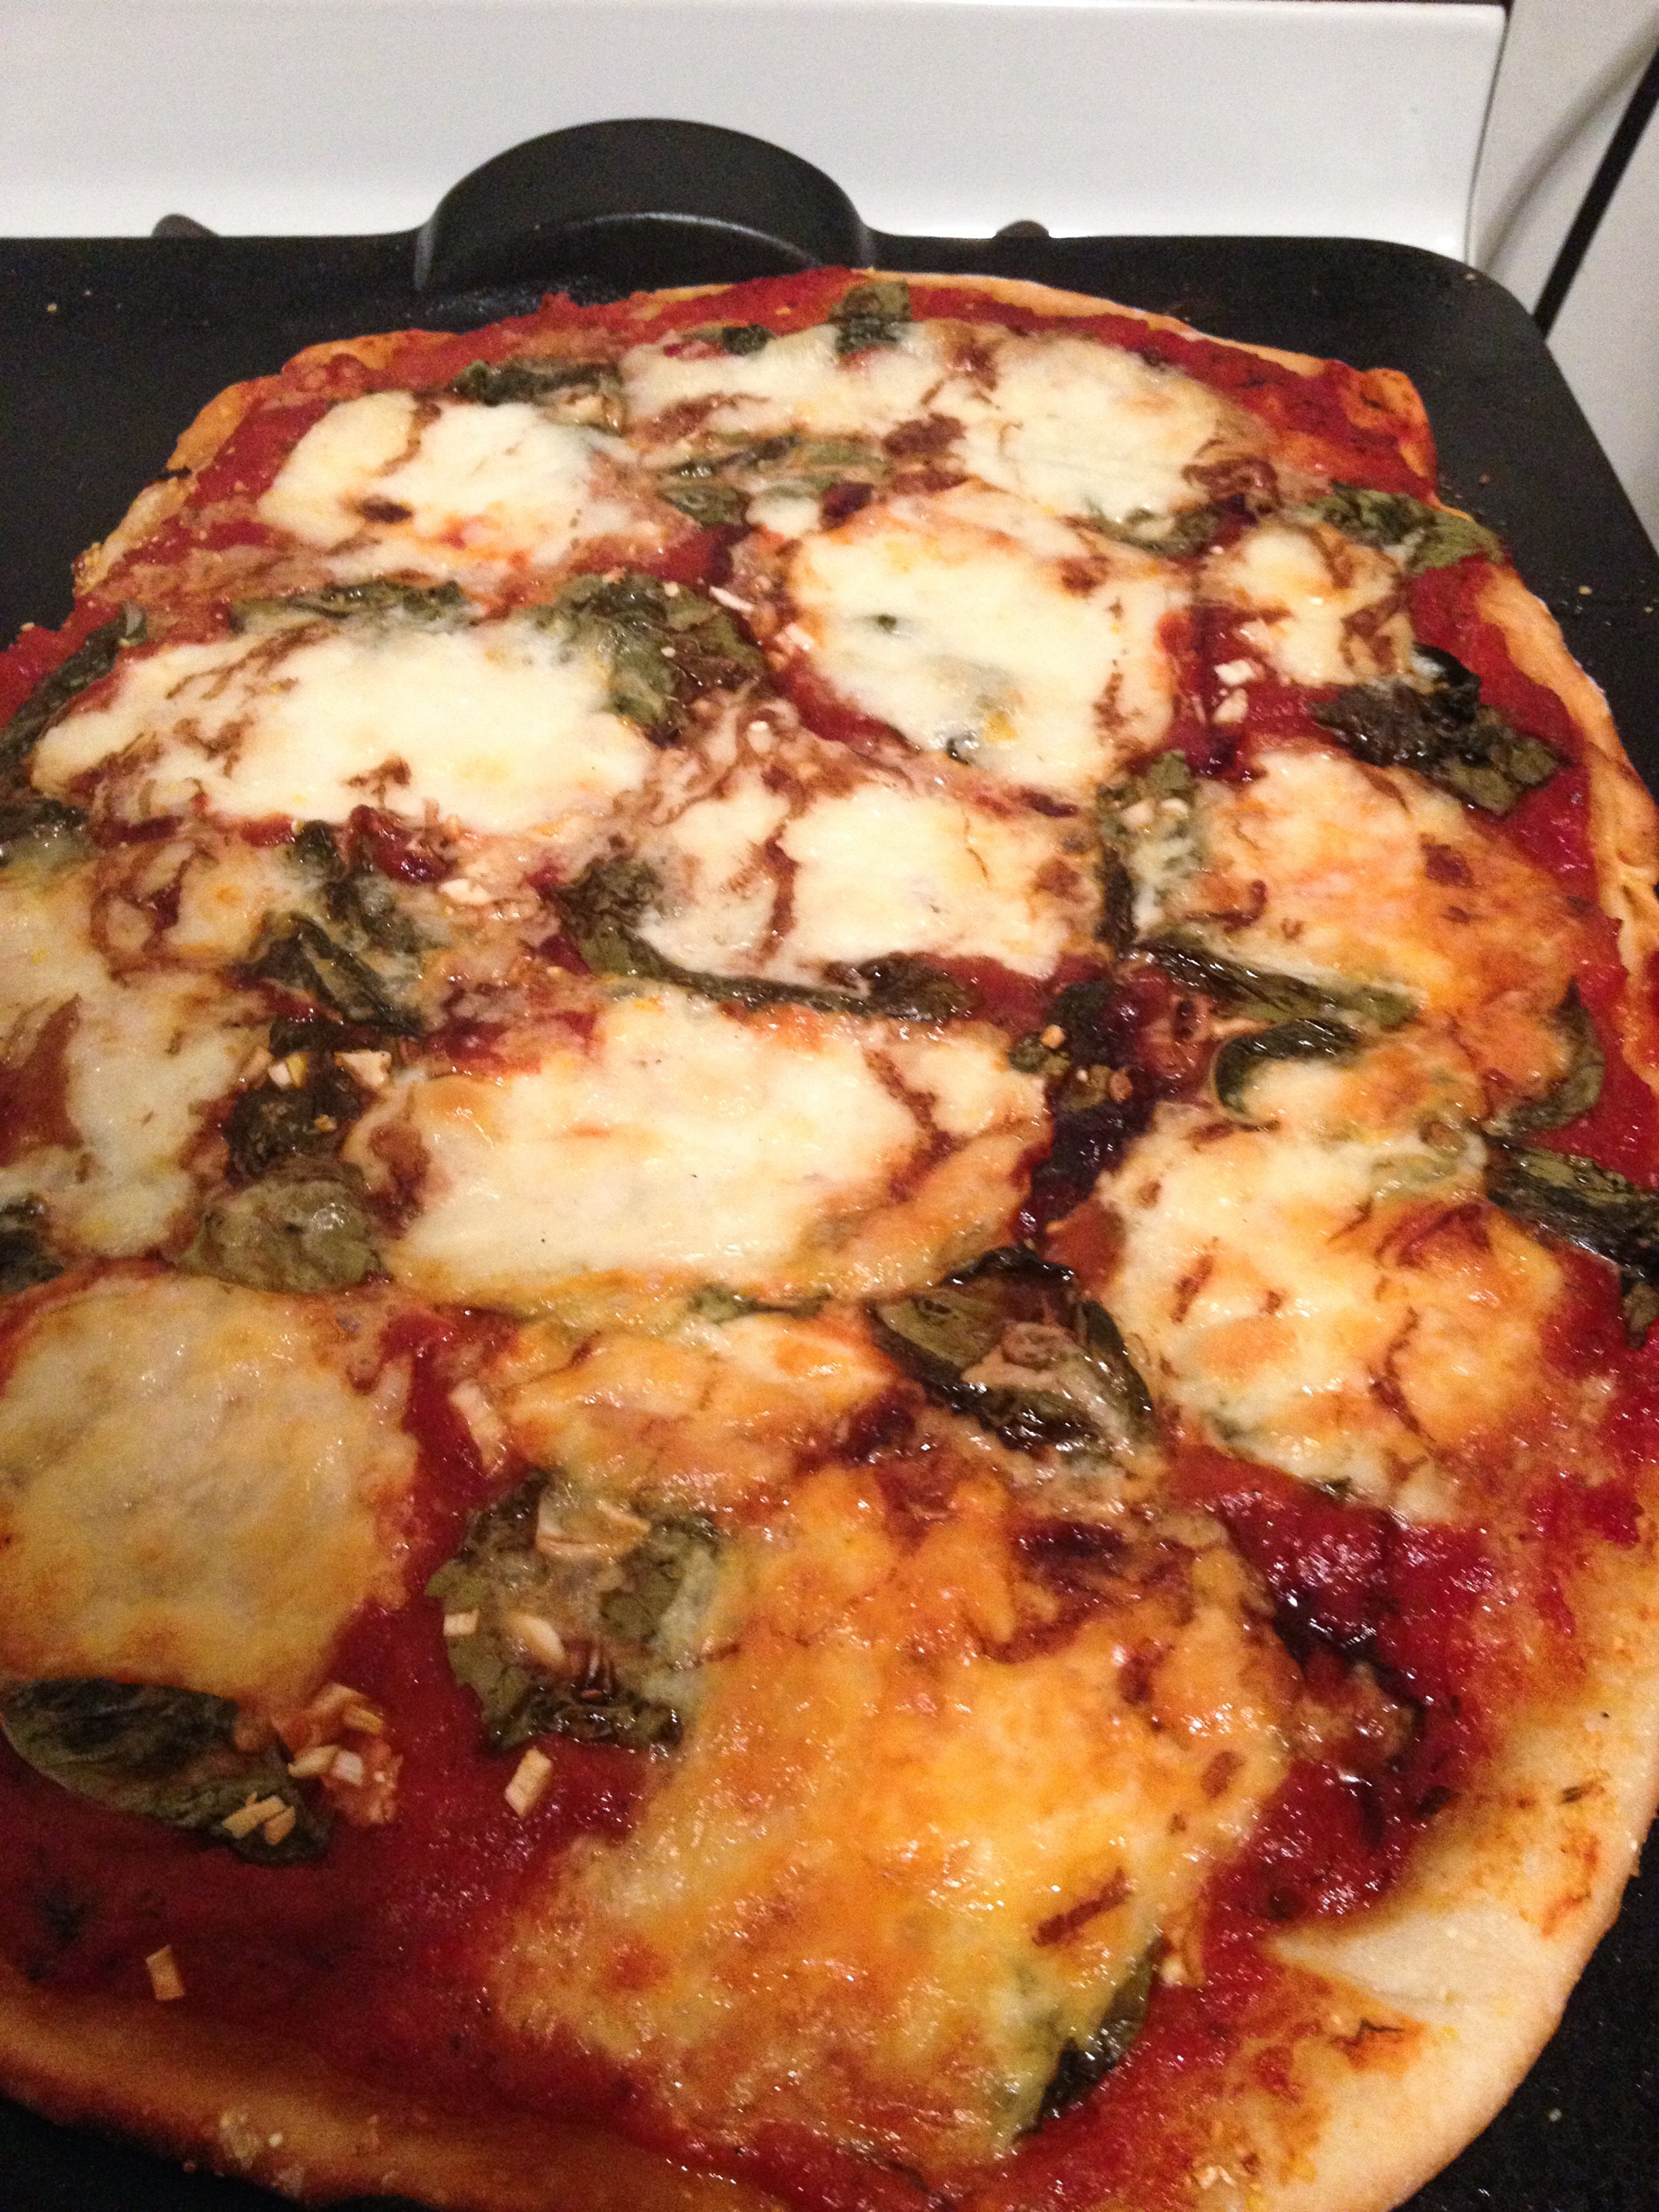
Happy Friday Night Pizza Night!!!

When you hear the word Pamplona, what do you think? First guess- “Running of the Bulls.” Correct? Okay, T.W.O. thought so! While in Spain, T.W.O. had the chance to experience the weeklong festival celebrating San Fermin, patron Saint of Navarra for one day. Actually, lets clarify….a couple hours!
Getting to Pamplona from San Sebastian isn’t hard, but making a day trip of it can be a little bit challenging if you wanted to see the run at 8am. (The first train that arrives is at 8:30am, which is already too late to see the run.) The solution….car service! T.W.O. travelled to Pamplona in style with a private driver. Arriving in Pamplona around 7am, T.W.O.’s first mission was to get the gear…the white capri pants and the red scarf. CHECK! Next, T.W.O. luckily had some family friends that were saving a spot on the last turn before going into the bull ring so they were able to see the run from the first row. Well, behind the barricades that housed the police and medics…so second row. CHECK!


The town was lively, full of “hydrated” people roaming/ stumbling the streets of Pamplona. Ambulances lined the city streets… re-assuring, right? Balconies were filled with spectators, anticipating the run as we watched them hoping the balcony didn’t collapse. Needless to say, it was quite the scene!
8am…..GO TIME! It was the fastest 30 seconds of T.W.O.’s life, watching people run for their lives….Some making it, others eating it on the cobblestone and the rest jumping over the barricades to escape the large beasts. The bulls wore bells around their neck, so the runners heard them coming. Torro! Torro! Torro!

It was a trip well-made and T.W.O. was glad that they can say they “ran with the bulls”.
Ole! Ole!


Having a dinner party with assigned seating? Can’t decide on how to display your guests’ name? Well T.W.O. has the perfect solution for you! All those wine corks you are “saving” for a special occasion can finally come in handy. It’s as easy as one…T.W.O.…three!!
What you will need:
– Name Tags (T.W.O. printed the name tags on Avery template pages)
– Wine Corks
– X-Acto Knife or Swish Army Knife

Step 1: Design and print out your name tags.
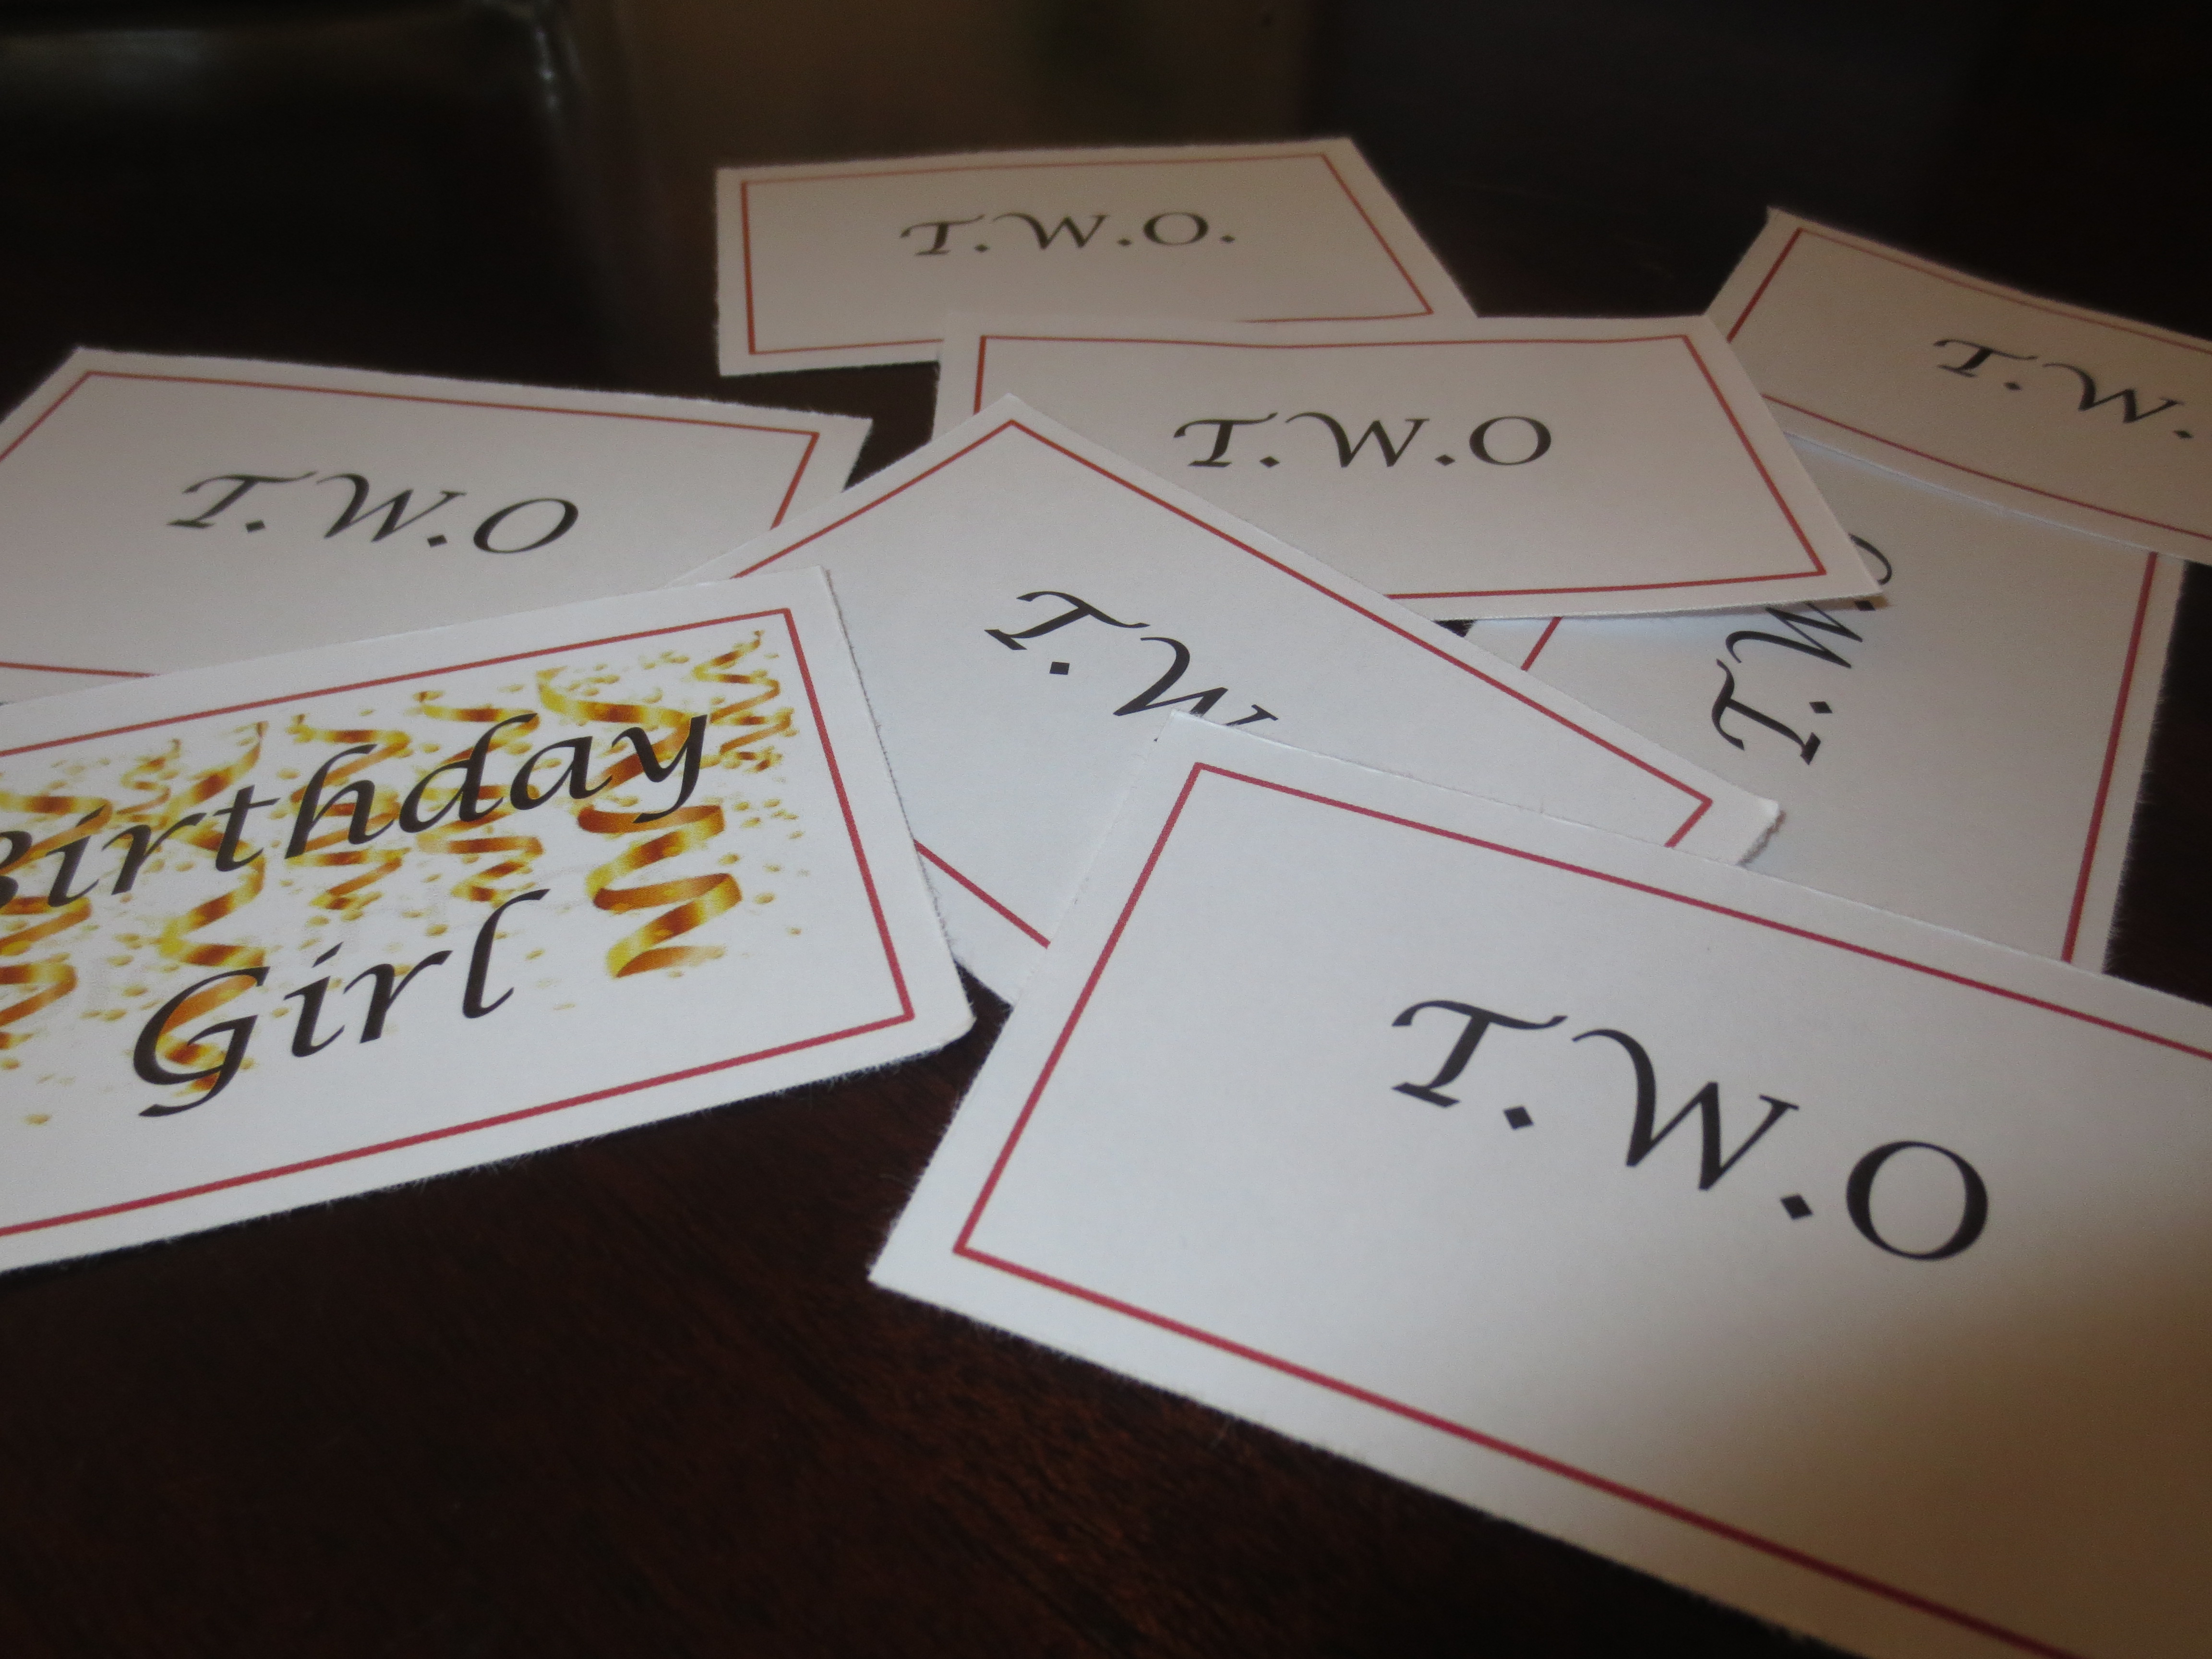
Step 2: Using your knife, cut a ½ cm deep line into the cork (lengthwise).

Step 3: Place the name tag in the slit and make sure it’s secured. *

Voilà!
Now that’s an easy DIY project! Happy designing!!!

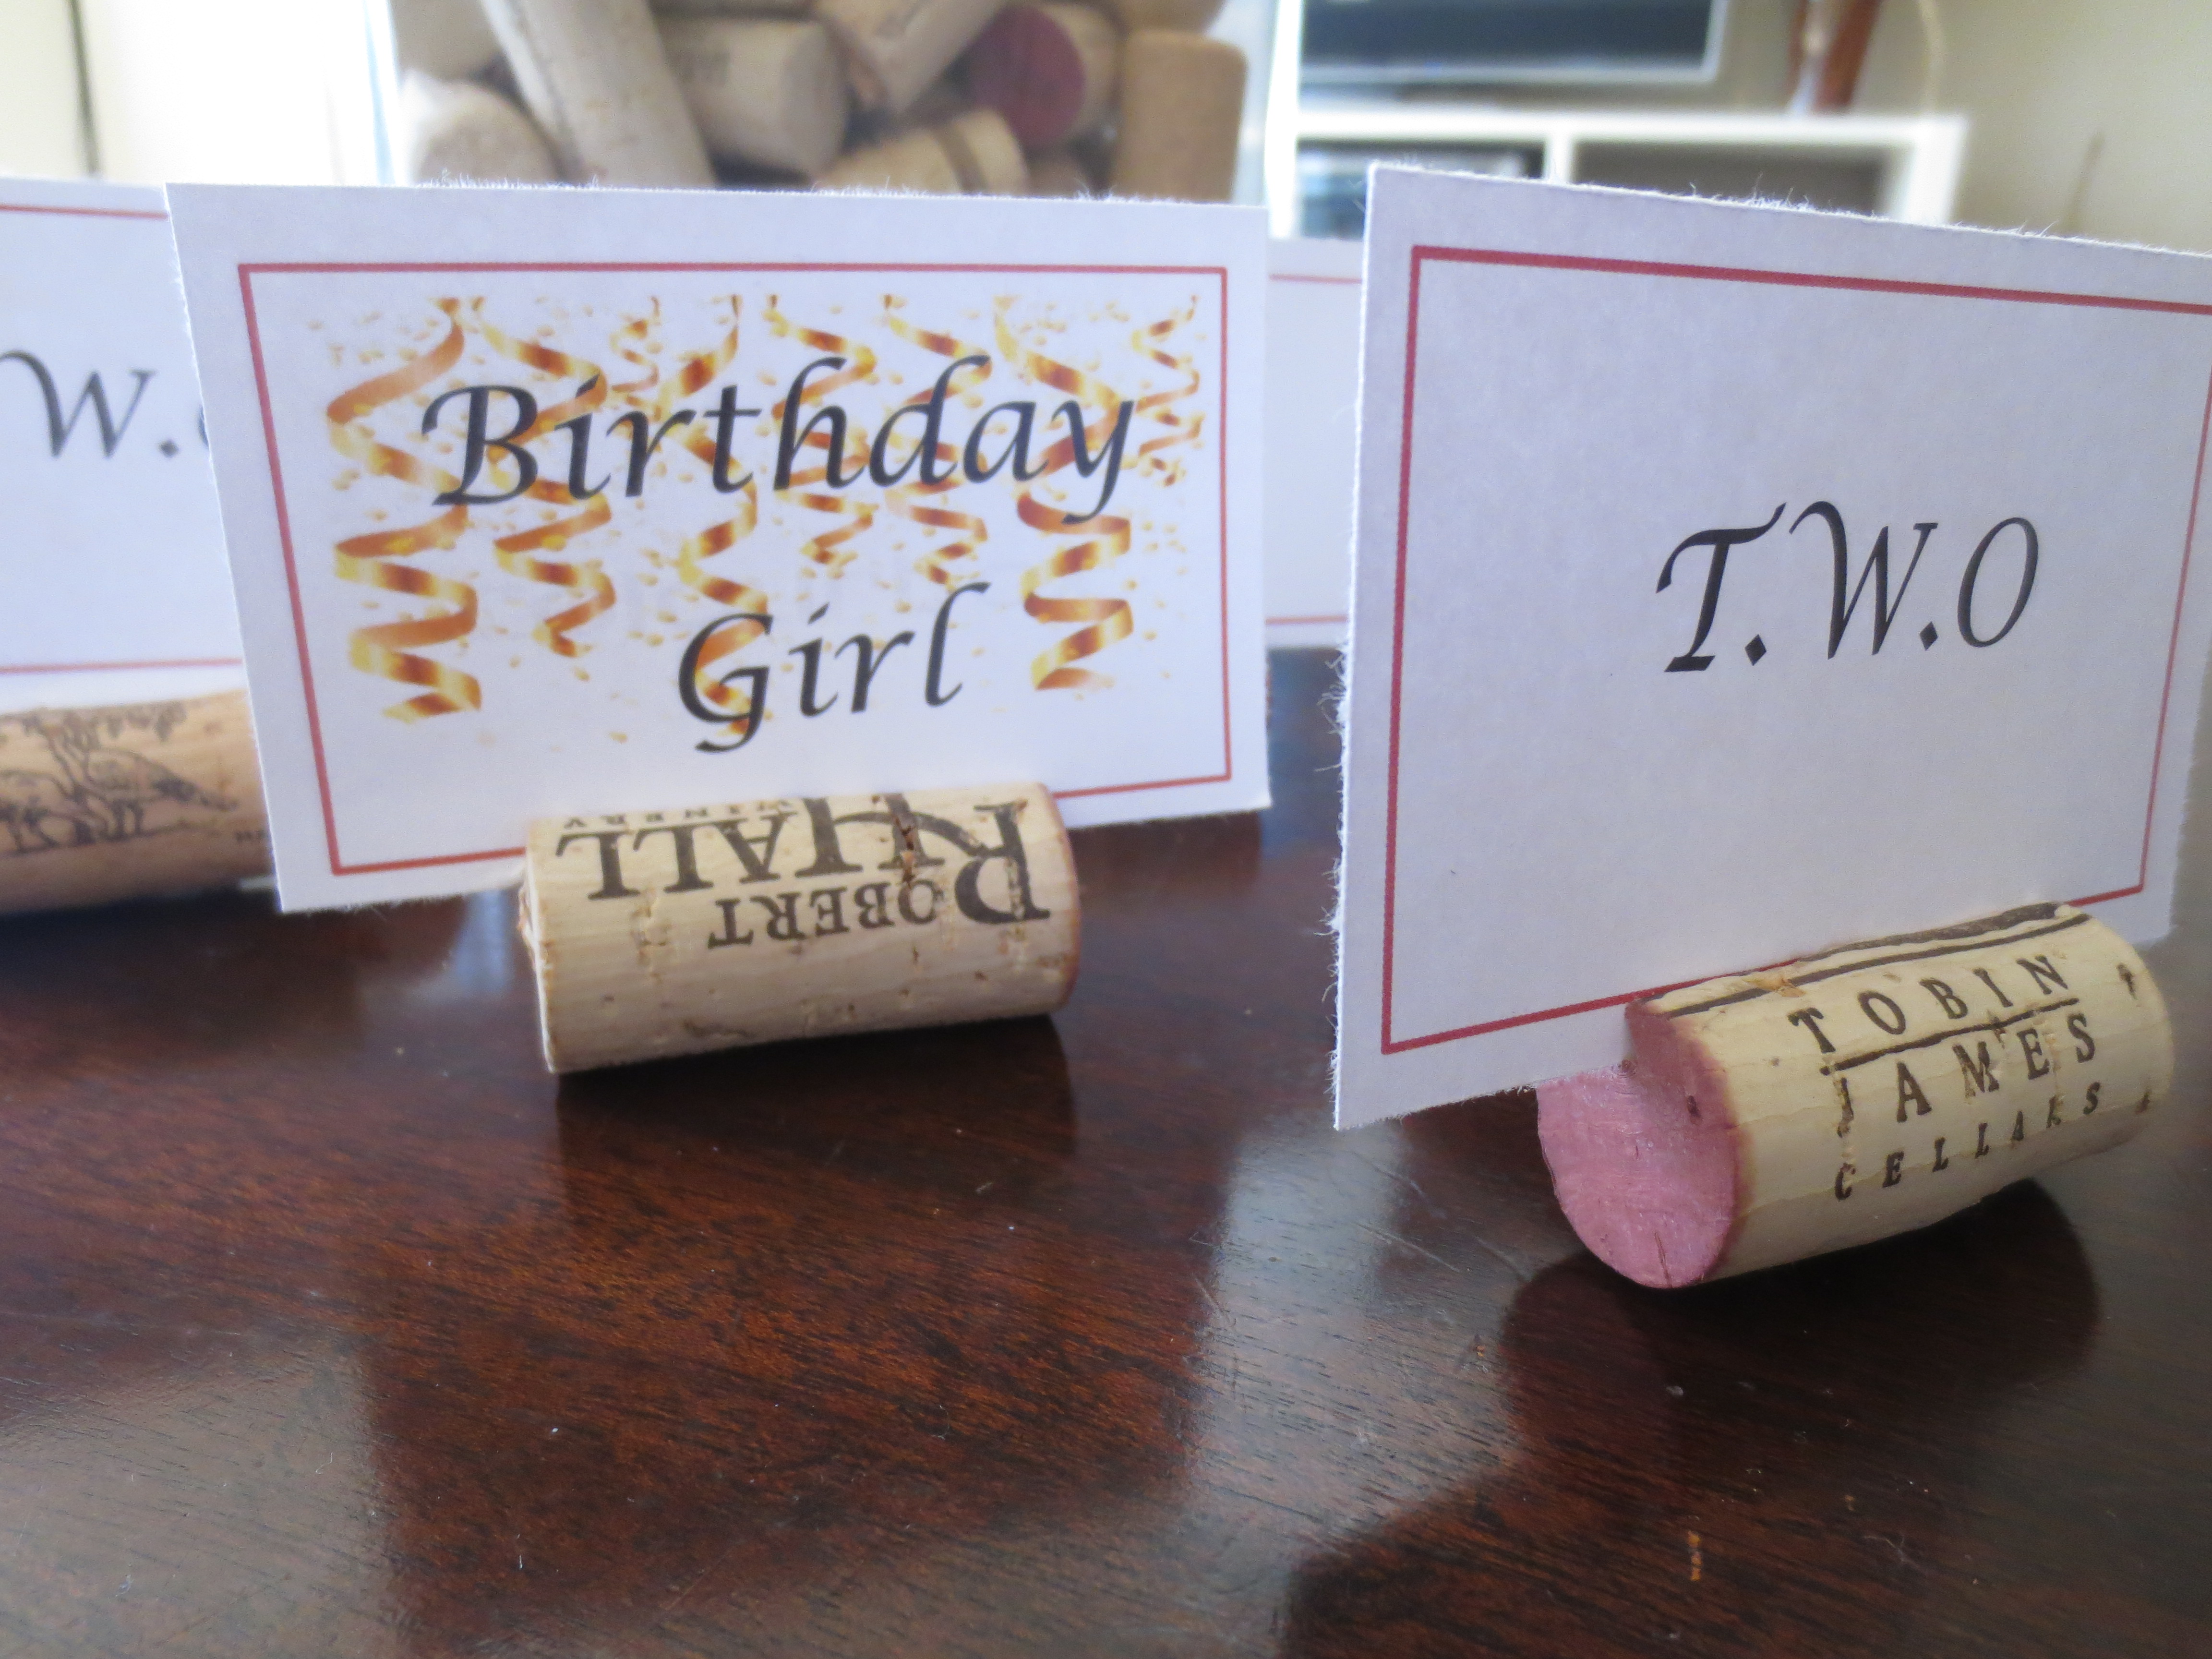
* If the wine cork place card isn’t standing upright, shave the bottom of the cork to create a flatter surface.
