Kale, Pomegranate, Apple and Flank Steak Salad

image

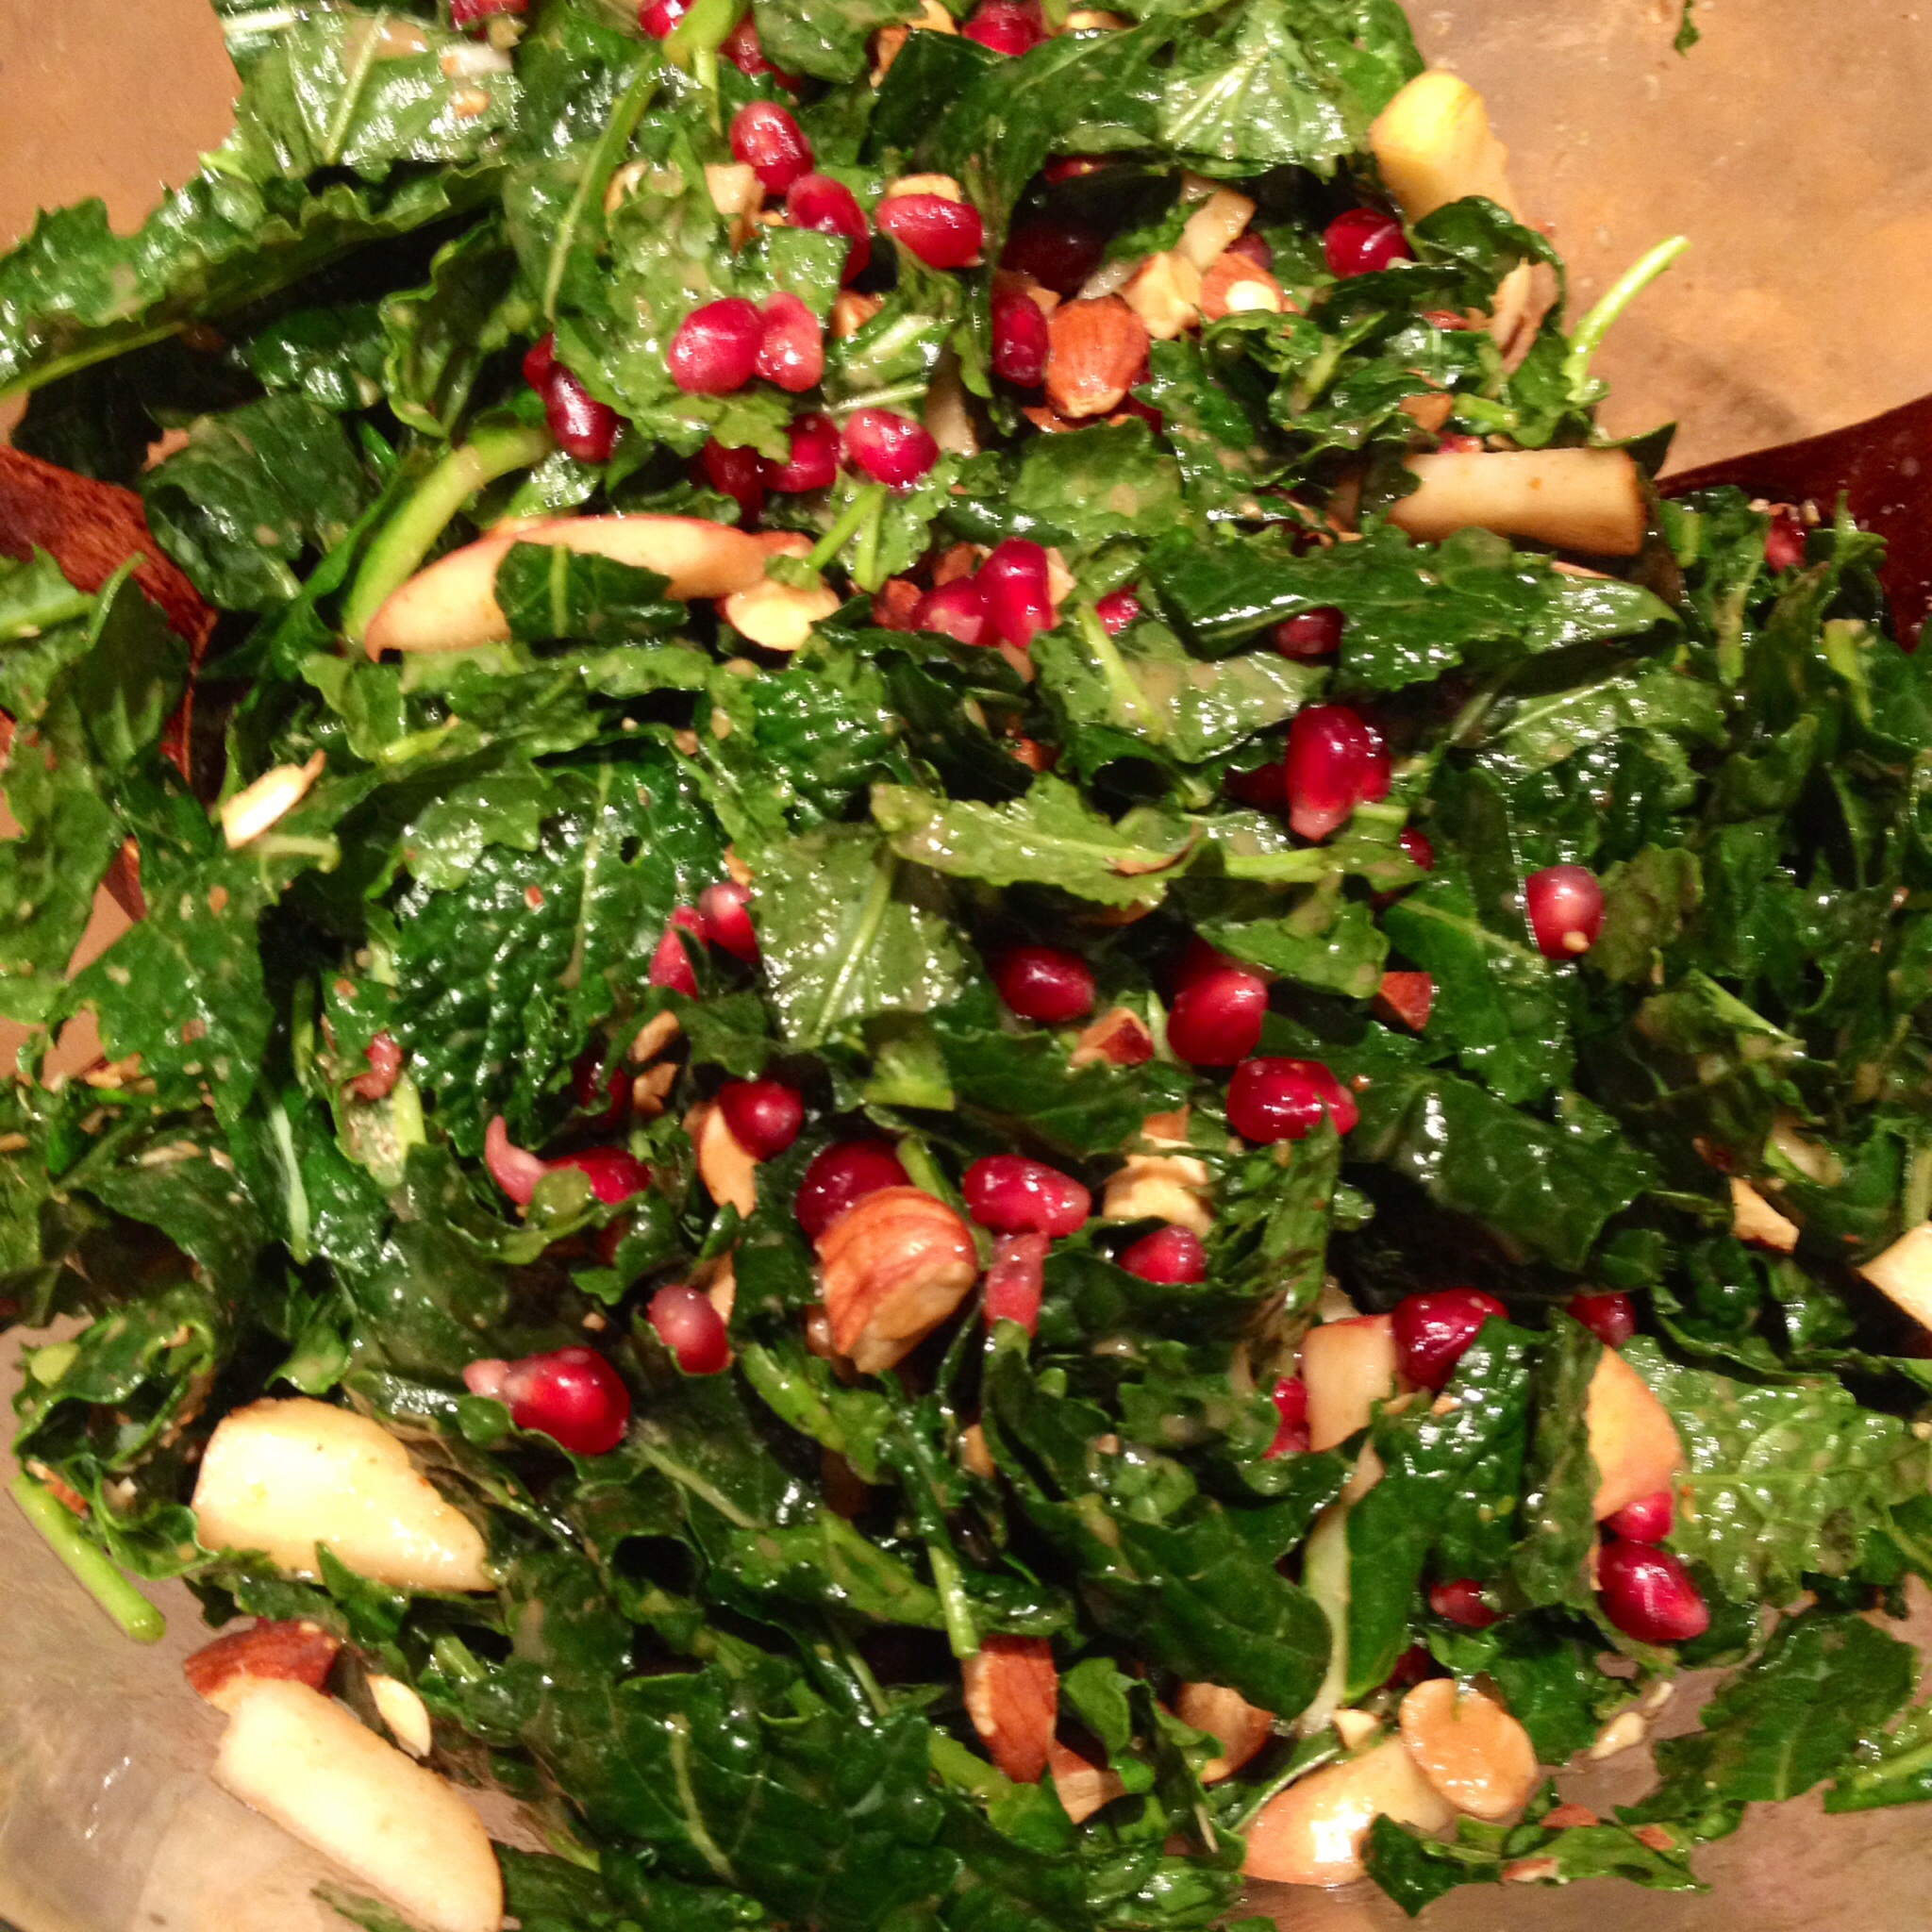
Need to spice up your salad? Well, T.W.O. has the perfect recipe for you. This salad is filled with nutrients, protein and antioxidants and will be sure to leave you wanting seconds! The baby kale leaves are tossed in a homemade lemon vinaigrette, topped with roasted almonds, pomegranates and sliced apples. Oh and it doesn’t stop there-we need protein right? Yes! How about a lean barbeque flank steak that was marinated in Hawaiian teriyaki sauce? You got it! Check out how to make this salad from scratch.

image

image

Ingredients:
– Baby Kale
– 1 cup pomegranate seeds
– ¼ cup roasted almonds, chopped
– 1 Pink Lady apple, sliced and diced
– 2 cups Trader Joes Island Soyaki sauce
– Flank Steak, lean
– 1 Lemon
– 4 Tablespoons spicy mustard
– 1 teaspoon olive oil
– 1 teaspoon balsamic vinegar
– Salt
– Pepper

Marinate the flank steak for a minimum of 2 hours prior to barbequing. About 20 minutes before you are ready to barbeque, take the meat out to bring to room temperature. While the barbeque is heating up, prepare your salad.

image

In a bowl, mix together the kale, pomegranate, roasted almonds and apples. Set aside.

image

image

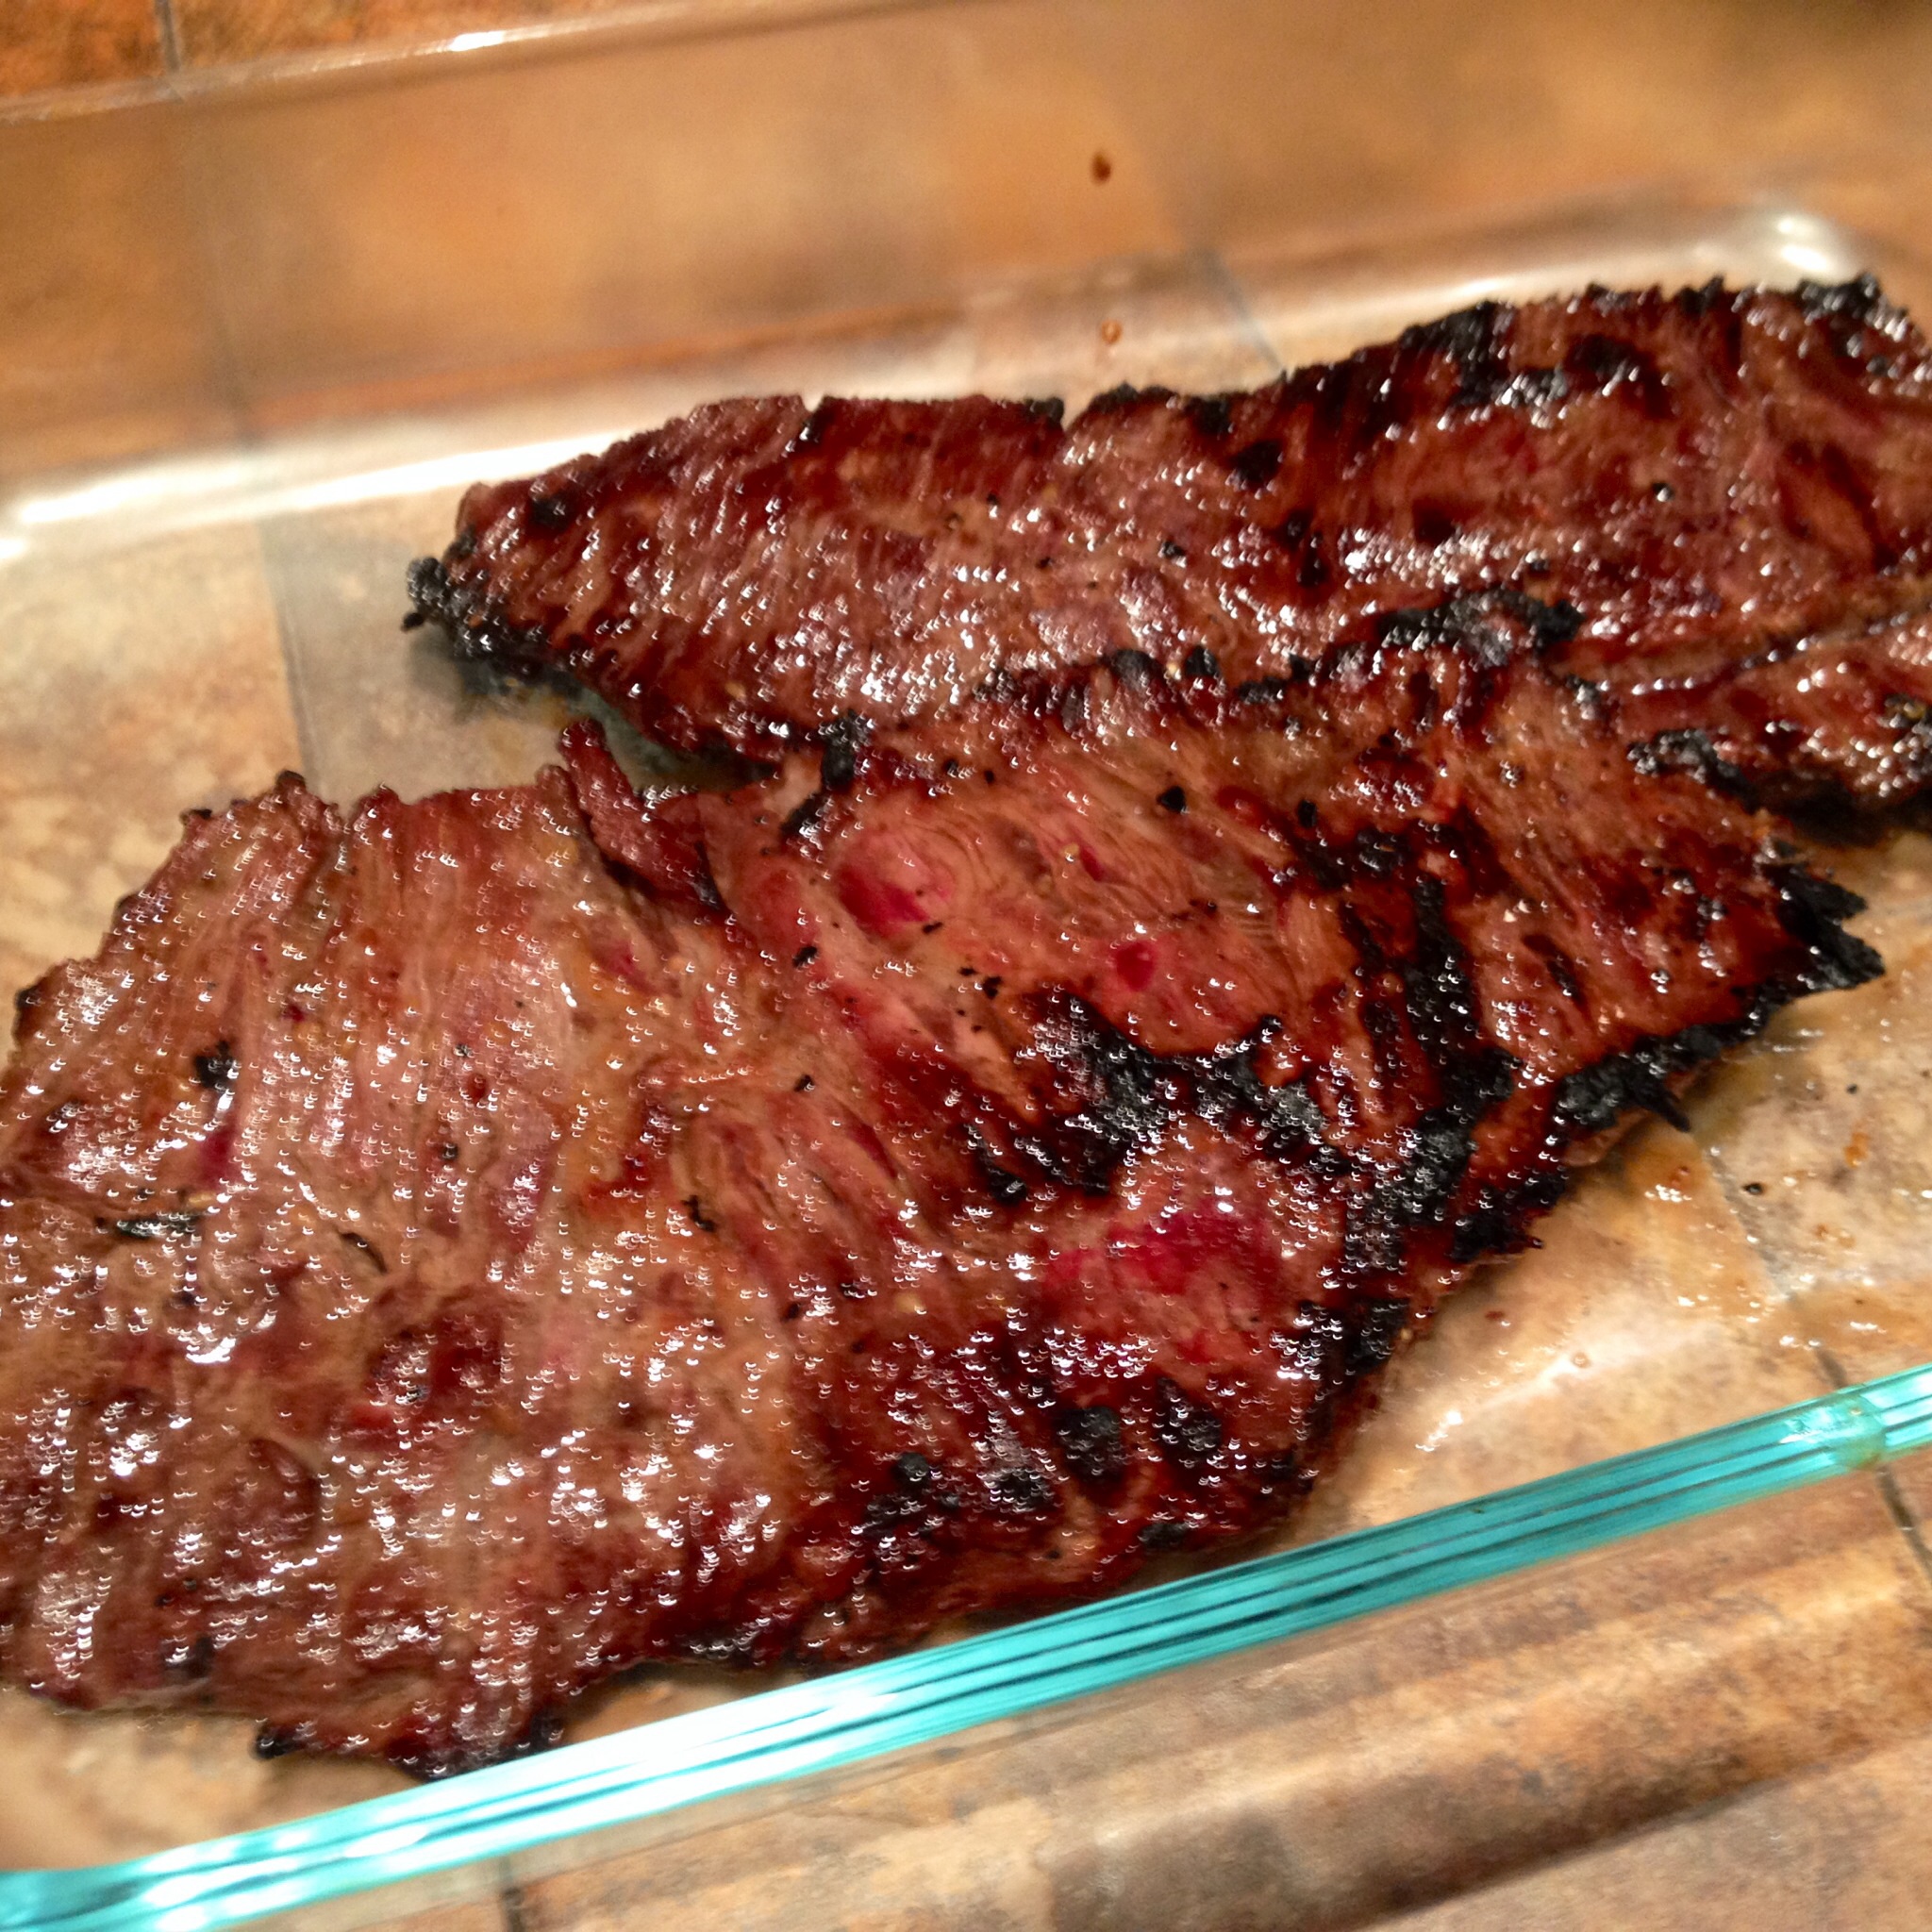
Put the meat on the barbeque and cook on medium heat. The meat should take about 15 minutes depending on your barbeque.

While the meat is cooking, prepare your dressing. In a small bowl, mix together the lemon juice, spicy mustard, olive oil and balsamic vinegar. Add salt and pepper to taste. Mix the dressing in the salad. It is okay to let the salad dressing marinate the kale. Kale won’t get soggy like most lettuce.

image

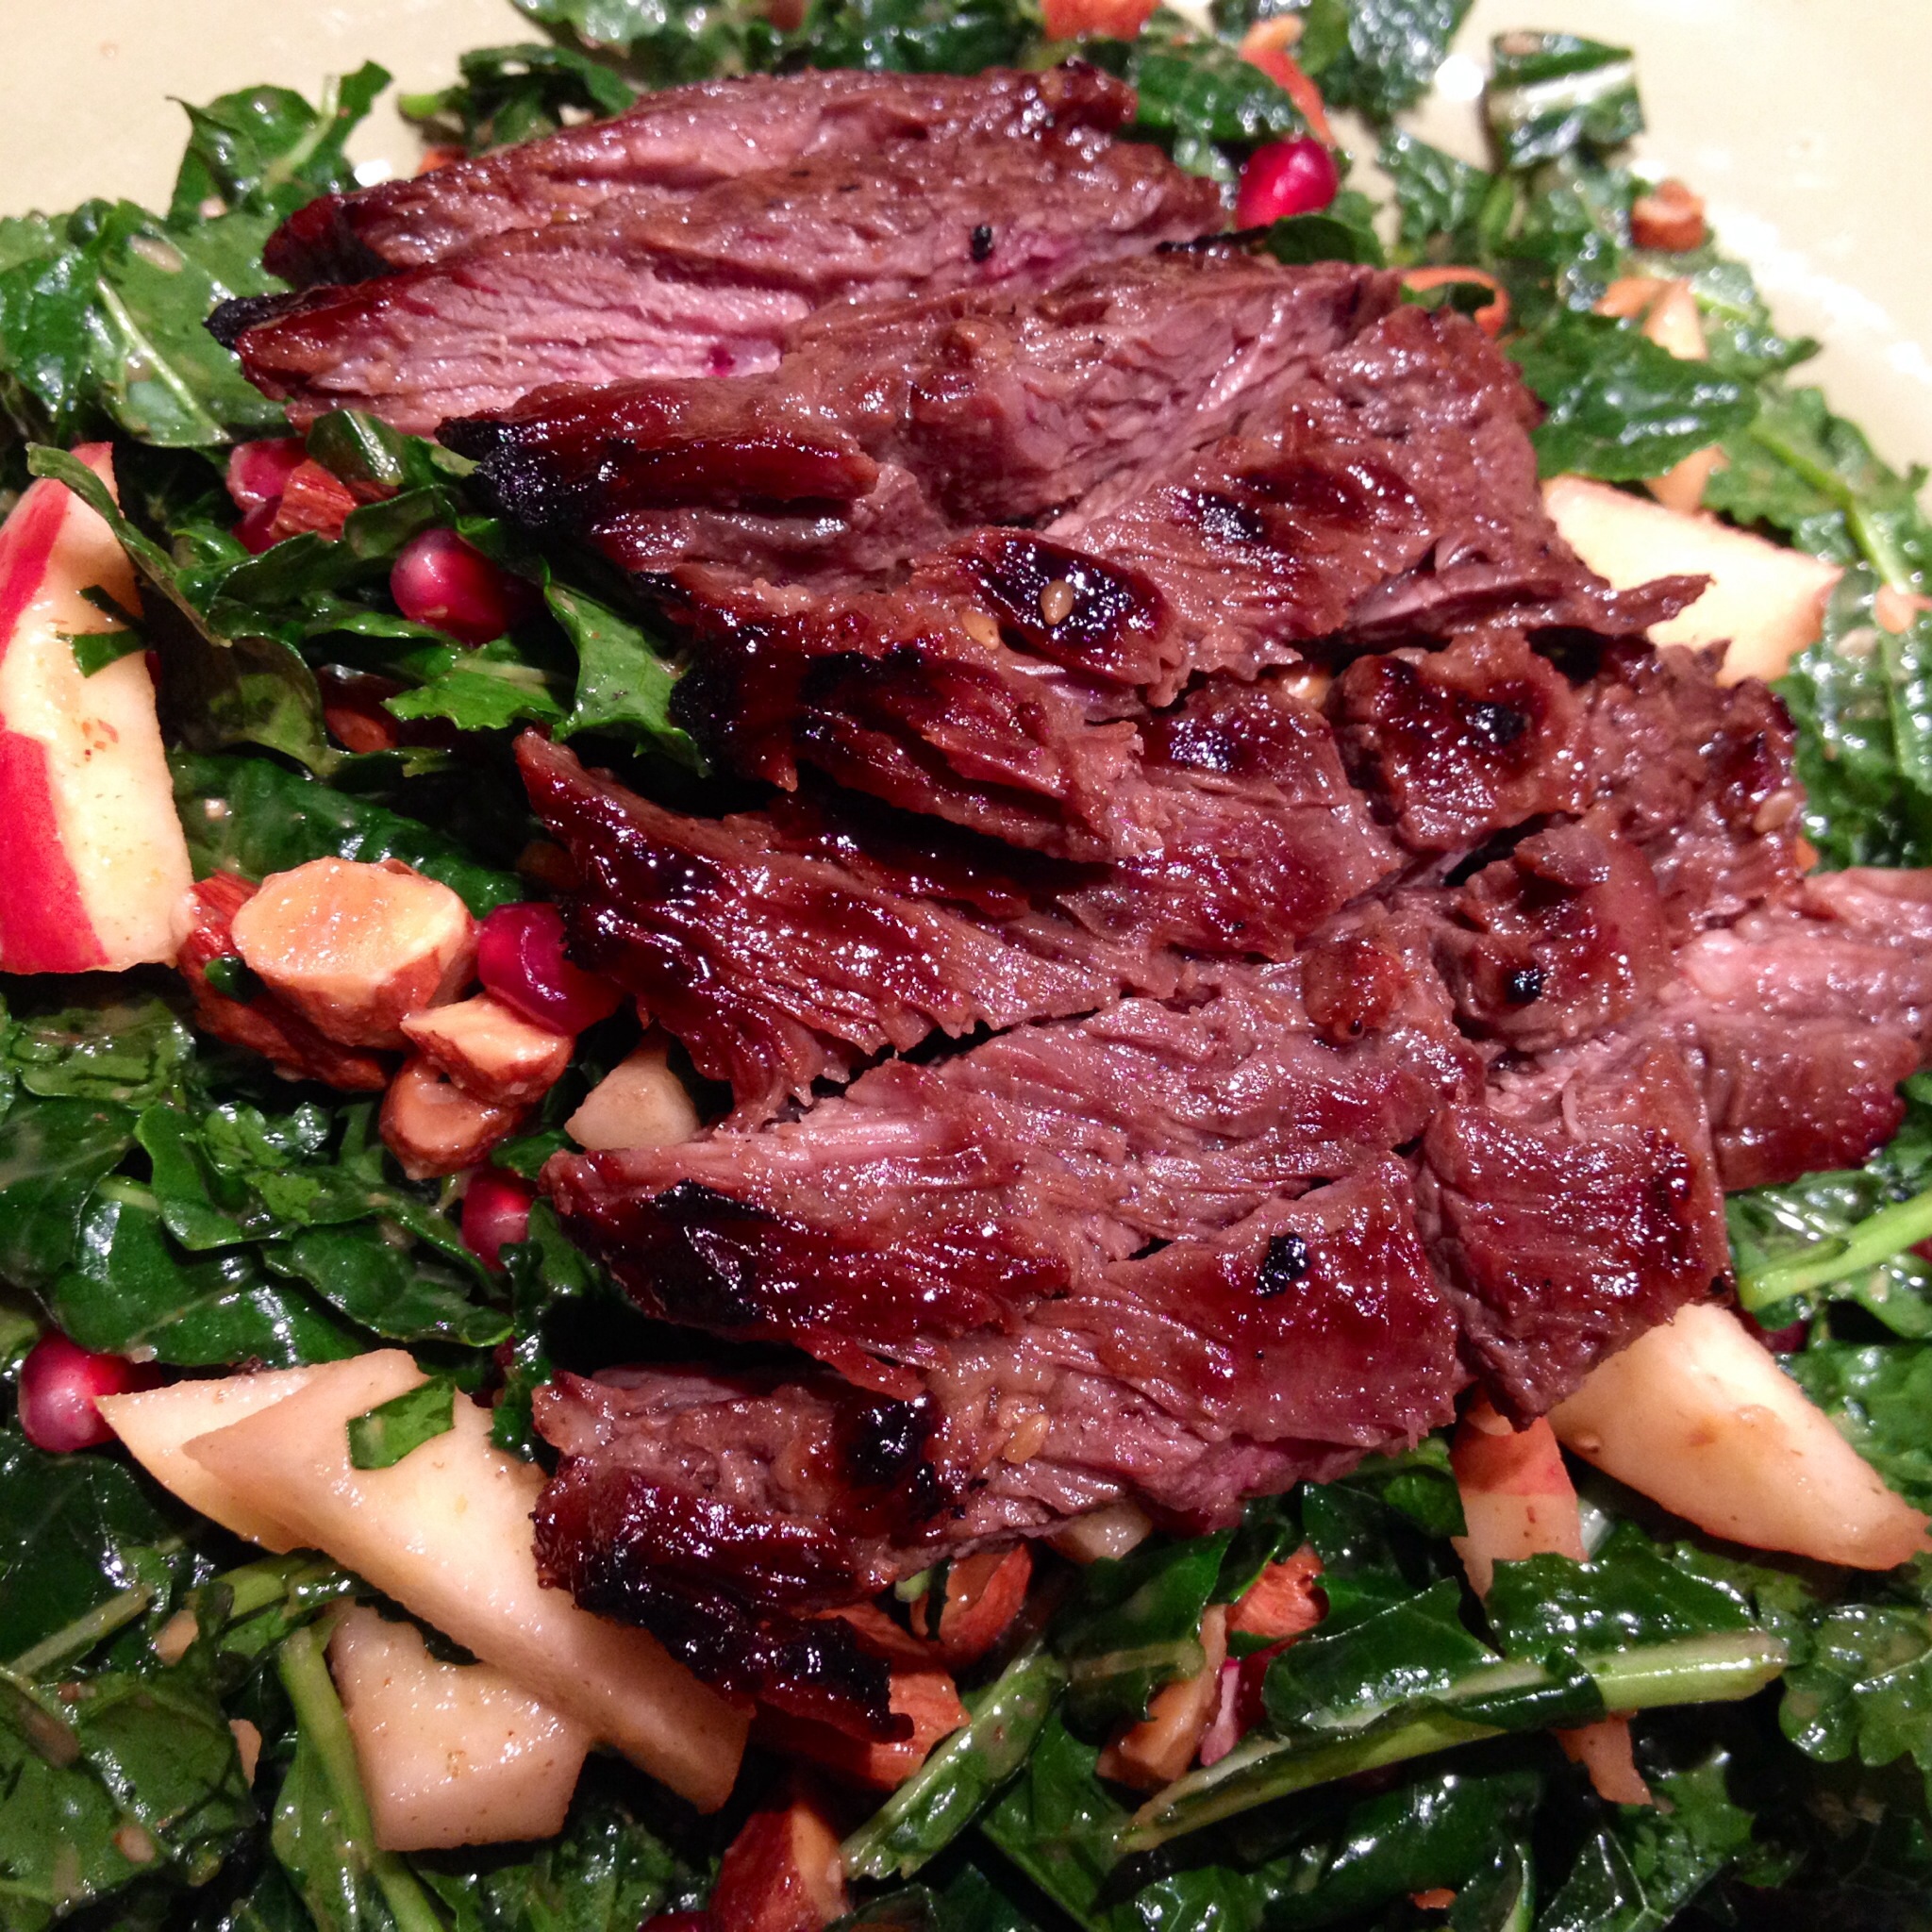
When the meat is done, take it off the barbeque and transfer to a cutting board. Thinly slice the meat. Plate the salad and top of it with the flank steak. And that’s it…you have yourself a fresh, hearty salad that will satisfy any audience.

imageimage image image

Cheers,

T.W.O. signature

Artichoke & Spinach Pizza

image

Do you know what night it is?? Yep, that’s right…Friday Night Pizza Night! We are featuring an Artichoke & Spinach Pizza this week. It’s a hearty pizza with a béchamel-style sauce and fresh spinach that will please any crowd. Check out how to make this delicious, gourmet pizza below!

Ingredients

– Pizza Dough*
– Cornmeal
– Flour
– 8 oz fresh spinach, divided
– 2 Tablespoon butter
– 2 Tablespoon unbleached flour
– ¾ cup milk
– ¼ teaspoon onion powder
– 2 cloves garlic, diced
– 1 Tablespoon Extra Virgin olive oil
– 6 ounces mozzarella cheese, shredded
– 2 ounces Pecorino Romano, grated
– 1-8 ounce can of marinated artichoke hearts
– Krazy Salt
– Fresh Ground Pepper

 *T.W.O. used pizza dough from VJB Deli.

image

Preheat oven to 425ᴼF.

Roll out the pizza dough on a floured/ cornmeal surface. Once the dough is evenly rolled out, transfer the dough to a greased cookie sheet.

In a large sauté pan, heat 1 Tablespoon of olive oil over medium heat for about 1 minute. Add ¾ of the spinach and sauté for 3 minutes or until wilted. Remove from heat and place on paper towels. Once some of the oil is drained, chop the spinach and set aside.

image

In a small saucepan, melt butter over medium heat. Whisk in flour and onion powder and cook for 2 minutes. Slowly add the milk and increase the temperature to medium-high heat for about 4 minutes or until the sauce thickens. Make sure you are stirring constantly, so the sauce doesn’t burn. Remove from heat and stir in 1 clove of diced garlic, pepper, Krazy Salt and sautéed spinach.

image

Chop the remaining fresh spinach and set aside.

Add the white béchamel spinach sauce to the top of the pizza dough. Add the fresh spinach along with the remaining 1 clove of chopped garlic. Sprinkle the shredded mozzarella and Pecorino Romano cheese on top.

image

Let the pizza rise for about 15 minutes. Note – you don’t want to put the pizza in a cold oven, so make sure your oven reaches 425ᴼF.Once the oven is ready, place the pizza in the oven and watch closely. Do not open the oven door, as you want to keep the heat in. The pizza will take 15-20 minutes. Once done, take the pizza out of the oven and let it sit for 5 minutes prior to cutting.

image image image

Happy Friday Night Pizza Night!

T.W.O. signature

Thanksgiving 2013 Recap

image

Is it just T.W.O. or does everyone have the Monday blues.  It’s mostly because we had a fabulous weekend with our family and wish we can do it all over again.  Here are some highlights from our Thanksgiving weekend!

Turkey Trot

image

The Table Decoratorsimage

image

image

The Cousins! imageimage

The Ladiesimage

imageimage

Baby  Taylen climbing up the stair for the first time!imageimage

The Sampler Platter!
image

Weekend Fun after Thanksgiving

HB Pierimage

image

imageimage image image

Cheers to another successful Thanksgiving!

T.W.O. signature

Pumpkin Coffee Cake

image

Pumpkin Chocolate Chip Cookies, Pumpkin Pie, Pumpkin Pancakes, Pumpkin Greek Yogurt…why not add Pumpkin Coffee Cake to the mix? T.W.O. just did that. Check out this savory coffee cake recipe that tastes like the holiday season in every bite! It’s a moist cake that can be enjoyed for breakfast, a snack and even dessert!

image
Crumb Layer
– ½ cup sugar
– 2 teaspoon cinnamon
– ½ teaspoon nutmeg
– 1 stick unsalted butter, melted
– 1 ½ cups unbleached flour
– Confectioner’s sugar (optional, to sprinkle on top of the cake when done)

 Cake Layer
– 1 ½ cups unbleached flour
– 2 teaspoons baking powder
– ½ teaspoon baking soda
-1 teaspoon cinnamon
– 1 teaspoon nutmeg
– 1 teaspoon cloves
– 1 stick unsalted butter, room temperature
-1 cup sugar
– 2 eggs
-1 Tablespoon vanilla
-½ cup sour cream
– ¾ cups Libby’s canned pumpkin

Preheat oven to 350ᴼF.

To Make the Crumb Topping:

Combine sugar, cinnamon and nutmeg in a bowl. Slowly add the melted butter and flour into the mixture. Mix well and set aside.

image

To Make the Cake:

Cream the butter, sugar in a bowl. (T.W.O. uses a KitchenAid mixer!) Add the eggs, pumpkin, vanilla and sour cream. Make sure all the ingredients are mixed well before adding in the flour, baking powder, baking soda, cinnamon, nutmeg and cloves. Once combined, get ready to assemble!

Pour the cake batter into a greased 9” round pan (or a spring-form pan, which makes for a better presentation of the cake!). Make sure the batter is evenly distributed. Add the crumble to the top of the batter and bake for 45 minutes or until a butter knife comes out clean. Allow the cake to cool for 15 minutes before taking it out of the pan.

image image

Is it done yet?  Sure is!!!!

image image

image

Grab yourself some coffee, tea or even a glass of vino to enjoy this delectable, seasonal dessert!

Cheers

T.W.O. signature

Roasted Butternut Squash with Swiss Chard

image

Picture this: A cold autumn’s night with green vegetables, toasted pine nuts, butternut squash and goat cheese. Sounds T.W.O. perfect, right? Well it is! Check out how to make this dish below.

image

Ingredients:

– 1 large butternut squash
– 2 large shallots, quartered
-4 gloves of garlic, skinned and halved
– 1 ½ Tablespoon cinnamon
– 1 ½ Tablespoon nutmeg
-1 large head Swiss chard, stems and leaves chopped separately
-¼ cup pine nuts, toasted
-¾ cups dried cranberries
– ¼ cup honey goat cheese, crumbled
– balsamic vinegar, to drizzle

Preheat oven to 375ᴼ. Peel the squash and cut in half lengthwise. Seed the squash and cut into bite-size cubes. Spray/brush the squash with olive oil and mix in cinnamon and nutmeg. Once the squash is coated, place on a baking sheet and cook for about 30-40 minutes until soft. Check the squash periodically and mix.

image

image

At the 20 minute mark, add the garlic and the shallots to the butternut squash on the baking pan in the oven.

While the squash medley is cooking, chop the Swish chard stems and sauté in a fry pan for 3 minutes with a drixzle of balsamic vinegar. After 2 minutes, add the Swish chard leaves.

image image

Mix in the cranberries and the roasted pine nuts.

image

Remove the squash, shallots and garlic from the oven and add to the Swish chard mixture. Once mixed, remove from stove and plate the ingredients. Add the goat cheese to the top for garnish. Serve immediately.

image

T.W.O. enjoys having this for leftovers for lunch the next day. Just heat it up in the microwave or on the stove and you will have another tasty meal!

Happy cooking!!!

T.W.O. signature

Chocolate Chip Cookies

image

T.W.O. has made a ton of chocolate chip cookies in their lifetime and we discovered that throughout the years, new recipes are constantly evolving.  Most recently, T.W.O. adapted this recipe that has a secret ingredient.  Find out the trick to making the best chocolate chip cookie!

image

Ingredients:

– 2 1/4 cups unbleached flour
– 1 teaspoon baking soda
– 1 ½ teaspoons cornstarch
– 1.5 sticks unsalted butter, soften
– ¾ cups light brown sugar
– ½ cup sugar
– 1 egg + 1 egg yolk
– 3 teaspoons vanilla
– 2 cups chocolate chips

In a bowl, mix butter, sugar, brown sugar, egg and yolk together. (T.W.O. uses a KitchenAid mixer!)  Once mixed well, add the flour, baking soda and the secret ingredient CORNSTARCH!  After 3 minutes, slowly add in the chocolate chips.  Place the dough in the refrigerator overnight or for a minimum 3 hours.

image

image

Don’t forget to taste the dough!

image

When you are ready to bake the cookies, take the dough out of the refrigerator.  Pre-heat 350ᴼF.  Let the dough sit out on the counter for about 15 minutes while the oven is pre-heating.  Roll the dough into balls and place them on an oil-sprayed cookie sheet.  Next, place the cookies in the oven for 10-11 minutes depending on your oven.

image

Once they are finished, take the cookies out of the oven.  Place the baked cooked on a cooling rack and grab yourself a glass of milk and enjoy!

image

image

Happy Baking!

T.W.O. signature

Burrata Margarita Pizza

image

Burrata. Basil. Marinara Sauce. Balsamic.

Happy Friday Night Pizza Night!!

T.W.O. decided to cook a lighter pizza for this Friday Night Pizza Night. Burrata looks a lot like fresh buffalo mozzarella, but it much softer and has a cream-like filling. And it makes for a great cheese to use for a pizza! This Burrata Margarita pizza is easy to whip up for yourself, date or family night. Has T.W.O. convince you to make this pizza yet?

Ingredients
1 – Roll of pizza dough
-12 ounces Marinara Sauce*
-8 ounces Burrata**
-1 Small package fresh, basil leaves
-2 Cloves garlic, chopped
Balsamic Vinegar
Salt

*T.W.O. uses SF Capellino Low-Fat Tomato and Garlic Sauce from Molinaris Deli…don’t let the “low-fat” scare you- the texture and flavor is still there!
**T.W.O. suggests using Di Stefano – Burrata Alla Panna

image

image

Roll out your pizza dough on a floured/ cornmeal surface. Once evenly rolled out, place dough on a pizza stone. Spread the marinara sauce on the dough making sure you get the edges.

image

Next, cut the burrata into pieces and distribute evenly on the pizza dough. (See below) It’s okay that the marinara is showing; the cheese will melt. Next, place your basil leaves and chopped garlic on the pizza. Last step- drizzle balsamic vinegar over the pizza and add salt to taste.

image

Let the pizza rise for about 15 minutes while the BBQ is heating up. Note –you don’t want to put the stone on a cold BBQ. The temperature should reach a medium-high heat before placing the pizza on. Watch the pizza closely; you don’t want your crust to burn! It should take about 15-20 minutes, depending on your grill.

image

Happy Friday Night Pizza Night!!!

T.W.O. signature

Chicken with Garbanzo Bean Salad and Burrata

image

One of T.W.O. ‘s favorite proteins to experiment with is chicken because it is eaten more often than any other protein and can get very old if you don’t switch it up! So T.W.O. decided to create a spin on chicken Parmesan and bruschetta by creating a dish using chicken, a garbanzo bean salad, and burrata! Whether it is for a dinner party, family gathering or weeknight meal, you will find this dish to be easy but most of all- gastronomical!

 Ingredients

– 2 boneless, skinless chicken breasts
-1 can of garbanzo beans
-Favorite pasta sauce
-Fresh Basil
-Garlic cloves
-Fresh pepper
Crazy salt
-Burrata cheese

image

 First, chop garlic and basil and place in a mixing bowl. Next, add garbanzo beans, pasta sauce and fresh ground pepper.  You want to add enough sauce just to cover the garbanzo beans and create a little liquid. Let this mixture marinade for about 20 minutes in the refrigerator.

image

While the garbanzo bean salad is marinating, start the grill. Season the chicken with salt and pepper.  Place chicken onto grill and cook for about 20-25 minutes or until done. Meanwhile, turn on your oven to 425° and take the garbanzo bean salad out of the refrigerator. When the chicken is done, place the chicken breasts into a Pyrex and top with the garbanzo bean salad.  (You will have left over salad if you only use 2 chicken breasts, but it makes for a great side dish or snack while cooking!)

image

Put the Pyrex into the oven for 3-5 minutes. Next, place the burrata cheese over the garbanzo bean salad and put in the oven.

image

Allow the cheese to melt for about 2 minutes and then turn the oven on broil. Let the dish broil for about 2 minutes, or until the cheese gets a little brown. Once this is done, take the chicken out of the oven and get ready to serve!

image

image

 Bon appetite!

T.W.O. signature

Friday Night Pizza

IMG_4184

Friday Night Pizza has been a tradition in T.W.O.’s family for decades.  It’s one night of the week that everyone partakes in the preparation of dinner by creating his or her own pizza.  It’s all about the dough, the ingredients and the cooking style that makes every week a unique experiment.  We aren’t afraid of trying new recipes and of course making it our own….T.W.O.!

T.W.O.’s first featured Friday Night Pizza was taken place in San Francisco with family.  Around 6pm, everyone was in the kitchen chopping, shredding and dicing their favorite ingredients.

The chefs made a total of 4 pizzas:

1. Peach & Ricotta Pizza with Arugula
2. BBQ Chicken Pizza
3. Deep Dish Pizza
4. Chicken & Pesto Pizza

PHOTOS BELOW:

This slideshow requires JavaScript.

T.W.O. will be featuring the Peach & Ricotta Pizza with Arugula

IMG_4187

Ingredients:

1 – pizza dough (T.W.O. suggests using SF’s Molinari’s pizza dough or Whole Food’s brand)
1 – yellow peach, ripe
1 – cup ricotta cheese
2 – tablespoons honey
½ – cup balsamic vinegar
1- tablespoon olive oil
¼ – cup lemon juice
8-10- fresh basil leaves
1 ½- cups arugula
¼ – cup cornmeal
Flour
Pizza Stone

The key to having a perfectly rolled out pizza is to make sure the dough is at room temperature.  Roll out the dough on a floured surface that is lightly sprinkled with cornmeal.  Once rolled out evenly in a circular shape, place the dough on a pizza stone.  T.W.O. decided to bake their pizza on a stone so that the crust would be thinner and the peaches would not be buried inside the dough.

IMG_4188

In a separate bowl, mix the arugula, olive oil, ¼ cup balsamic vinegar and lemon juice.  Place aside for later.

Now it’s ricotta time! First, add the honey to the ricotta and mix well.  Spread the ricotta/ honey mixture evenly on the dough. Make sure your spread it all the way to the edges. Thinly slice the peaches and remove the stems from the basil.  Next, place the peaches and basil on the ricotta.  Once the pizza is “dressed,” start the BBQ.  It is important to make sure the BBQ is pre-heated so that it cooks at the set temperature.  (The temperature should be around 414° – 450° depending on your BBQ)

IMG_4193

BBQ the pizza for about 15 minutes, depending on how you like your crust.  T.W.O. highly suggests that you take your glass of wine out to the BBQ and watch the pizza, so you achieve the perfect crust and not a charbroiled crisp!

Once the pizza is done, drizzle ¼ cup of the remaining balsamic vinegar on the peach, ricotta and basil topping.  To finish, add the arugula salad to the top of the pizza.  Now you are ready to serve! Bon Appetit!

IMG_4199

Wine Pairing Suggestions: Kaz, Winemakers Red Blend (of course, signed by the winemaker himself!)

IMG_4191

T.W.O. signature

Introducing T.W.O

…..And T.W.O. is launched!!!! After more than 20 years of keeping our recipes, DIY projects, travels and style behind closed doors we decided to share them with the world. T.W.O is excited about this new adventure and hopes that you will enjoy all the posts as much as T.W.O had in creating them!

Now sit back, relax and enjoy T.W.O!

T.W.O. signature

photo