The Traveling T.W.O. Journal

image

Travel journals have been around since the beginning of time. The pioneers kept journals while traveling to the West to document their hardships, sightings and experiences to the new unexplored land.  Many of these journals have been used to learn more about history and many were lost in the rough, leaving unanswered questions.  Today, T.W.O. has adapted the same concept with their travels around the world.

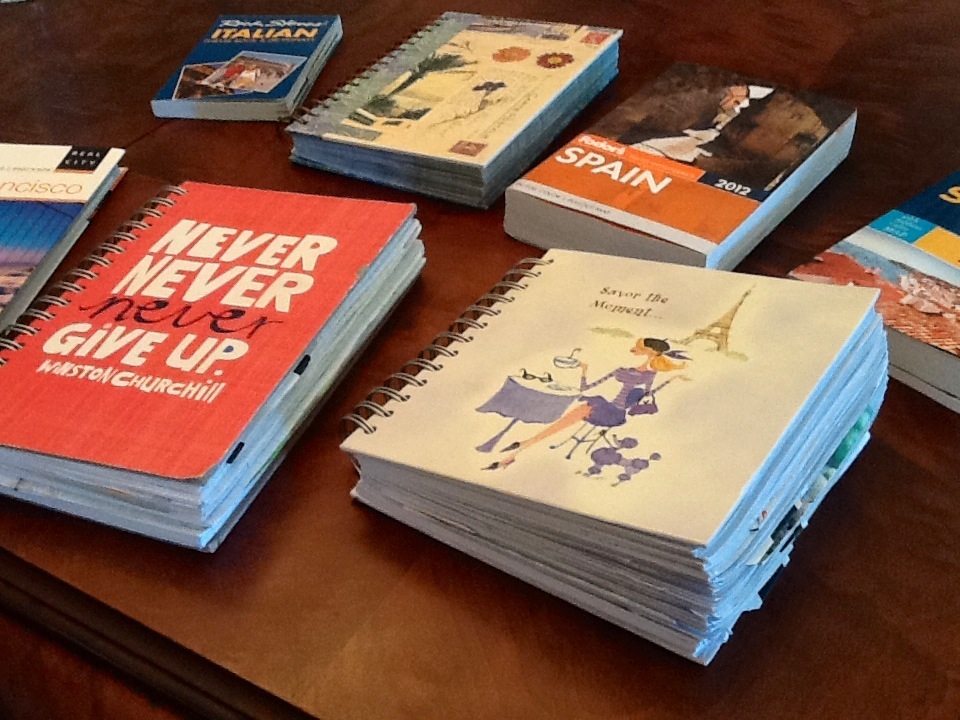
Before every big trip, T.W.O. buys a journal to document their memories and capture their favorite quotes and experiences. The journal selection process is important; you just can’t select a book with paper in it. Below are some requirements that are needed:

– Hard cover
– Memorable quote or picture on the front, depicting the trip
– Wire ring binding
– 70+ pages

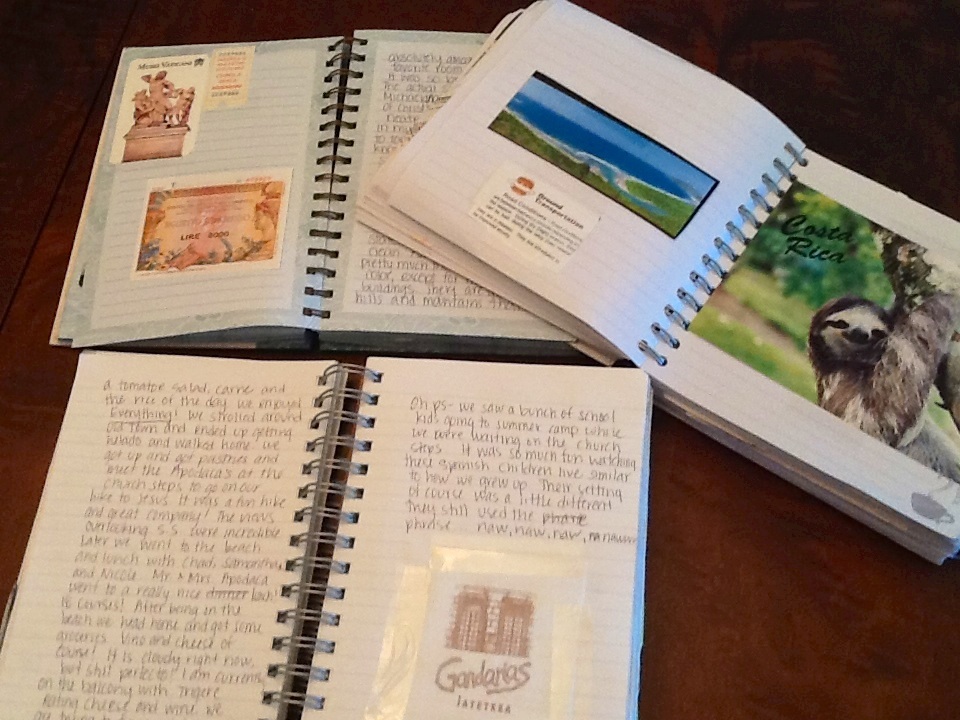
The main idea of the travel journal is to write about each day’s activities so that you can remember everything years later. Hotel and restaurant names, shopping stores and city neighborhoods are all noted in the book.

image

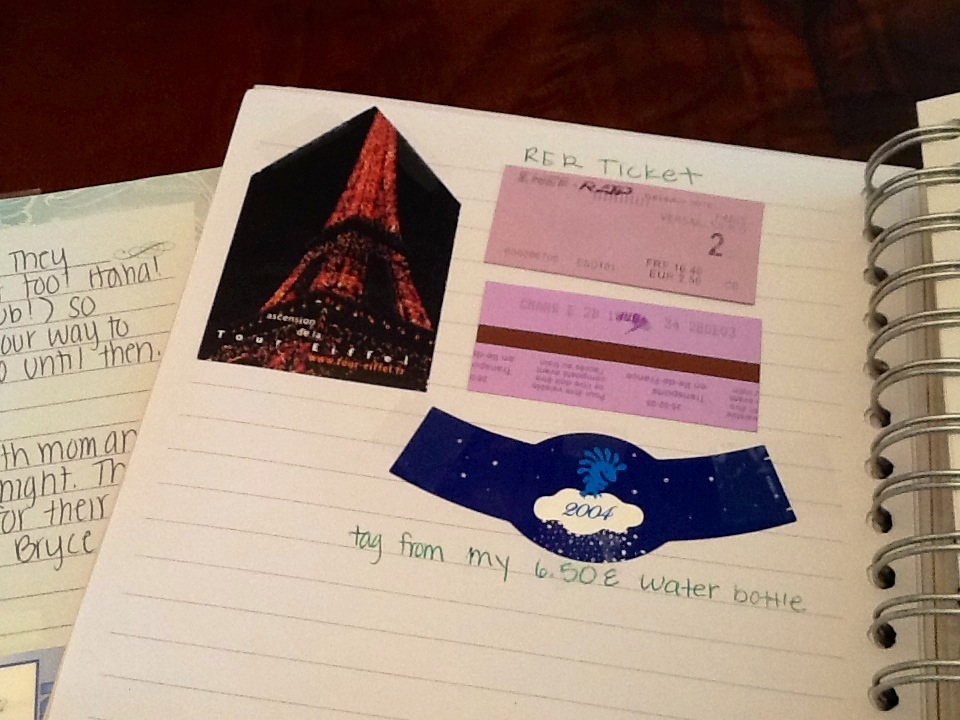
T.W.O. uses the travel journal to suggest places to friends and family traveling to the same destination.  The most important part of the book is the “scrapbook” section, which has restaurant business cards, post cards, wine bottle labels, maps and anything else that comes across the way during T.W.O.’s travels.  (There is even a smudge of chocolate from a croissant T.W.O. had in Paris in the travel journal!) Scotch tape is important to bring along so you can tape the items into the book that same day.

image image image

At the end of the trip, T.W.O. recaps their favorite memories and quotes.  T.W.O. finds it important to document these experiences as soon as you can because as time goes own, details are forgotten.  And just like the pioneers, these journals will be passed to future generations.  From wagons, to cars, to trains to planes, we will see what the next century brings!

image

image

Happy Travels!!!!T.W.O. signature

San Francisco’s Off the Grid Presidio Picnic

Every Sunday, dozens of gourmet food trucks, bakeries, and fresh produce stands gather in San Francisco’s Presidio for one of the largest public picnics T.W.O. has ever seen. There is live music, vendors walking around with wagons selling Bloody Mary kits, wine, beer and champagne and the best free entertainment-people watching! T.W.O. brought along a picnic basket, blanket and of course, a bottle of Rosé for a lovely afternoon sitting in the sun, while enjoying great company with family and 300 of their closest friends! Below are some photos of T.W.O.’s Presidio Picnic adventure!

(Click the mosaic to see a slideshow of the photos)

T.W.O. signature

Zucchini Noodles

image

When in Rome, you eat pasta.  When cooking with T.W.O, you make zucchini noodles!  This is such an easy dish that can be transformed into a snack, a summer salad or an entrée.  The most important part of this dish is the peeler….a julienne peeler! You can find it at SUR LA TABLE or even TARGET.

Zucchini Noodles

Ingredients:

–  4 zucchini
– 1 clove garlic, diced
– 1 lemon; juiced
– Olive oil
– Krazy Salt

After washing the vegetables, place the zucchini flat on a cutting board.  Hold with one hand the top of the zucchini that is furthest from you, while holding the zucchini peeler in the other hand. The key to creating “noodles” is to peel the zucchini using only one stroke.  From top to bottom, peel the zucchini in a straight line.  This will form your perfect “noodles”.  Continue until the zucchini is all peeled.

IMG_4169

Place all the “noodles” in a bowl and add lemon juice, diced garlic, olive oil and Crazy Salt to your desire.  Let the noodles marinate for about 10 minutes.

image

Once the “noodles” have marinated, squeeze the excess juice out of the “noodles” so your meal isn’t soggy. Now comes the question….What can I do with these “noodles?”  T.W.O decided to make a summer salad.  To make this, you will need the following ingredients:

Summer Salad

– Zucchini noodles
-8 to 10 mini balls of fresh mozzarella
-1 cup cherry tomatoes, halved
– 4 Tablespoons fresh basil
-Balsamic vinegar to drizzle

Add the mozzarella, tomatoes, and basil to the noodles. Finish the dish by drizzling the noodle mixture with balsamic vinegar. Now it’s time to enjoy this tasty, light summer salad poolside!

image

IMG_4174

T.W.O. signature

Friday Night Pizza

IMG_4184

Friday Night Pizza has been a tradition in T.W.O.’s family for decades.  It’s one night of the week that everyone partakes in the preparation of dinner by creating his or her own pizza.  It’s all about the dough, the ingredients and the cooking style that makes every week a unique experiment.  We aren’t afraid of trying new recipes and of course making it our own….T.W.O.!

T.W.O.’s first featured Friday Night Pizza was taken place in San Francisco with family.  Around 6pm, everyone was in the kitchen chopping, shredding and dicing their favorite ingredients.

The chefs made a total of 4 pizzas:

1. Peach & Ricotta Pizza with Arugula
2. BBQ Chicken Pizza
3. Deep Dish Pizza
4. Chicken & Pesto Pizza

PHOTOS BELOW:

This slideshow requires JavaScript.

T.W.O. will be featuring the Peach & Ricotta Pizza with Arugula

IMG_4187

Ingredients:

1 – pizza dough (T.W.O. suggests using SF’s Molinari’s pizza dough or Whole Food’s brand)
1 – yellow peach, ripe
1 – cup ricotta cheese
2 – tablespoons honey
½ – cup balsamic vinegar
1- tablespoon olive oil
¼ – cup lemon juice
8-10- fresh basil leaves
1 ½- cups arugula
¼ – cup cornmeal
Flour
Pizza Stone

The key to having a perfectly rolled out pizza is to make sure the dough is at room temperature.  Roll out the dough on a floured surface that is lightly sprinkled with cornmeal.  Once rolled out evenly in a circular shape, place the dough on a pizza stone.  T.W.O. decided to bake their pizza on a stone so that the crust would be thinner and the peaches would not be buried inside the dough.

IMG_4188

In a separate bowl, mix the arugula, olive oil, ¼ cup balsamic vinegar and lemon juice.  Place aside for later.

Now it’s ricotta time! First, add the honey to the ricotta and mix well.  Spread the ricotta/ honey mixture evenly on the dough. Make sure your spread it all the way to the edges. Thinly slice the peaches and remove the stems from the basil.  Next, place the peaches and basil on the ricotta.  Once the pizza is “dressed,” start the BBQ.  It is important to make sure the BBQ is pre-heated so that it cooks at the set temperature.  (The temperature should be around 414° – 450° depending on your BBQ)

IMG_4193

BBQ the pizza for about 15 minutes, depending on how you like your crust.  T.W.O. highly suggests that you take your glass of wine out to the BBQ and watch the pizza, so you achieve the perfect crust and not a charbroiled crisp!

Once the pizza is done, drizzle ¼ cup of the remaining balsamic vinegar on the peach, ricotta and basil topping.  To finish, add the arugula salad to the top of the pizza.  Now you are ready to serve! Bon Appetit!

IMG_4199

Wine Pairing Suggestions: Kaz, Winemakers Red Blend (of course, signed by the winemaker himself!)

IMG_4191

T.W.O. signature

Toasted Quinoa

quinoa

Quinoa. A superfood, high in protein and dietary fiber. By now, everyone has either heard about it, cooked with it, or both! It is a great addition to any breakfast, lunch or dinner! But most of the recipes out there are just so similar- so soft!! So T.W.O. has decided to change up the texture of this superfood and “crunch it up!” Toasted Quinoa! It is a great addition to any dish you would like to add some crunch and protein without the added fat or gluten.

Toasted Quinoa

Ingredients:

 -2 cups of water
-1 cup of Quinoa, rinsed
Crazy Salt
-Garlic powder
-Cayenne pepper powder
-1 tablespoon of olive oil

IMG_1778

Bring water to a boil in a sauce pan. Once boiling, pour quinoa, crazy salt, garlic powder and cayenne pepper into water. (Please note that seasonings can be added to your liking!) Bring water to a boil once again, then reduce to low-medium temperature and cover pan. Allow quinoa to cook for about 10-12 minutes. When complete, use a fork to “fluff” quinoa and transfer to a cookie sheet to cool down. Once quinoa is cooled, heat up a sauté pan with olive oil. When pan is hot, place quinoa in pan and reduce heat to medium. Make sure to mix the quinoa often so it doesn’t burn. Toast the quinoa for about 6 minutes or until golden brown. Wah lah- it’s done! Toasted quinoa can be eaten hot or cold and can be stored in an air-tight container for about 5 days. Just make sure that the quinoa is cool before placing the lid on the container- you don’t want it to get soggy!

IMG_1788

IMG_1792

T.W.O. decided to add the warm, toasted quinoa to a salad. It added not only crunch, but protein to this gastronomical meal.

IMG_1793

IMG_1794

T.W.O. has also added the toasted quinoa to Greek yogurt and fruit. It was just like granola, but better! If you are planning on using it with yogurt, T.W.O. would suggest eliminating the seasonings above (salt, garlic and cayenne) and add cinnamon or nutmeg!

Enjoy “crunching” it up!

T.W.O. signature

HOT OFF THE PRESS

T.W.O. is featured in the Huntington Beach

WAVE!

 “Gemelas en España!”

gemelasenespana

T.W.O. signature

The Silk Headband

Many of our favorite designers featured silk, twisted headbands in their summer line this year. T.W.O. was in search of the perfect one for their trip to España.  After a couple shopping trips, T.W.O. decided that there wasn’t a print out there that was worth the money, so T.W.O.’s mom stepped in and offered her sewing services.  Technology these days helped T.W.O. select the material in a matter of minutes since they were unable to accompany their mom to the fabric store. Thank you Apple!

photo 1photo 2photo 3photo 4

Great job T.W.O Mom!!!!

We received the headbands the weekend before our trip to España and were able to enjoy them with the entire family!!!

kaytrigmom

IMG_3568

IMG_3570

Here are some photos of T.W.O. enjoying our headbands in San Sebastian, San Diego, San Francisco and Sausalito:

IMG_3726

IMG_1763 IMG_1766 IMG_4231

IMG_4122

Peach + Boysenberry Pie

image

The ultimate summer dessert – Peach Pie!!!!  It’s a fresh, light and sweet ending to a perfect barbecued meal.  Grab your rolling pins (or wine bottles!) and let’s start baking!

Ingredients:

Flaky Crust:
2 cups flour
¾ cup shortening (T.W.O. uses butter flavor)
2-3 Tablespoons sugar
5-6 Tablespoons cold water

Pie Filling:
5-6 yellow peaches
1 cup boysenberries
1 Tablespoon nutmeg
1 Tablespoon cinnamon
1 ½ Tablespoons cornstarch
1/4 cup sugar

IMG_4132

IMG_4133

Preheat oven to 350°.

In a bowl mix the flour, shortening, sugar and cold water.   T.W.O. uses a pastry blender to mix the dough together.  Form the dough in a ball and set aside.

IMG_4134

Now for the filling! Make sure the peaches are washed and dried well.  You don’t want extra protein in your pie! There are two ways you can remove the skin from the peaches…either blanch them in water or peel the skins off or you can take a carving knife and remove the skin like a peeler.  T.W.O. removed the skin using a small knife.

IMG_4136

Halve the peaches and remove the pit.  Cut the peaches in thin slices and place in a bowl.  Once all the peaches are sliced, add the nutmeg, cinnamon, sugar and boysenberries.  Mix well, but not too much since you don’t want the fruit to break.

Let’s roll that dough now! Make sure your surface is floured well so that the dough doesn’t stick to your countertop or mat. Take a “hand-full” of dough and put aside.  (This will be for the lattice top) Using your rolling pin/ wine bottle, roll the remaining dough out evenly in a circular shape.  With the assistance of a spatula, move the rolled out dough into the oiled or “PAM’ed” pie dish.  Pinch the crust tops with your fingers to make a stylish pattern.  Once the dough is set, sprinkle the bottom of the pie with cornstarch. This will absorb the juices from the peaches to prevent a soggy crust.

Take your peach filling and place it in the pie dish.  Make sure the ingredients are evenly distributed.

IMG_4138

Almost there! Now it’s time for the lattice.  Roll the remanding dough out thinly with your rolling pin/ wine bottle to form a rectangle.  Take a sharp knife and cut long stripes in the dough.  Use these stripes to create the lattice formation for the topper. Be creative with your placement!

IMG_4140

Place the pie dish on a cookie sheet lined with foil to prevent any excess juice from the pie to drip onto the bottom of the oven. Also, put foil around the pie crush so that it doesn’t burn.  It’s oven time! The pie should take about 45 minutes, but let’s face it, not all ovens are the same, so just keep an eye on it! T.W.O. knows the pie is ready when the juices are bubbling!

IMG_4142

Once the pie is removed from the oven, T.W.O. likes to place it on a wire rack so that the pie can cool down a bit.  Wait 15 minutes, 45 minutes or 4 hours to eat this pie- it’s delicious anytime! T.W.O. suggests adding a scoop of vanilla ice cream to your slice!  Enjoy!!!

IMG_4143

IMG_4146IMG_4148

T.W.O. signature

Fresh Tomato Bun Burger with Avocado

IMG_4108

Love hamburgers? But don’t seem to eat them because of the carb-loaded bun? Well, we have a solution for you. Tomatoes! You will definitely not be missing that bun after you sink your teeth into that sweet, juicy tomato, complemented by that savory beef patty. This recipe is a healthy, gluten free option that works great for your next meal. Or just add a toothpick and serve as an appetizer for your next dinner party. Check out the recipe below:

IMG_4101

Ingredients:
-4 large tomatoes
-1 lb lean ground beef
– 1 teaspoon ground pepper
– 3 Tablespoons sriracha
– 2 Tablespoons Montreal Steak Seasoning
– 1 cup mushrooms, diced
– 1 cup bell pepper, diced
– 2 shallots, diced
– 3 cloves garlic, diced
– 1 avocado
– lettuce
– mustard (spicy, regular or dijon)
– ketchup
– mayo (optional)

In a bowl, mix the beef, ground pepper, sriracha, Montreal Steak Seasoning, mushrooms, bell peppers, shallots and garlic. Make sure all the ingredients are evenly distributed between the meat. Form 5 patties and press them out on parchment paper.

IMG_4103

Now, let’s GRILL! You can grill the burgers on the bbq, but if you don’t have a bbq, try using a stove top grilling pan. Cook the patties to your liking. (Rare, medium rare, medium, medium well, well-done)

IMG_4107

While the burgers are grilling, cut the tomatoes in half and scoop out the seed membrane with a spoon. Set aside. Cut the avocado in thin slices.

IMG_4106

Once the burgers are done, place them on a paper towel to soak up the excess grease. Place the patties on the cut tomatoes and add the avocado, lettuce and your favorite burger condiments. T.W.O put a squeeze of ketchup and spicy Dijon mustard on ours!

IMG_4109

Wine pairing suggestion: Old Vine Zinfandel

** Please note, if the tomato is too big or won’t stay on your plate cut the tops off so it creates a flat surface.

Introducing T.W.O

…..And T.W.O. is launched!!!! After more than 20 years of keeping our recipes, DIY projects, travels and style behind closed doors we decided to share them with the world. T.W.O is excited about this new adventure and hopes that you will enjoy all the posts as much as T.W.O had in creating them!

Now sit back, relax and enjoy T.W.O!

T.W.O. signature

photo