Cheese-Filled Pastry

image

Waking up in the morning and enjoying a cup of coffee along with a fresh piece of pastry is typical of the European lifestyle. T.W.O. would love to take on that same tradition and bring it to the States. Every day is a vacation, right? Well not exactly, but T.W.O. can help out in the pastry department. Learn how to make this scrumptious cheese pastry that will “WOW” a crowd!

Ingredients

For the Dough:
-2 ¼ teaspoons instant yeast
– ¼ cup water, lukewarm
– ½ cup 2% milk, lukewarm
-¼ cup unsalted butter, melted
– ¾ cup granulated sugar
-1 Tablespoon vanilla
– 1 egg
– 3 cups unbleached all-purpose flour

 For the Filling:
-8 ounces cream cheese or Neufchâtel, room temperature
-½ cup granulated sugar
-1 egg
-1 Tablespoon vanilla extract
– 2 teaspoons lemon zest or orange zest
-3 Tablespoons flour
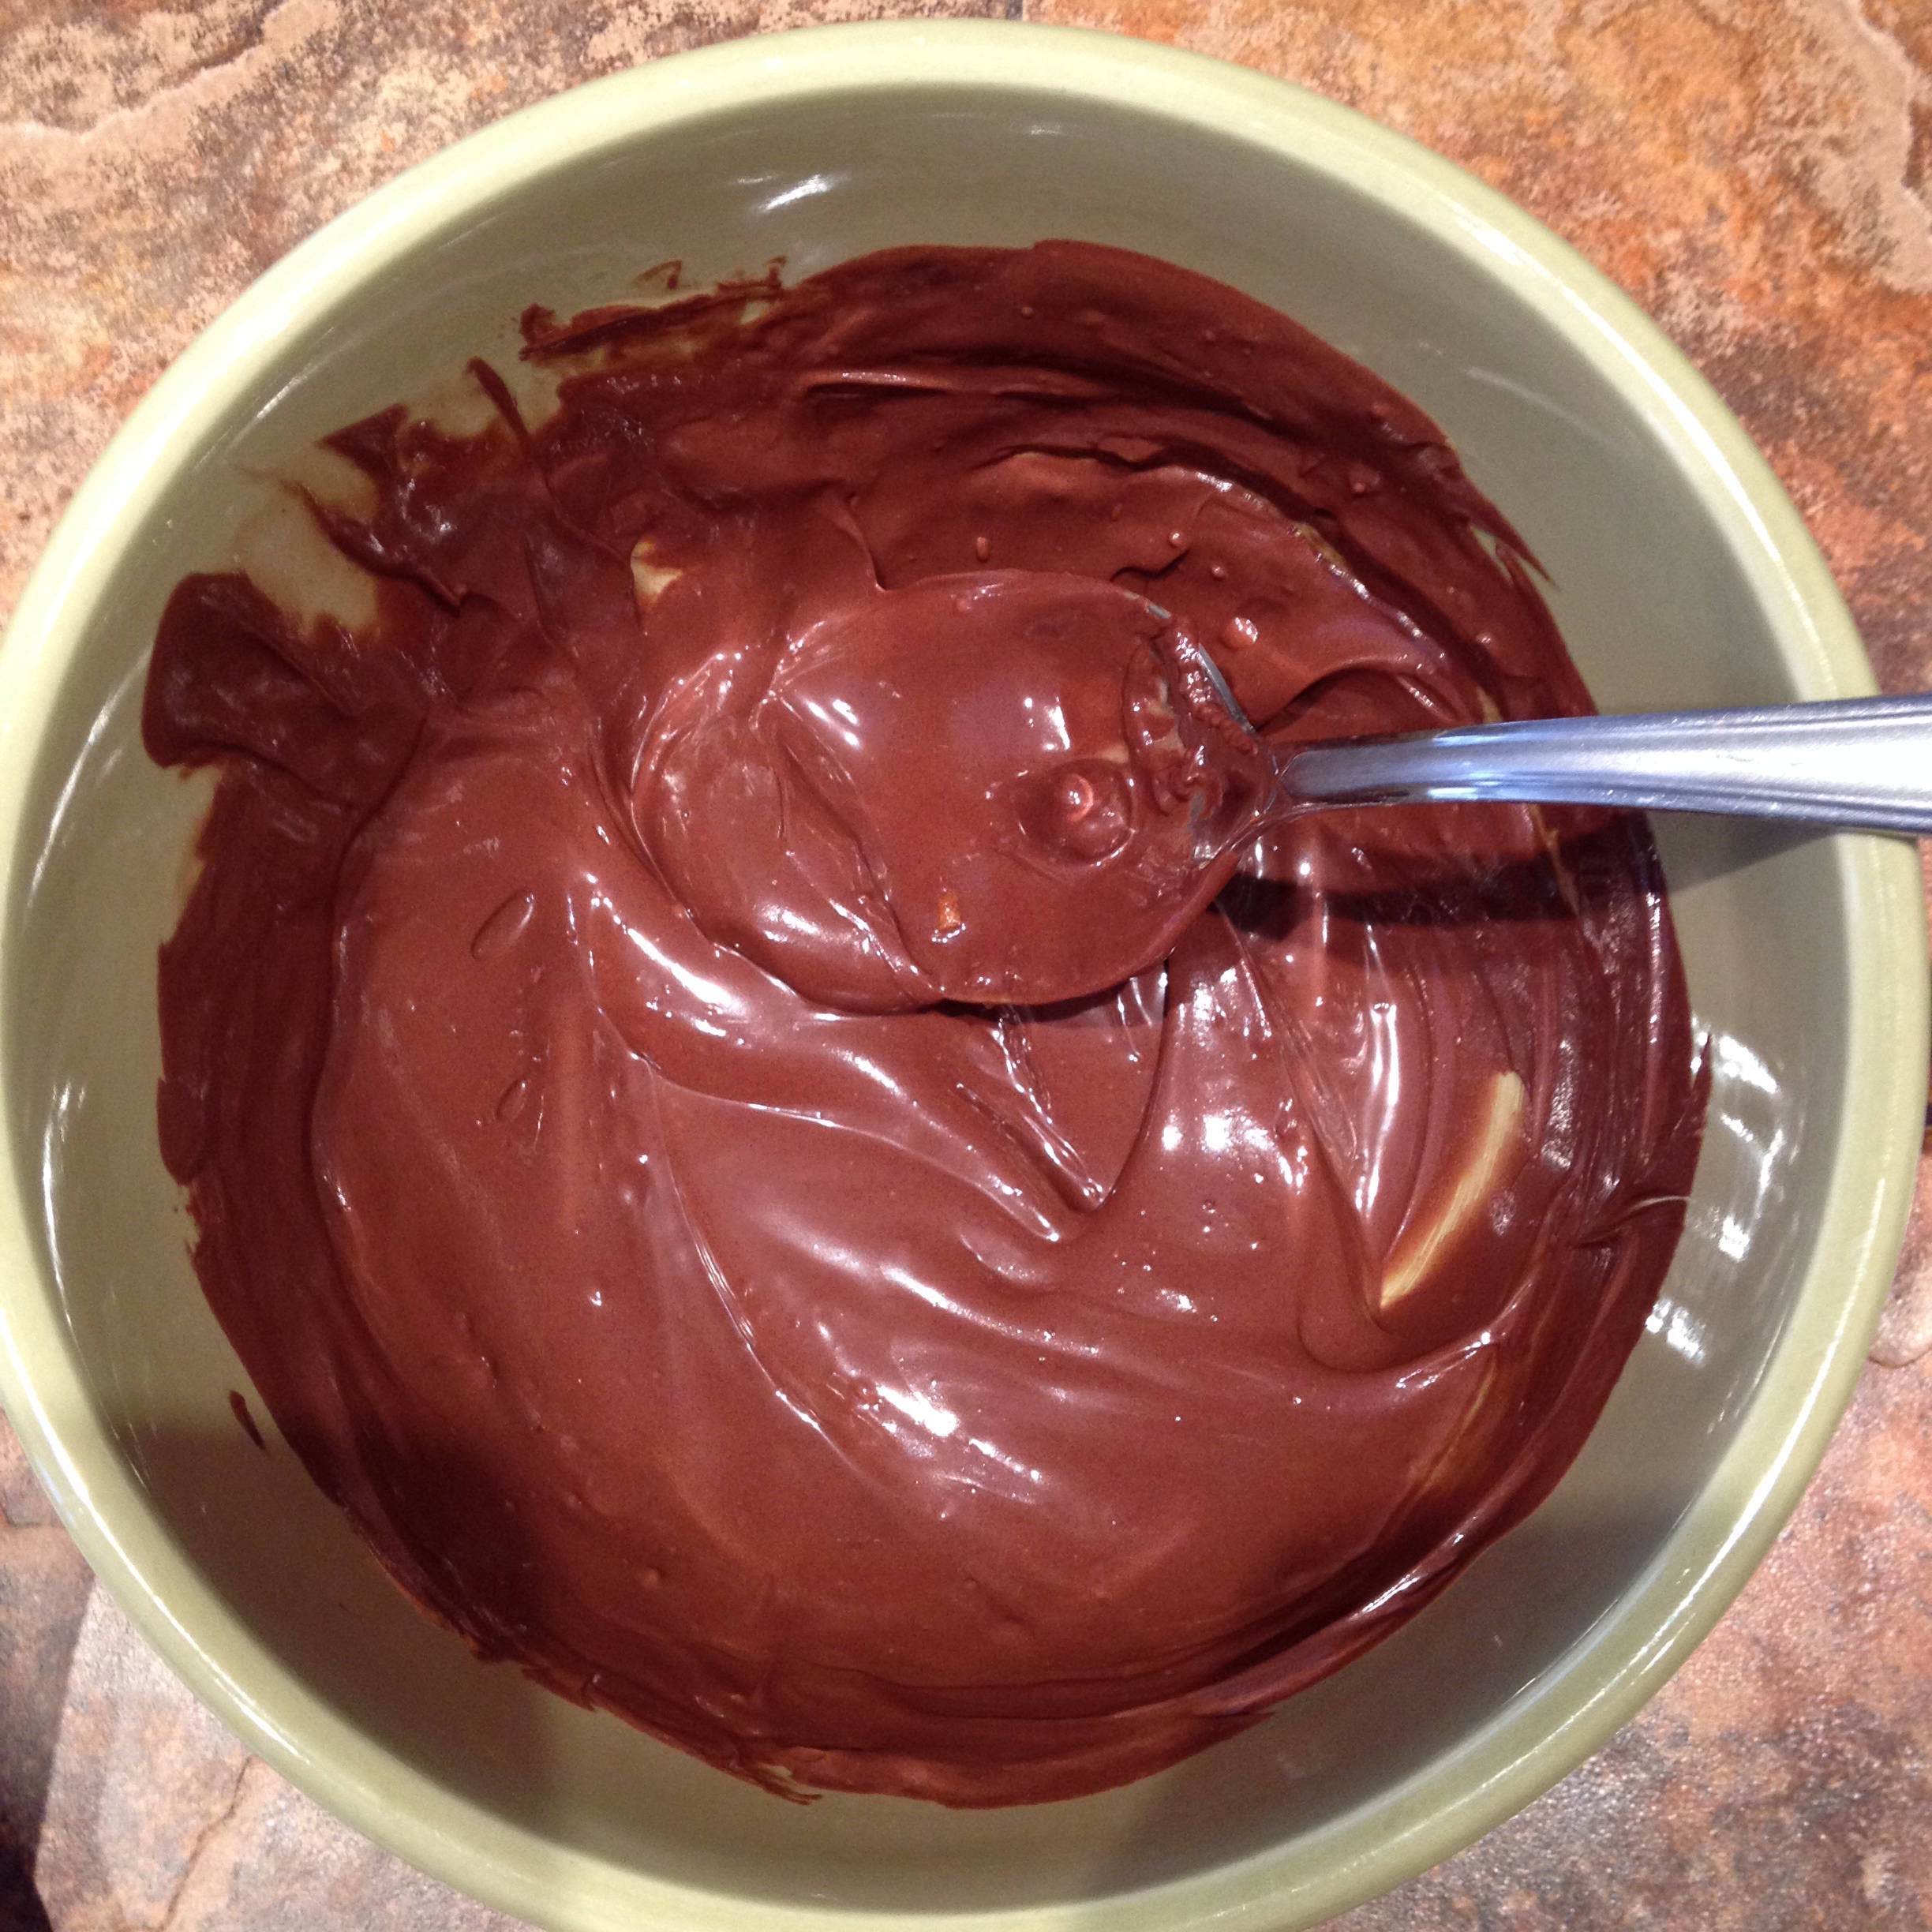
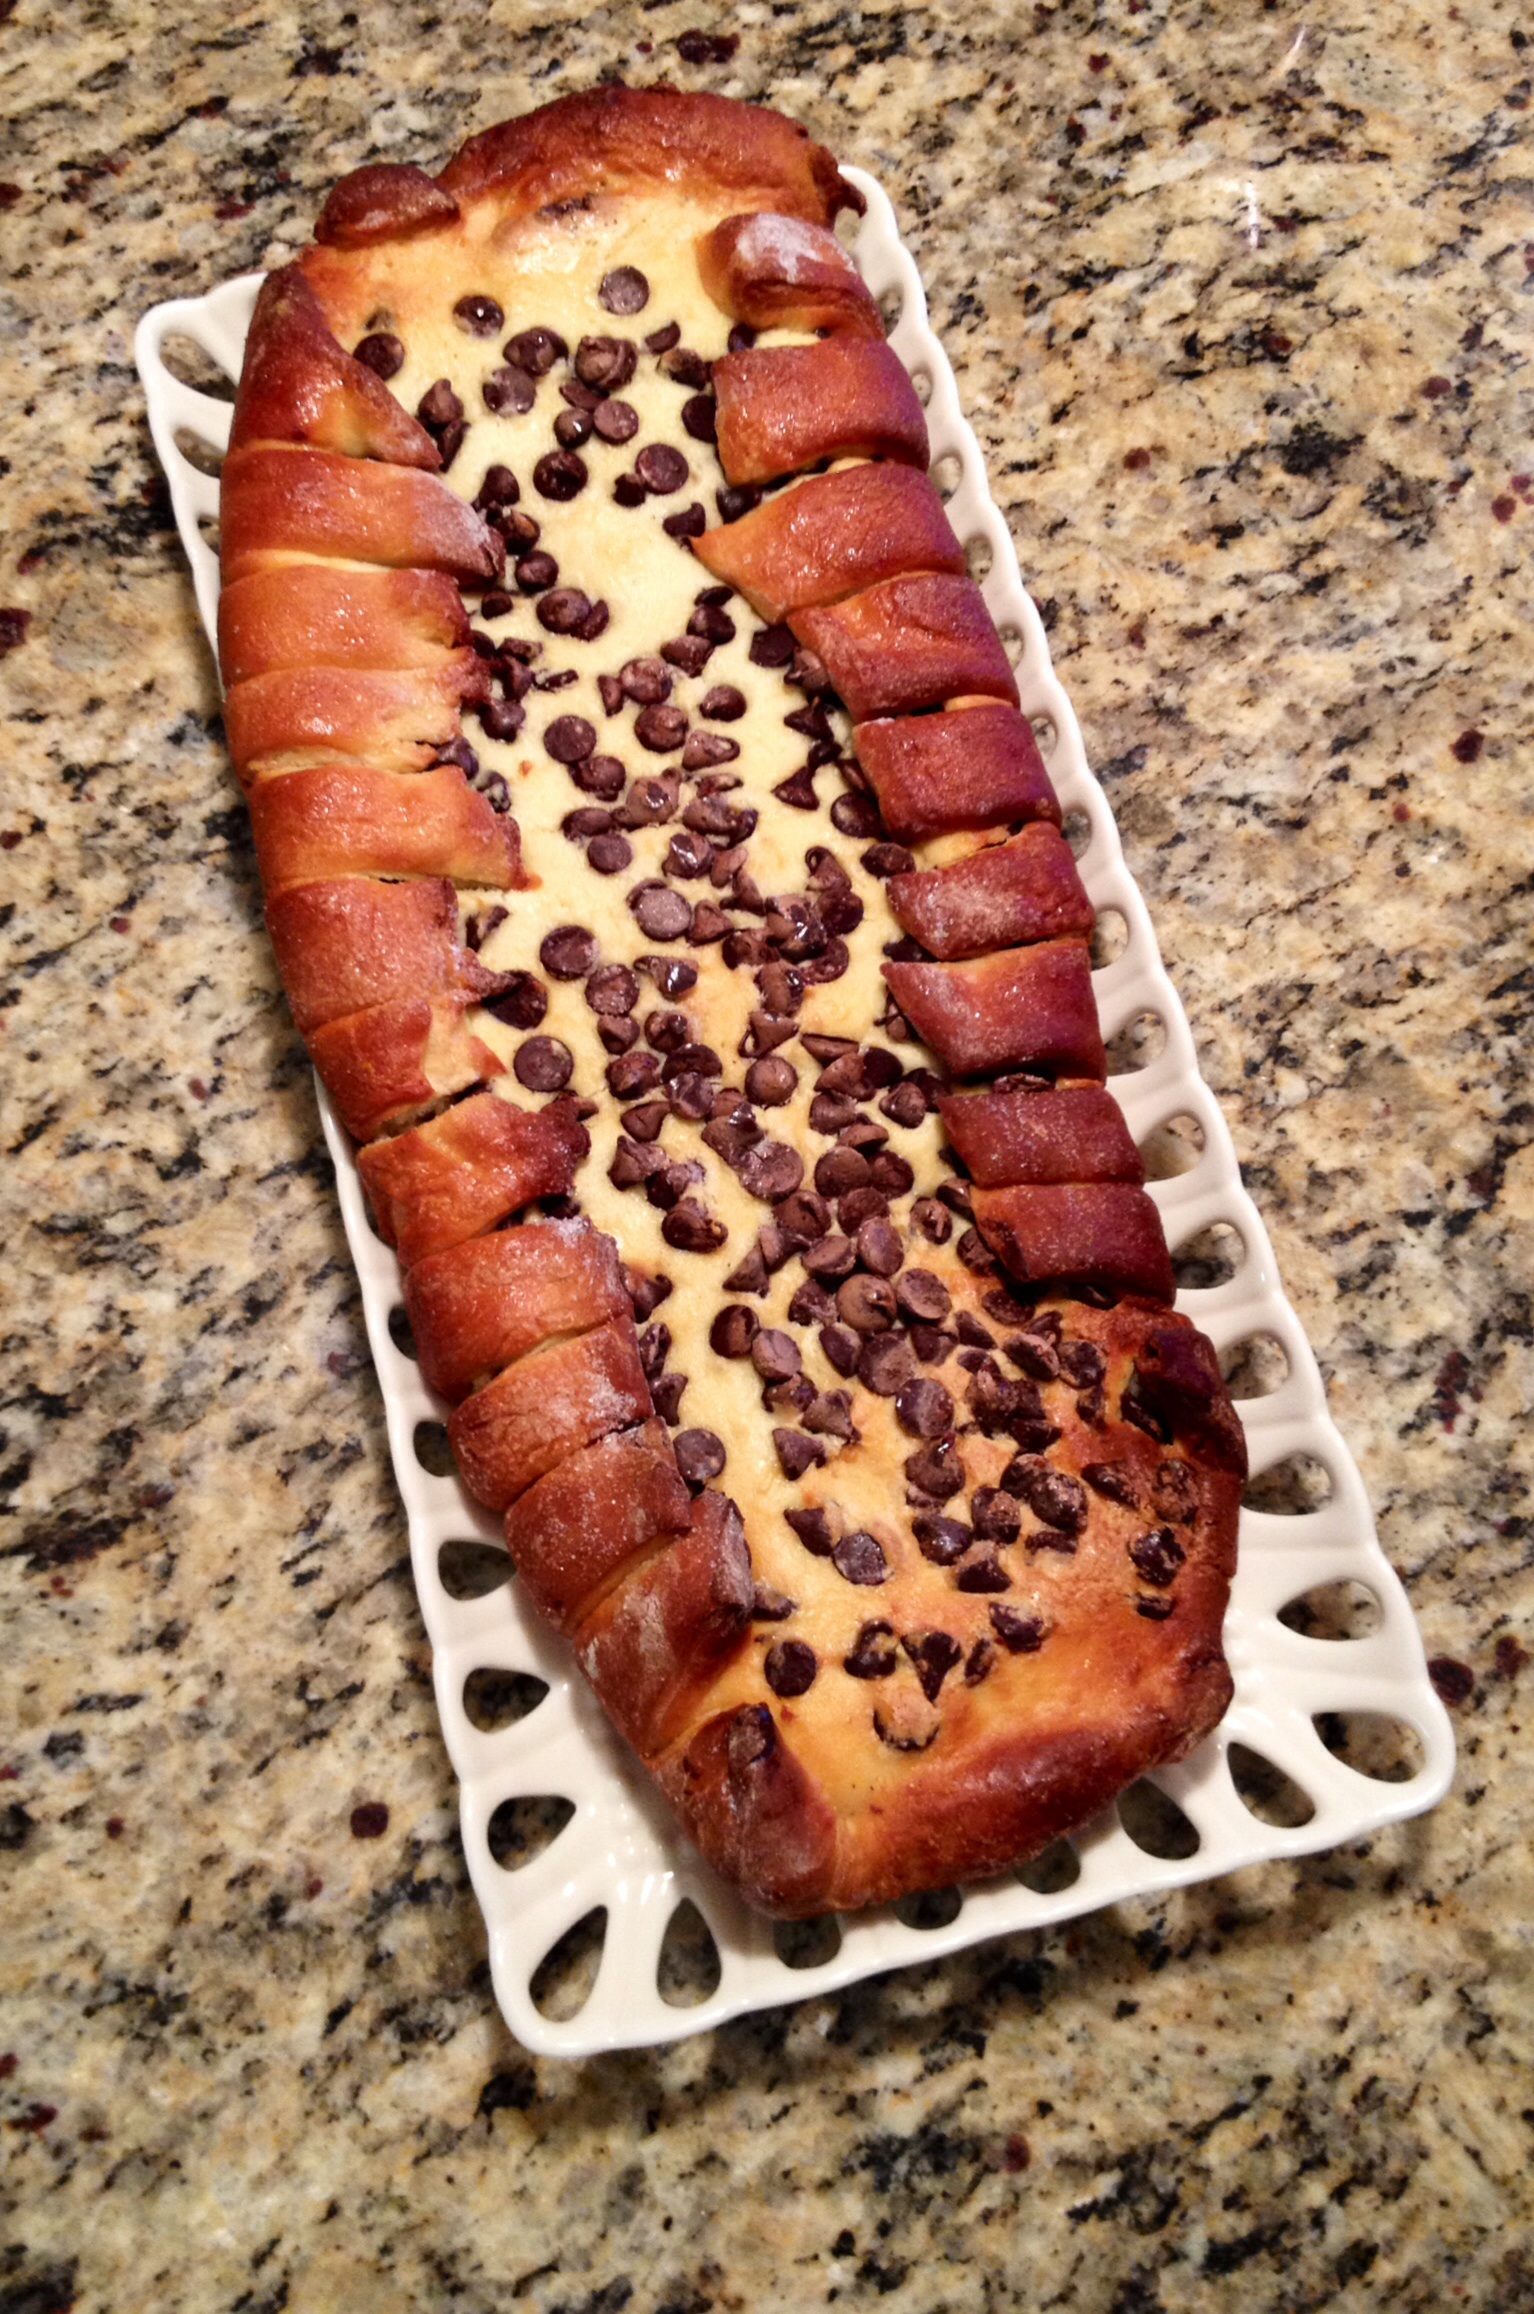
– 1 cup of your favorite fruit jam or chocolate chips*

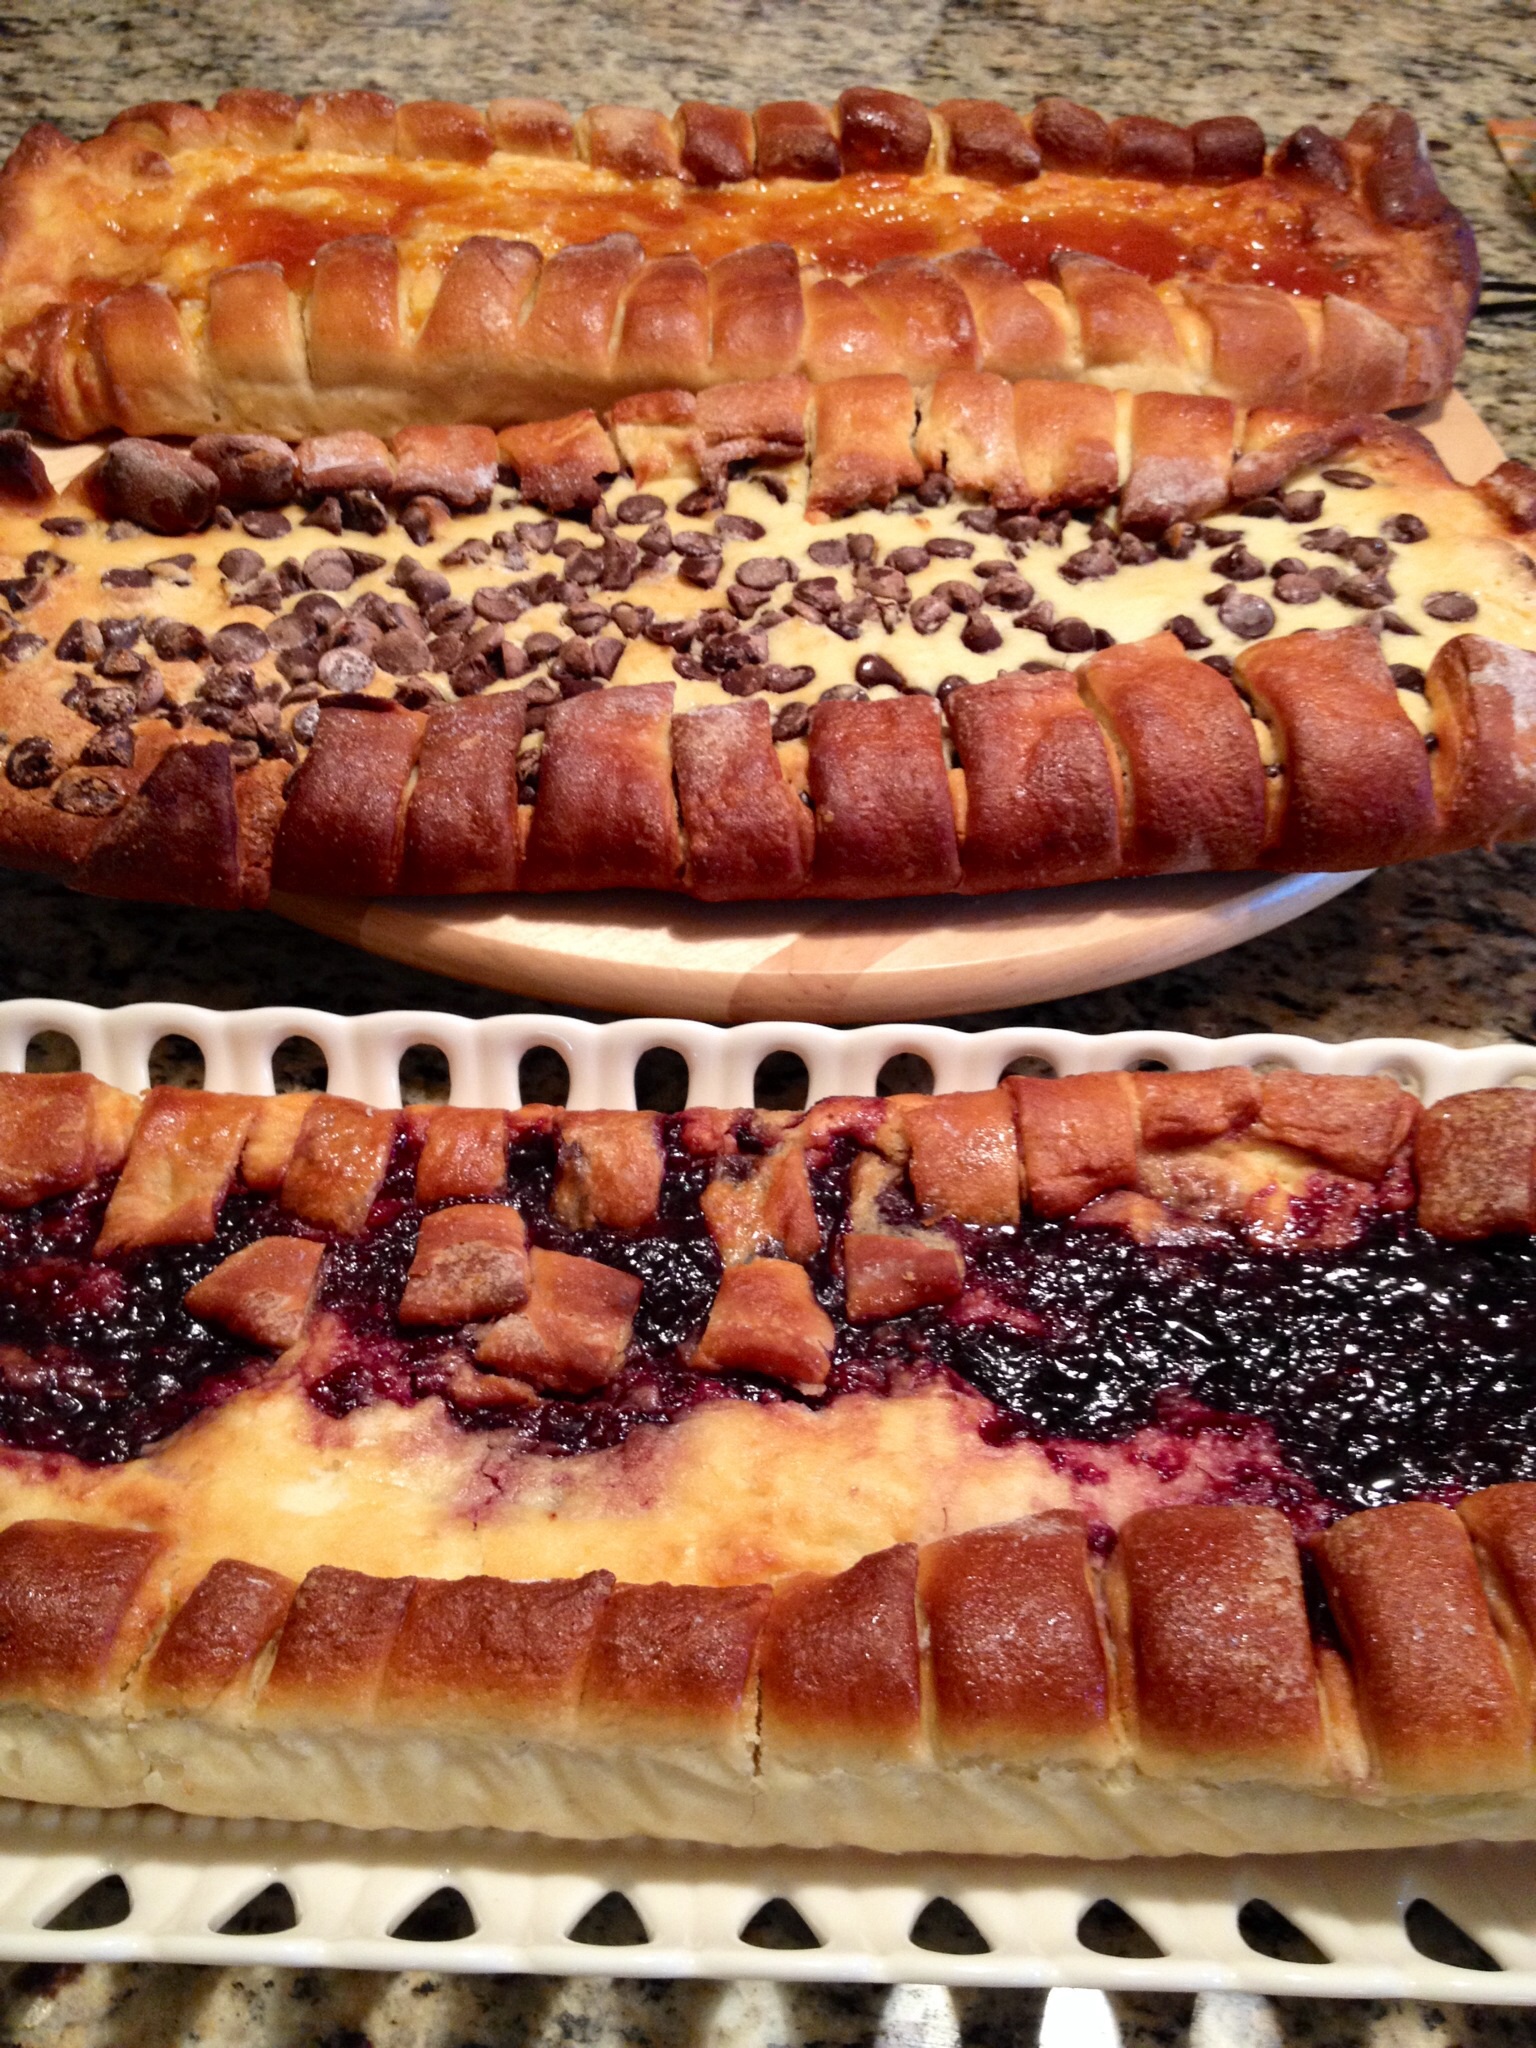
*T.W.O. doubled the recipe and made 3 large braids. They used apricot jam, boysenberry preserves and chocolate chips.

image

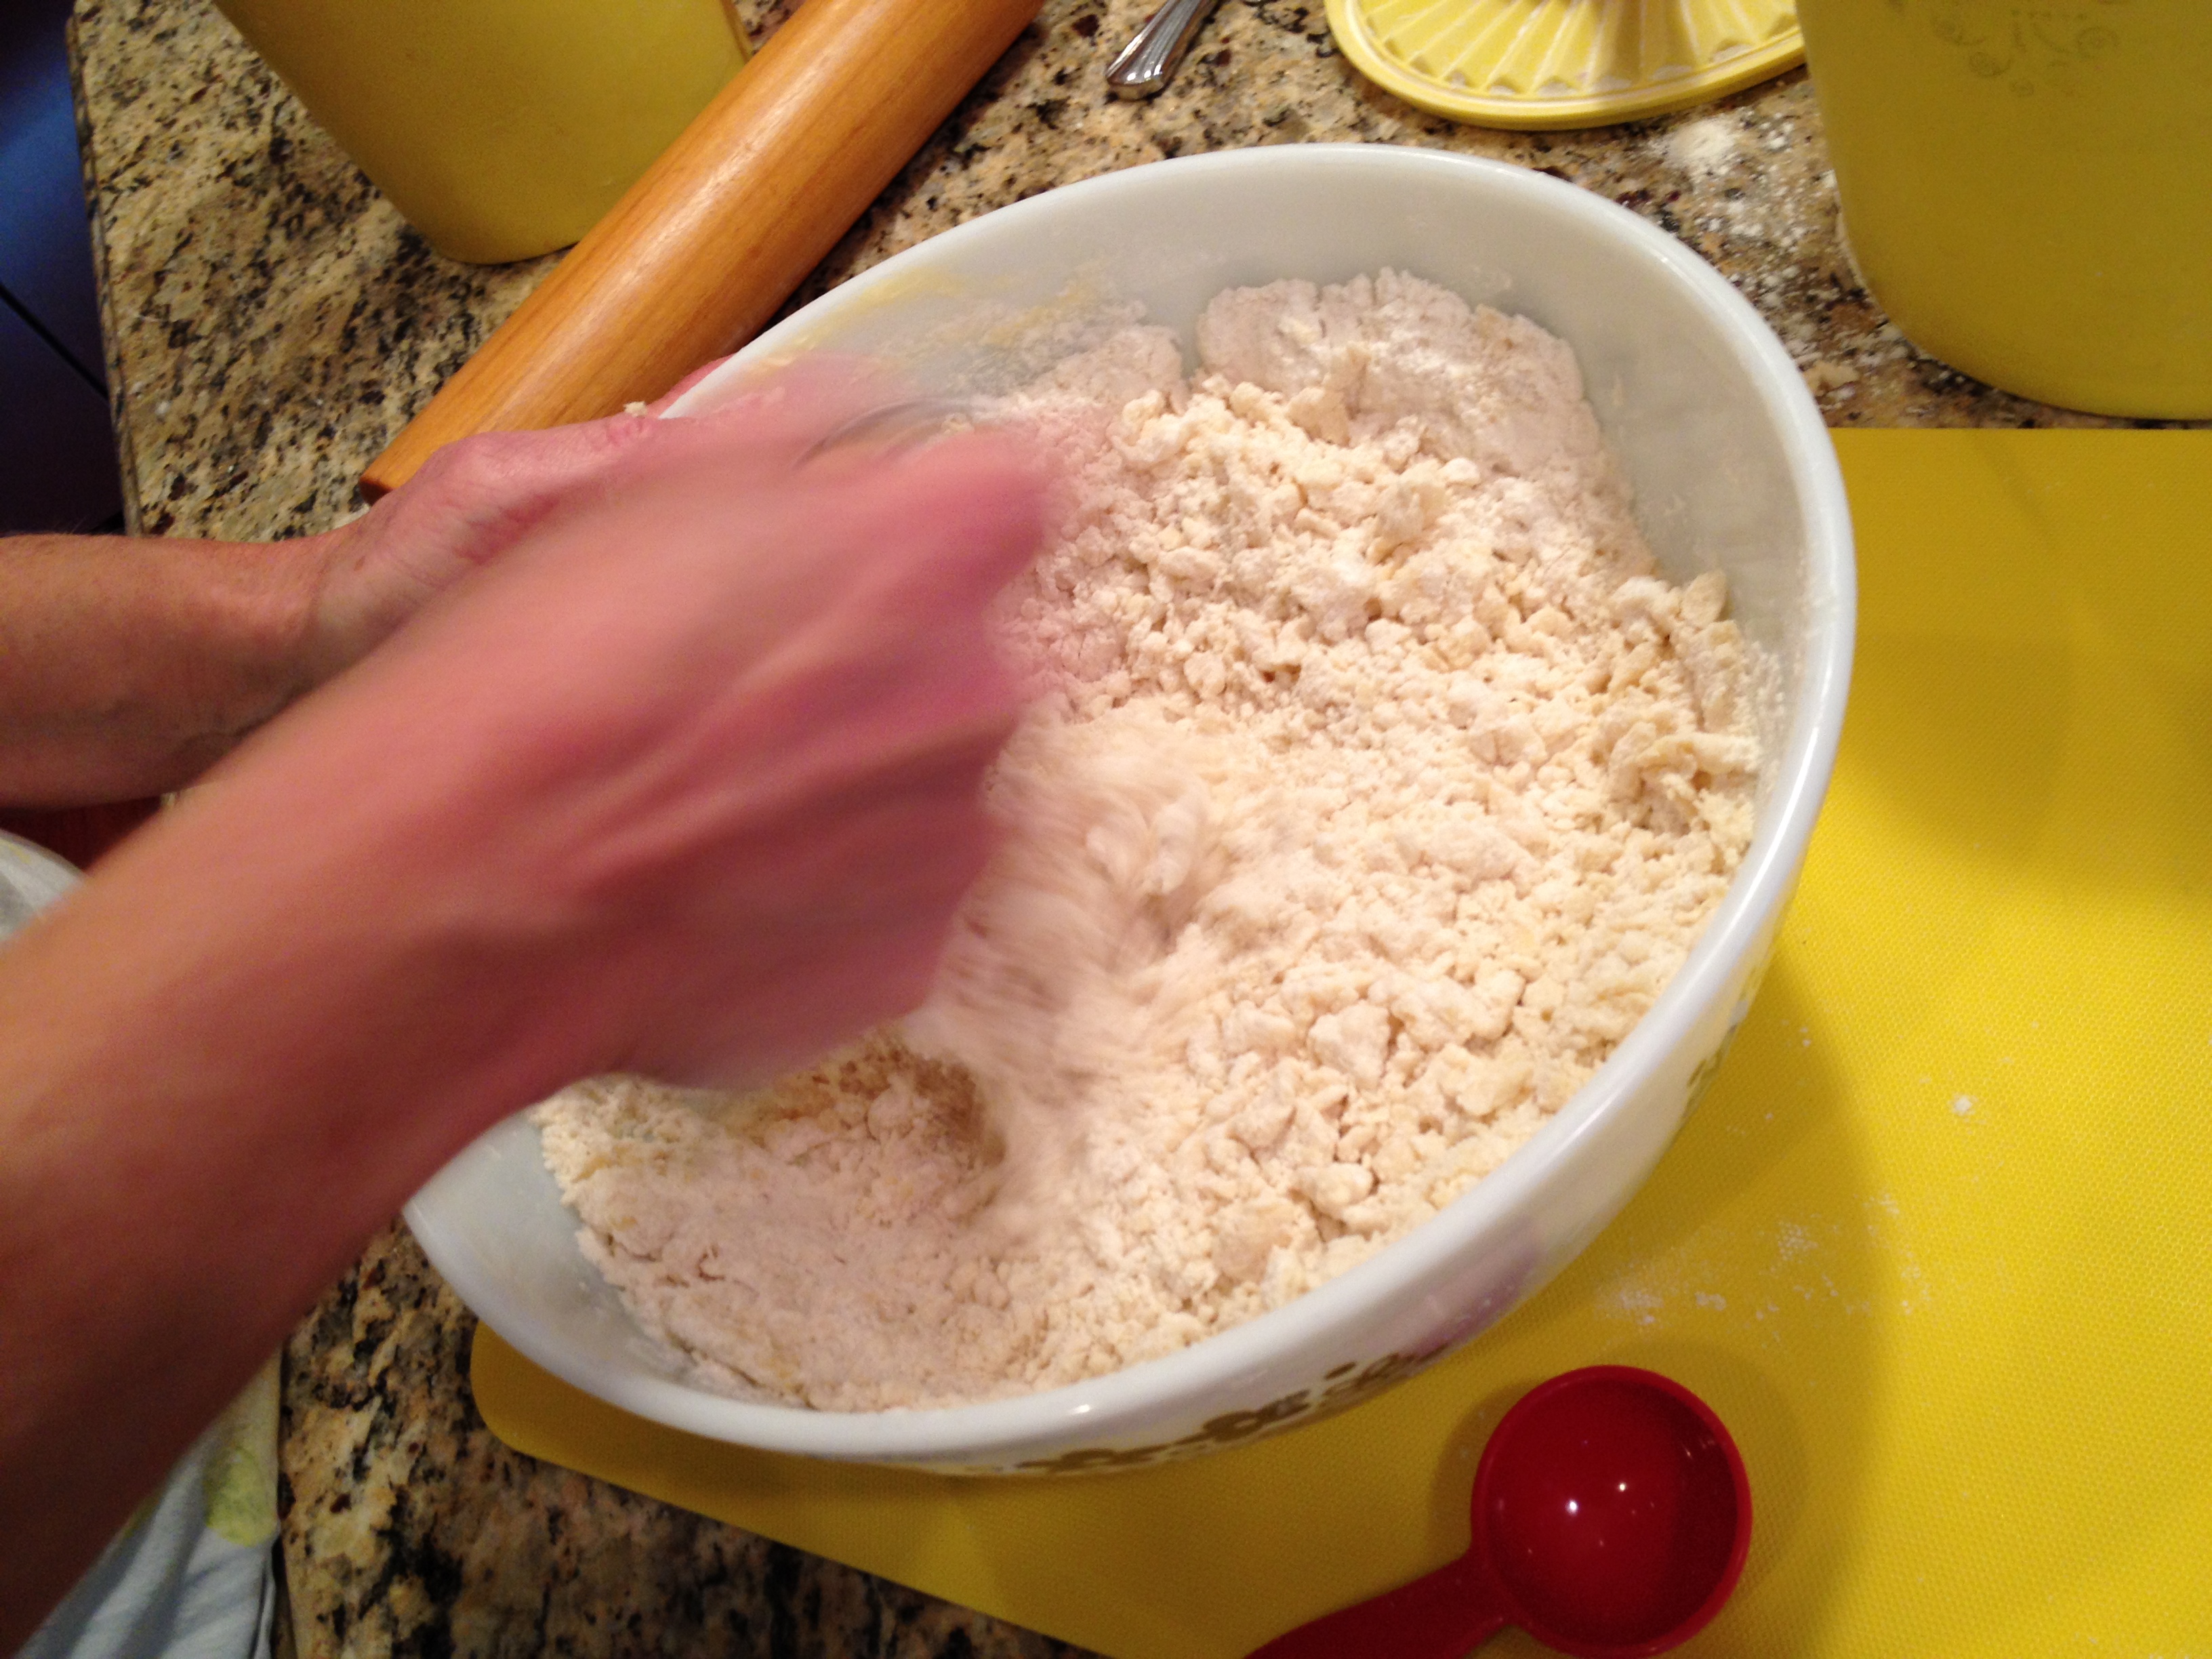
In a small bowl, mix the lukewarm water and the yeast together. Set aside. Mix all the dough ingredients together in a large bowl. (It’s best to use a mixer or a pastry blender) Mix in the water/yeast mixture. The dough should form a soft, smooth ball. Set aside and cover for about 2 hours or until the dough has doubled in size.

image

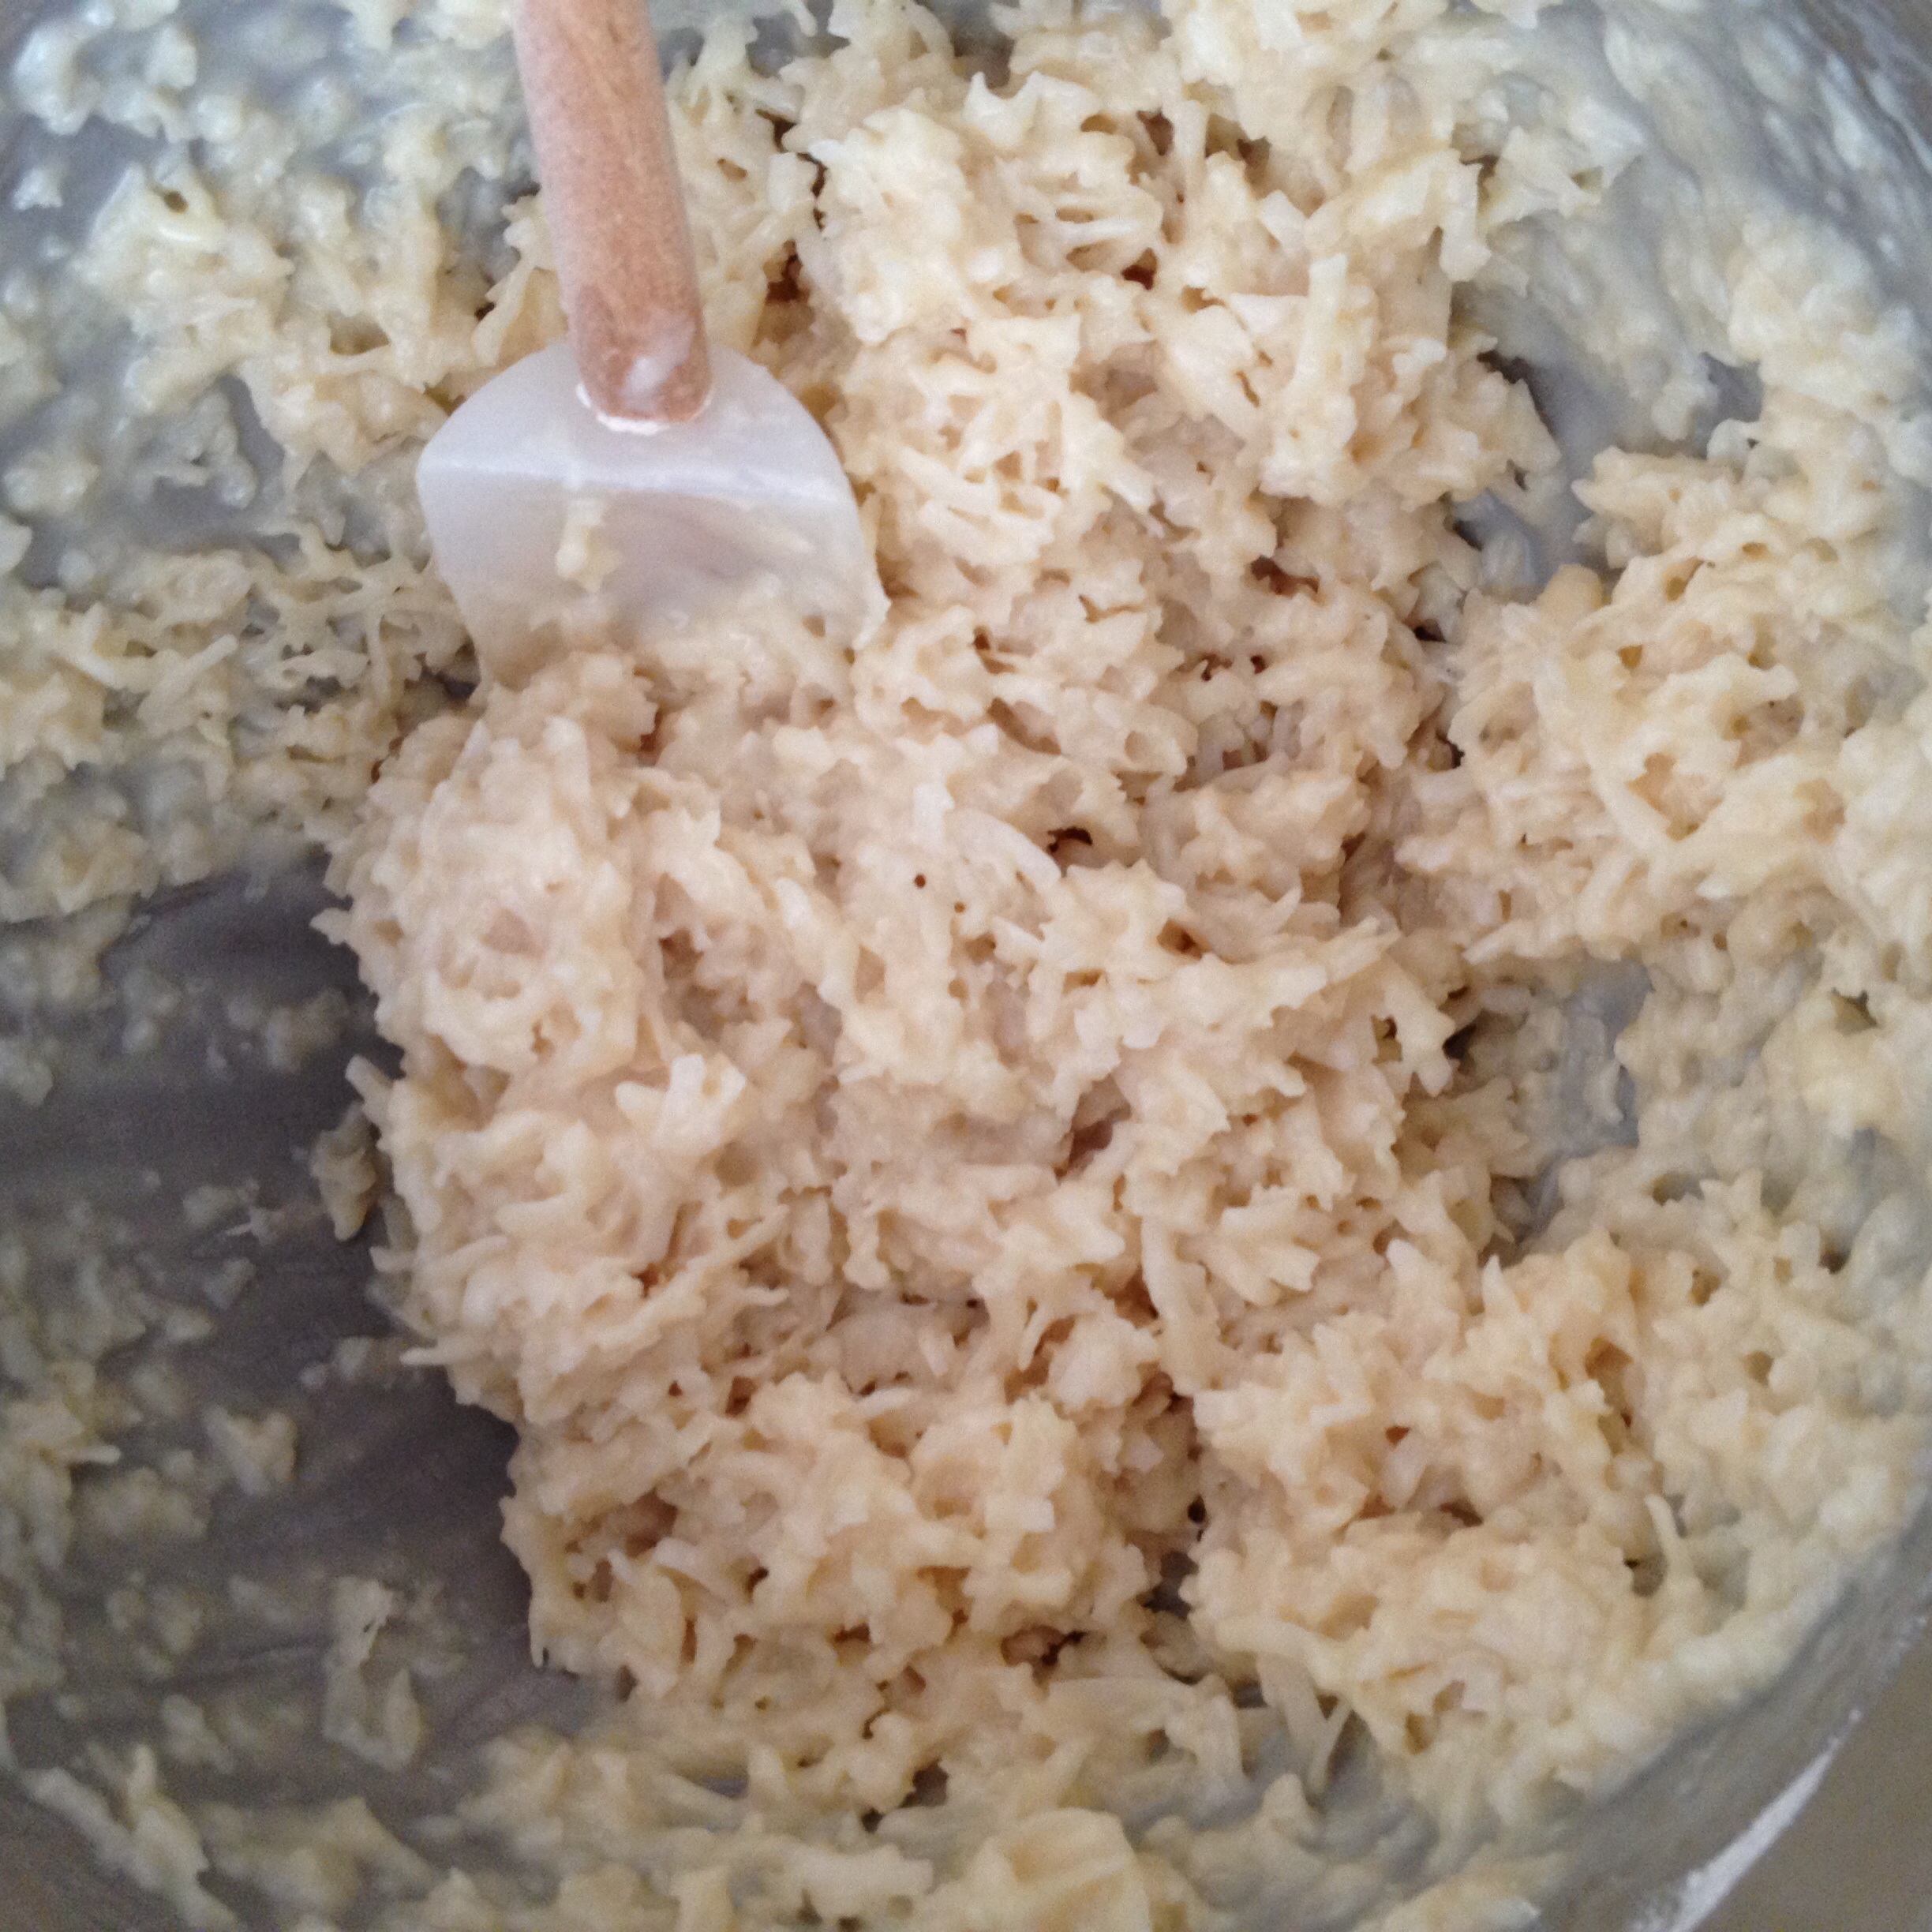
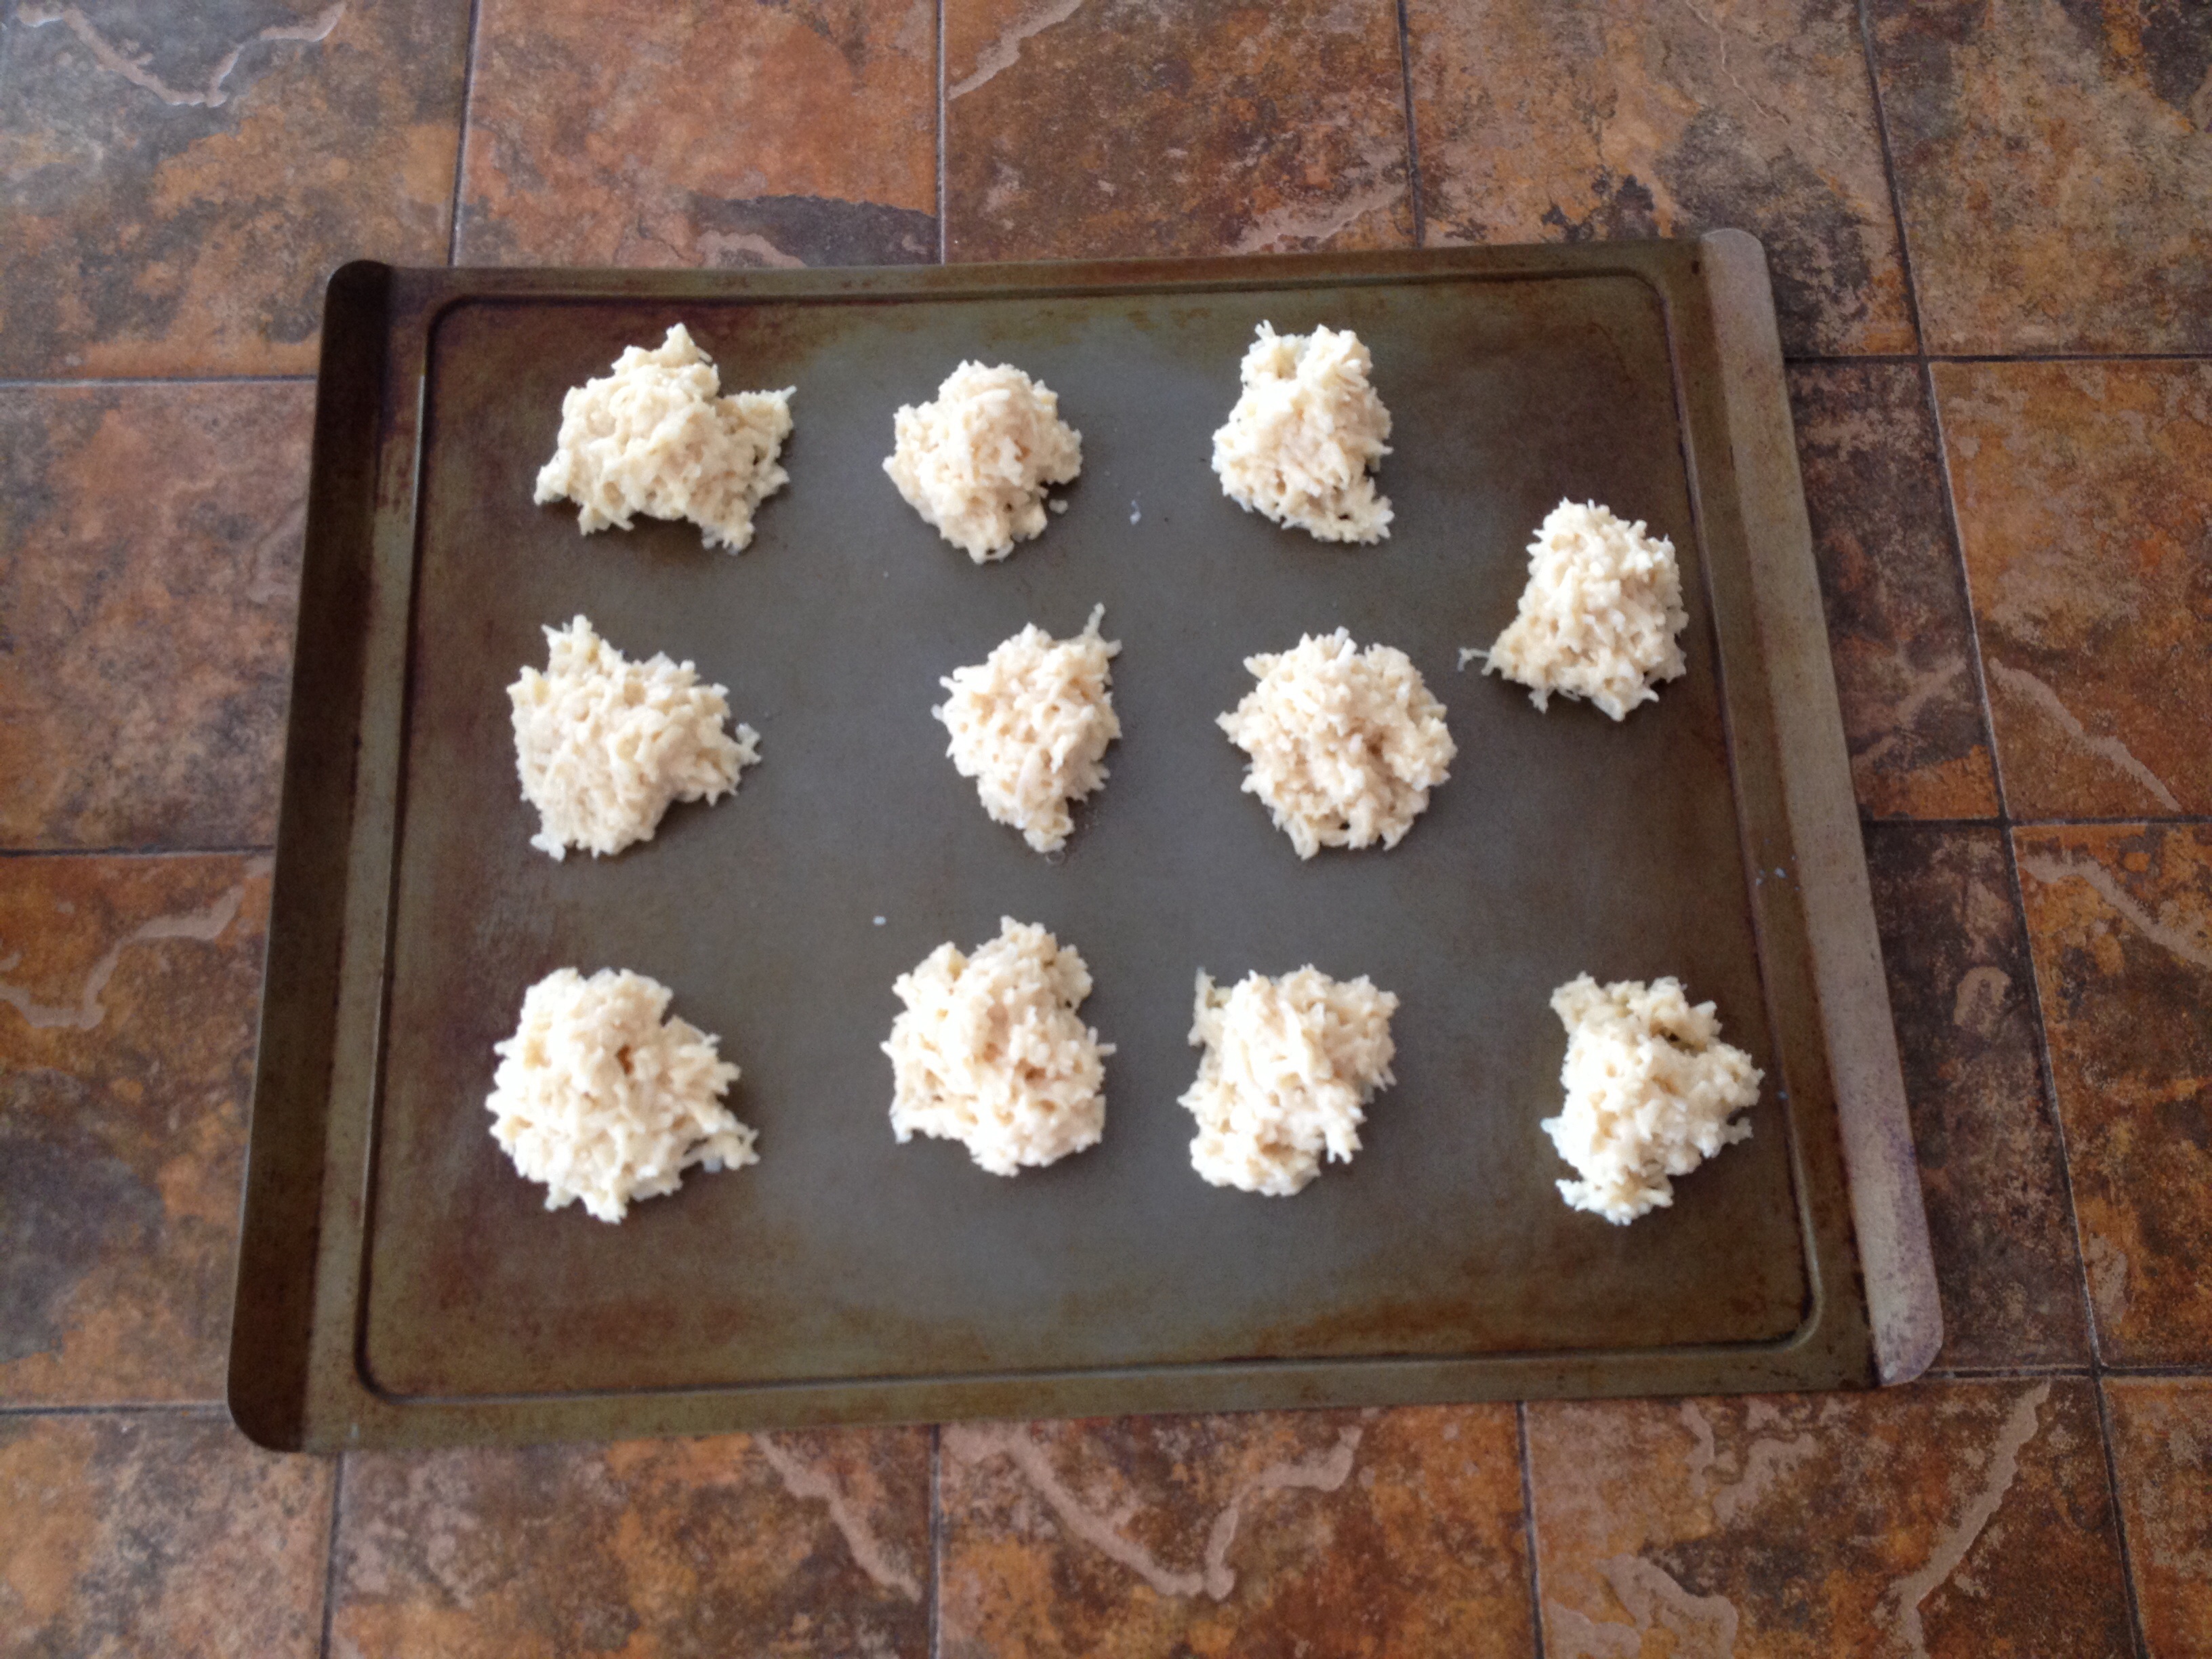
While the dough is rising, start making the filling. Using a KitchenAid or handmixer, mix the cream cheese until fluffy. Add the egg, sugar and vanilla. Mix well. Finally, add the lemon/orange zest and flour. Place the filling in the refrigerator to chill.

image

After the dough has doubled in size, place the dough on a floured surface and divide in half. Roll each dough out into a long rectangle making sure it is rolled out evenly.

image image

Spread the cream cheese filling in the middle of the dough. Top with your favorite jam or chocolate chips. Cut 1 inch wide strips around the edge of the dough. Fold the strips towards the middle to create a lattice top.


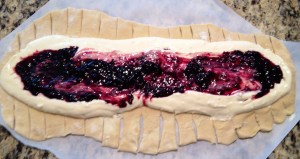
Click the thumbnails for a larger photo

Once completed, cover the pastries and set aside to rise for about 1 hour.

Preheat oven to 350ᴼF.

Right before the pastry is ready to go in the oven, brush the dough with egg whites. Sprinkle with sugar. The pastries will bake for about 30 minutes, but watch them closely so your dough doesn’t get brown.

Ready yet? I think so! Now it’s time to pour yourself some coffee and enjoy your pastry! T.W.O. suggests eating the pastry warm. If you want to reheat the pastry, cover it with foil and place it in a 200ᴼF oven for about 15 minutes.

image image image image image image

Happy Baking!

T.W.O. signature

French Silk Pie

image

Are you a chocolate lover? Are you a pie lover? Well, you are in luck! T.W.O. has the perfect recipe for your –French Silk Pie. It’s a rich, fluffy, dense mousse pie that will be great for your next dinner party!

Ingredients:

-4 oz. bittersweet or semisweet chocolate
-1 teaspoon butter or shortening
-1 cup unsalted butter, softened
-1 ½ cups granulated sugar
-2 tablespoons vanilla extract
-4 eggs, room temperature
-1 fully pre-baked 9 inch pie shell (See recipe HERE)
-3 cups whipped cream

 Preheat oven to 350°F.

In a microwave safe bowl, head the chocolate and butter/shortening in 20-second intervals, stirring between each interval until completely melted. Cool for 10 minutes.

image

With a KitchenAid or handmixer, cream together butter, sugar until fluffy. Add the melted chocolate gradually until mixed well. Add vanilla.

Using a whisk or the whisk attachment, add one egg at a time. Each egg should be beat for 5 minutes, totaling 20 minutes. The filling should be thick and fluffy. Once you get the consistency, add the filling to a pre-baked pie shell.

image

image

Place the pie in the oven and bake for 30 minutes or until a butter knife comes out clean. Let the pie cool for about 30 minutes. Once cooled, place the pie in the refrigerator for a minimum of 4 hours. It’s best to make this pie the night before.

Just when you are ready to serve, put the whipped cream on top of the pie. Garnish the top of the pie with shaved chocolate.

By this time, I am sure you are ready to taste this delectable, chocolaty pie!

imageimage

Happy Baking!

T.W.O. signature

Pumpkin Cheesecake

image

Need a recipe for the holidays that will really impress your guests? Well, T.W.O. has the perfect solution for you – Pumpkin Cheesecake. It’s a moist, creamy and delectable cake that will compliment any meal. There is even better news too – you can make it the night before so you don’t have to worry about baking the day of your dinner party!

image

Ingredients

Crust:
– 1 ¾ cups graham cracker crumbs
– 3 tablespoons light brown sugar
– ½ teaspoon ground cinnamon
– ½ teaspoon ground nutmeg
– 1 stick butter, melted

 Cheesecake filling:
– 2 (8-ounce) packages cream cheese, room temperature
– 1 (8-ounce) packages Neufchâtel, room temperature
– 1 (15-ounce) can pureed pumpkin
– 3 eggs plus 1 egg yolk
– ¼ cup sour cream
– 1 ½ cups granulated sugar
– 1 teaspoon ground cinnamon
– 1 teaspoon ground nutmeg
– ½ teaspoon ground cloves
– 2 Tablespoon all-purpose flour
– 1 teaspoon vanilla extract

Preheat oven to 350ᴼF.

In a bowl, mix the graham cracker crumbs, sugar, cinnamon, nutmeg and butter. Create crust by pressing this mixture to the bottom and sides of a 9-inch springform pan. Put aside.

image

Using a mixer (T.W.O. uses a KitchenAid mixer), beat cream cheese until smooth. It is important to make sure your cream cheese is room temperature so the filling doesn’t contain chunks of cream cheese. Add in eggs, yolk, pumpkin, sour cream, sugar, vanilla, cinnamon, nutmeg and cloves. Mix well. Slowly combine flour into the filling mixture.

image

image

Pour the filling into the springform pan, and make sure it’s evenly distributed. Put a bowl of water on the bottom wrack of the oven. This helps prevent any cracks in your filling. Place the cheesecake in the oven for about 1 hour or until a butter knife comes out clean. Set aside and let cool for 30 minutes. Cover the cake and place in the refrigerator for a minimum of 4 hours. T.W.O.suggests leaving it overnight.

image

Once you are ready to eat, add some whipped cream to the top of the cake, garnish with a sprinkle of cinnamon and serve! Don’t be surprised if people ask for seconds or get caught eating it for breakfast! T.W.O. did!

image

image

Happy Baking!!

T.W.O. signature

The Pumpkin Pie

IMG_2610

Pumpkin Pie. It is as important (maybe a little more!) than the turkey for T.W.O.’s family Thanksgiving feast. With Thanksgiving around the corner, T.W.O. decided to bake this delicious dessert a few weeks before the big day to get our and your mouths watering! You won’t be disappointed!

Ingredients

 Flaky Crust:

-2 cups flour
-¾ cup shortening (T.W.O. uses butter flavor)
-2-3 Tablespoons sugar
-5-6 Tablespoons cold water

*Depending on the size of your pans or how thick you want your crust, you might want to double the crust recipe. T.W.O. uses 9 inch pie pans.

Pumpkin Filling:

-1 ½ cups sugar
-1 teaspoon ground cinnamon
-1 teaspoon ground ginger
-1/2 teaspoon ground cloves
-4 large eggs
-1 can (29 oz) Libby’s 100% Pure Pumpkin
-2 cans (12 fl. Oz., each) evaporated milk

 IMG_2583

IMG_2589

Preheat oven to 425 degrees. In a bowl mix the flour, shortening, sugar and cold water. T.W.O. uses a pastry blender to mix the dough together, forming into a ball.

IMG_2584

Once the dough ball is formed, let’s get ready to roll it out! Make sure your surface is floured so that the dough doesn’t stick to your countertop or mat. Split the dough in half to make the 2 piecrusts. Using your rolling pin, roll the dough out evenly in a circular shape. With the assistance of a spatula, move the rolled out dough into the oiled or “PAM’ed”pie dish. Pinch the crust tops with your fingers to make a stylish pattern. Repeat for second pie dough.

IMG_2587

Now for the pumpkin filling. Mix sugar, cinnamon, ginger, and cloves in small bowl (T.W.O. uses a KitchenAid). Beat eggs in a large bowl. Stir in pumpkin and sugar-spice mixture. Gradually stir in evaporated milk.

IMG_2590

Pour into pie shells.

IMG_2591

Bake in oven for 15 minutes. Reduce temperature to 350 degrees; bake 40-50 minutes or until knife inserted near center comes out clean. Cool on wire rack for about 1-2 hours. Serve immediately or refrigerate.

IMG_2597

Happy Baking!

*T.W.O. makes a foil ring to cover the crusts so that it does not burn.

IMG_2611

T.W.O. signature

Roasted Butternut Squash with Swiss Chard

image

Picture this: A cold autumn’s night with green vegetables, toasted pine nuts, butternut squash and goat cheese. Sounds T.W.O. perfect, right? Well it is! Check out how to make this dish below.

image

Ingredients:

– 1 large butternut squash
– 2 large shallots, quartered
-4 gloves of garlic, skinned and halved
– 1 ½ Tablespoon cinnamon
– 1 ½ Tablespoon nutmeg
-1 large head Swiss chard, stems and leaves chopped separately
-¼ cup pine nuts, toasted
-¾ cups dried cranberries
– ¼ cup honey goat cheese, crumbled
– balsamic vinegar, to drizzle

Preheat oven to 375ᴼ. Peel the squash and cut in half lengthwise. Seed the squash and cut into bite-size cubes. Spray/brush the squash with olive oil and mix in cinnamon and nutmeg. Once the squash is coated, place on a baking sheet and cook for about 30-40 minutes until soft. Check the squash periodically and mix.

image

image

At the 20 minute mark, add the garlic and the shallots to the butternut squash on the baking pan in the oven.

While the squash medley is cooking, chop the Swish chard stems and sauté in a fry pan for 3 minutes with a drixzle of balsamic vinegar. After 2 minutes, add the Swish chard leaves.

image image

Mix in the cranberries and the roasted pine nuts.

image

Remove the squash, shallots and garlic from the oven and add to the Swish chard mixture. Once mixed, remove from stove and plate the ingredients. Add the goat cheese to the top for garnish. Serve immediately.

image

T.W.O. enjoys having this for leftovers for lunch the next day. Just heat it up in the microwave or on the stove and you will have another tasty meal!

Happy cooking!!!

T.W.O. signature

Spaghetti Squash “Pasta” Bowls

image

Spaghetti squash is one of T.W.O.’s favorite vegetables to eat during fall and winter. It makes for a great side dish, entrée, or even a snack! Spaghetti squash is full of nutrients such as folic acid, potassium, and vitamin A. It is also gluten free! So T.W.O. decided to give your typical “spaghetti dinner” a spin and create a delicious, healthy dish for dinner!

 Ingredients

-Spaghetti squash
-½ sweet white onion
-2 garlic cloves
-Mushrooms
-Broccoli florets
-Pasta sauce
-Fresh buffalo mozzarella or Parmesan cheese
-Salt & Pepper

 Preheat oven to 350°. Using a sharp knife cut the spaghetti squash in half and remove all the seeds. Place squash on a foil-lined cookie sheet and put in oven. Bake for 30-45 minutes or until the “meat” of the squash is soft.

image

Meanwhile, chop up garlic, onion, and mushrooms and broccoli. Once the squash is done, take it out of the oven to cool slightly. (Keep oven on) While the squash is cooling, sauté the garlic, onion and mushrooms in olive oil. Microwave the broccoli florets in a bowl filled with ¼ inch of water for about 2 minutes.

image

image

Using a fork, scrap out the squash and put into a large bowl. Squash should come out like “spaghetti.” Once all the squash is out of the “shells” place the “shells” aside. These will be used as bowls for the dish.

image

Add the sautéed garlic, onions, and mushrooms to the squash and mix. Season with salt and pepper. Next, add in the broccoli and pasta sauce and mix.

image

Place the spaghetti squash back into the “shells”, top with fresh mozzarella and put back into the oven. (Parmesan cheese can also be used.) Bake for about 10 minutes. Before taking the squash out, turn the oven to broil. Broil for about 1-2 minutes or until cheese is slightly brown. Now it’s time to eat!!

image

image

image

Enjoy!

T.W.O. signature

Chocolate-Dipped Coconut Macaroons

image

 Tired of making the same old cookie recipe? Need a new one in your life? Well, T.W.O. has the perfect recipe for you! Chocolate Dipped Coconut Macaroons! These cookies are so easy to make, only requires 6 ingredients and are so delicious you will find yourself going back for more!

 Ingredients

-2/3 cup flour
-5 ½ cups flaked coconut
-1 (14 ounce) can sweetened condensed milk
-2 teaspoons vanilla extract
-2 teaspoons of butter-flavored Crisco
-2 ½ cups chocolate chips

image

Preheat oven to 350°F. Mix together flour and coconut. Add the sweetened condensed milk and vanilla and mix until all ingredients are blended. Refrigerate the dough for about 30 minutes.

image

image

Place dough (about a golf ball size) onto greased cookie sheet. Bake for about 12 minutes or until the tops of the cookies are slightly toasted.

image

image

Let cookies cool for about 45 minutes. Once cool, begin melting the chocolate by placing chocolate chips and Crisco into a microwave safe bowl. Microwave for 30-45 seconds and mix until chocolate becomes smooth.

image

Dip each cookie into the chocolate and place on wax paper.

image

Slide the wax paper onto a tray and place dipped cookies in the freezer for about 10 minutes so that chocolate hardens.  Now it is time to indulge!!!

image

T.W.O. signature

Chicken with Garbanzo Bean Salad and Burrata

image

One of T.W.O. ‘s favorite proteins to experiment with is chicken because it is eaten more often than any other protein and can get very old if you don’t switch it up! So T.W.O. decided to create a spin on chicken Parmesan and bruschetta by creating a dish using chicken, a garbanzo bean salad, and burrata! Whether it is for a dinner party, family gathering or weeknight meal, you will find this dish to be easy but most of all- gastronomical!

 Ingredients

– 2 boneless, skinless chicken breasts
-1 can of garbanzo beans
-Favorite pasta sauce
-Fresh Basil
-Garlic cloves
-Fresh pepper
Crazy salt
-Burrata cheese

image

 First, chop garlic and basil and place in a mixing bowl. Next, add garbanzo beans, pasta sauce and fresh ground pepper.  You want to add enough sauce just to cover the garbanzo beans and create a little liquid. Let this mixture marinade for about 20 minutes in the refrigerator.

image

While the garbanzo bean salad is marinating, start the grill. Season the chicken with salt and pepper.  Place chicken onto grill and cook for about 20-25 minutes or until done. Meanwhile, turn on your oven to 425° and take the garbanzo bean salad out of the refrigerator. When the chicken is done, place the chicken breasts into a Pyrex and top with the garbanzo bean salad.  (You will have left over salad if you only use 2 chicken breasts, but it makes for a great side dish or snack while cooking!)

image

Put the Pyrex into the oven for 3-5 minutes. Next, place the burrata cheese over the garbanzo bean salad and put in the oven.

image

Allow the cheese to melt for about 2 minutes and then turn the oven on broil. Let the dish broil for about 2 minutes, or until the cheese gets a little brown. Once this is done, take the chicken out of the oven and get ready to serve!

image

image

 Bon appetite!

T.W.O. signature

BBQ Chicken Pizza

IMG_3566

Friday Night Pizza night!

T.W.O. had some leftover chicken in the refrigerator, so why not make a BBQ Chicken Pizza?!

IMG_3560

 Ingredients:

– Pizza Dough
– Cornmeal
– Flour
– Chicken breast, shredded
– BBQ sauce
– 1/2 cup olives, sliced
– 1 cup mushrooms, sliced
– 1/4 cup cilantro, diced
– 1/2 cup red onions, diced
– 2-3 cups mozzarella

Roll out the pizza dough on a floured/ cornmeal surface. Once the dough is evenly rolled out, transfer the dough to the pizza stone. Next take the BBQ sauce and spread it on the dough, making sure you reach all the edges.

IMG_3561

Then, add your mozzarella! Take the sliced olives, mushrooms, cilantro and red onions and spread it on the cheese. In a bowl, mix the shredded chicken breast and BBQ sauce. Once mixed, put the chicken on the pizza.

IMG_3563

 Let the pizza rise for about 15 minutes while the BBQ is heating up. Note – you don’t want to put the stone on a cold BBQ. The temperature should reach a medium-high heat before placing the pizza on. Watch the pizza closely; you don’t want your crust to burn! It should take about 15-20 minutes, depending on your grill.

IMG_3568

IMG_3567

Bon Appetite!

T.W.O. signature

Flour + Water (San Francisco)

IMG_3525

Flour + Water is a Italian restaurant located in the Mission District of San Francisco. All their pasta is homemade, just like they do in Italy. The Neapolitan style pizza is a fan-favorite as well as the whole animal utilization in their dishes.  The menu is constantly changing to capture the season’s best vegetables. T.W.O. had a chance to eat here in August and enjoy their tasting menu. Note – please do not read this while you are hungry….you will be starving after!

Summer Tasting Menu

crispy trotter with eggplant, almond, confit shallot & pickled mustard seed

2012 Bisson, Glera, Marca Trevigian, Veneto

 ̃

teleme scarpinocc with aceto balsamico

2011 St. Michael-Eppan, Pinot Bianco, Schulthauser, Alto Adige DOC

fennel tortelli with whey, bufala & pollen

2010 Vigneti Massa, Timorasso, Derthona, Colli Tortonesi DOC, Piemonte

salmon tortellini with tomato, crème fraîche & preserved lemon

2011 Poggio dei Gorleri, Ormeasco di Pornassio DOC, Peinetti, Liguria

carrot farfalle with braised hen, charred scallion & carrot top gremolata

2011 Montalbera, Ruche di Castagnole Monferrato DOC, Piemonte

 ̃

bomboloni with tarragon crema & strawberry

2012 De Forville, Moscato d’Asti DOCG, Piemonte

 The atmosphere of the restaurant is rustic, artistic and inviting. T.W.O. enjoyed sitting at the community farm-fresh table at the front of the restaurant. There are private tables near the back, along with a bar that looks like a great place to enjoy a glass of wine as you wait for your table. The atmosphere is great for a group, a date or even friends catching up, especially with the great playlist they have on!

IMG_3535

Flour + Water does takes reservations, but if you forget and just walk in, there is usually a wait time of over an hour. The foodies will line-up at 5 o’clock waiting for the gastronomical experience….consider T.W.O. one of those people!

T.W.O. signature