Chicken Vegetable Soup

IMG_3164

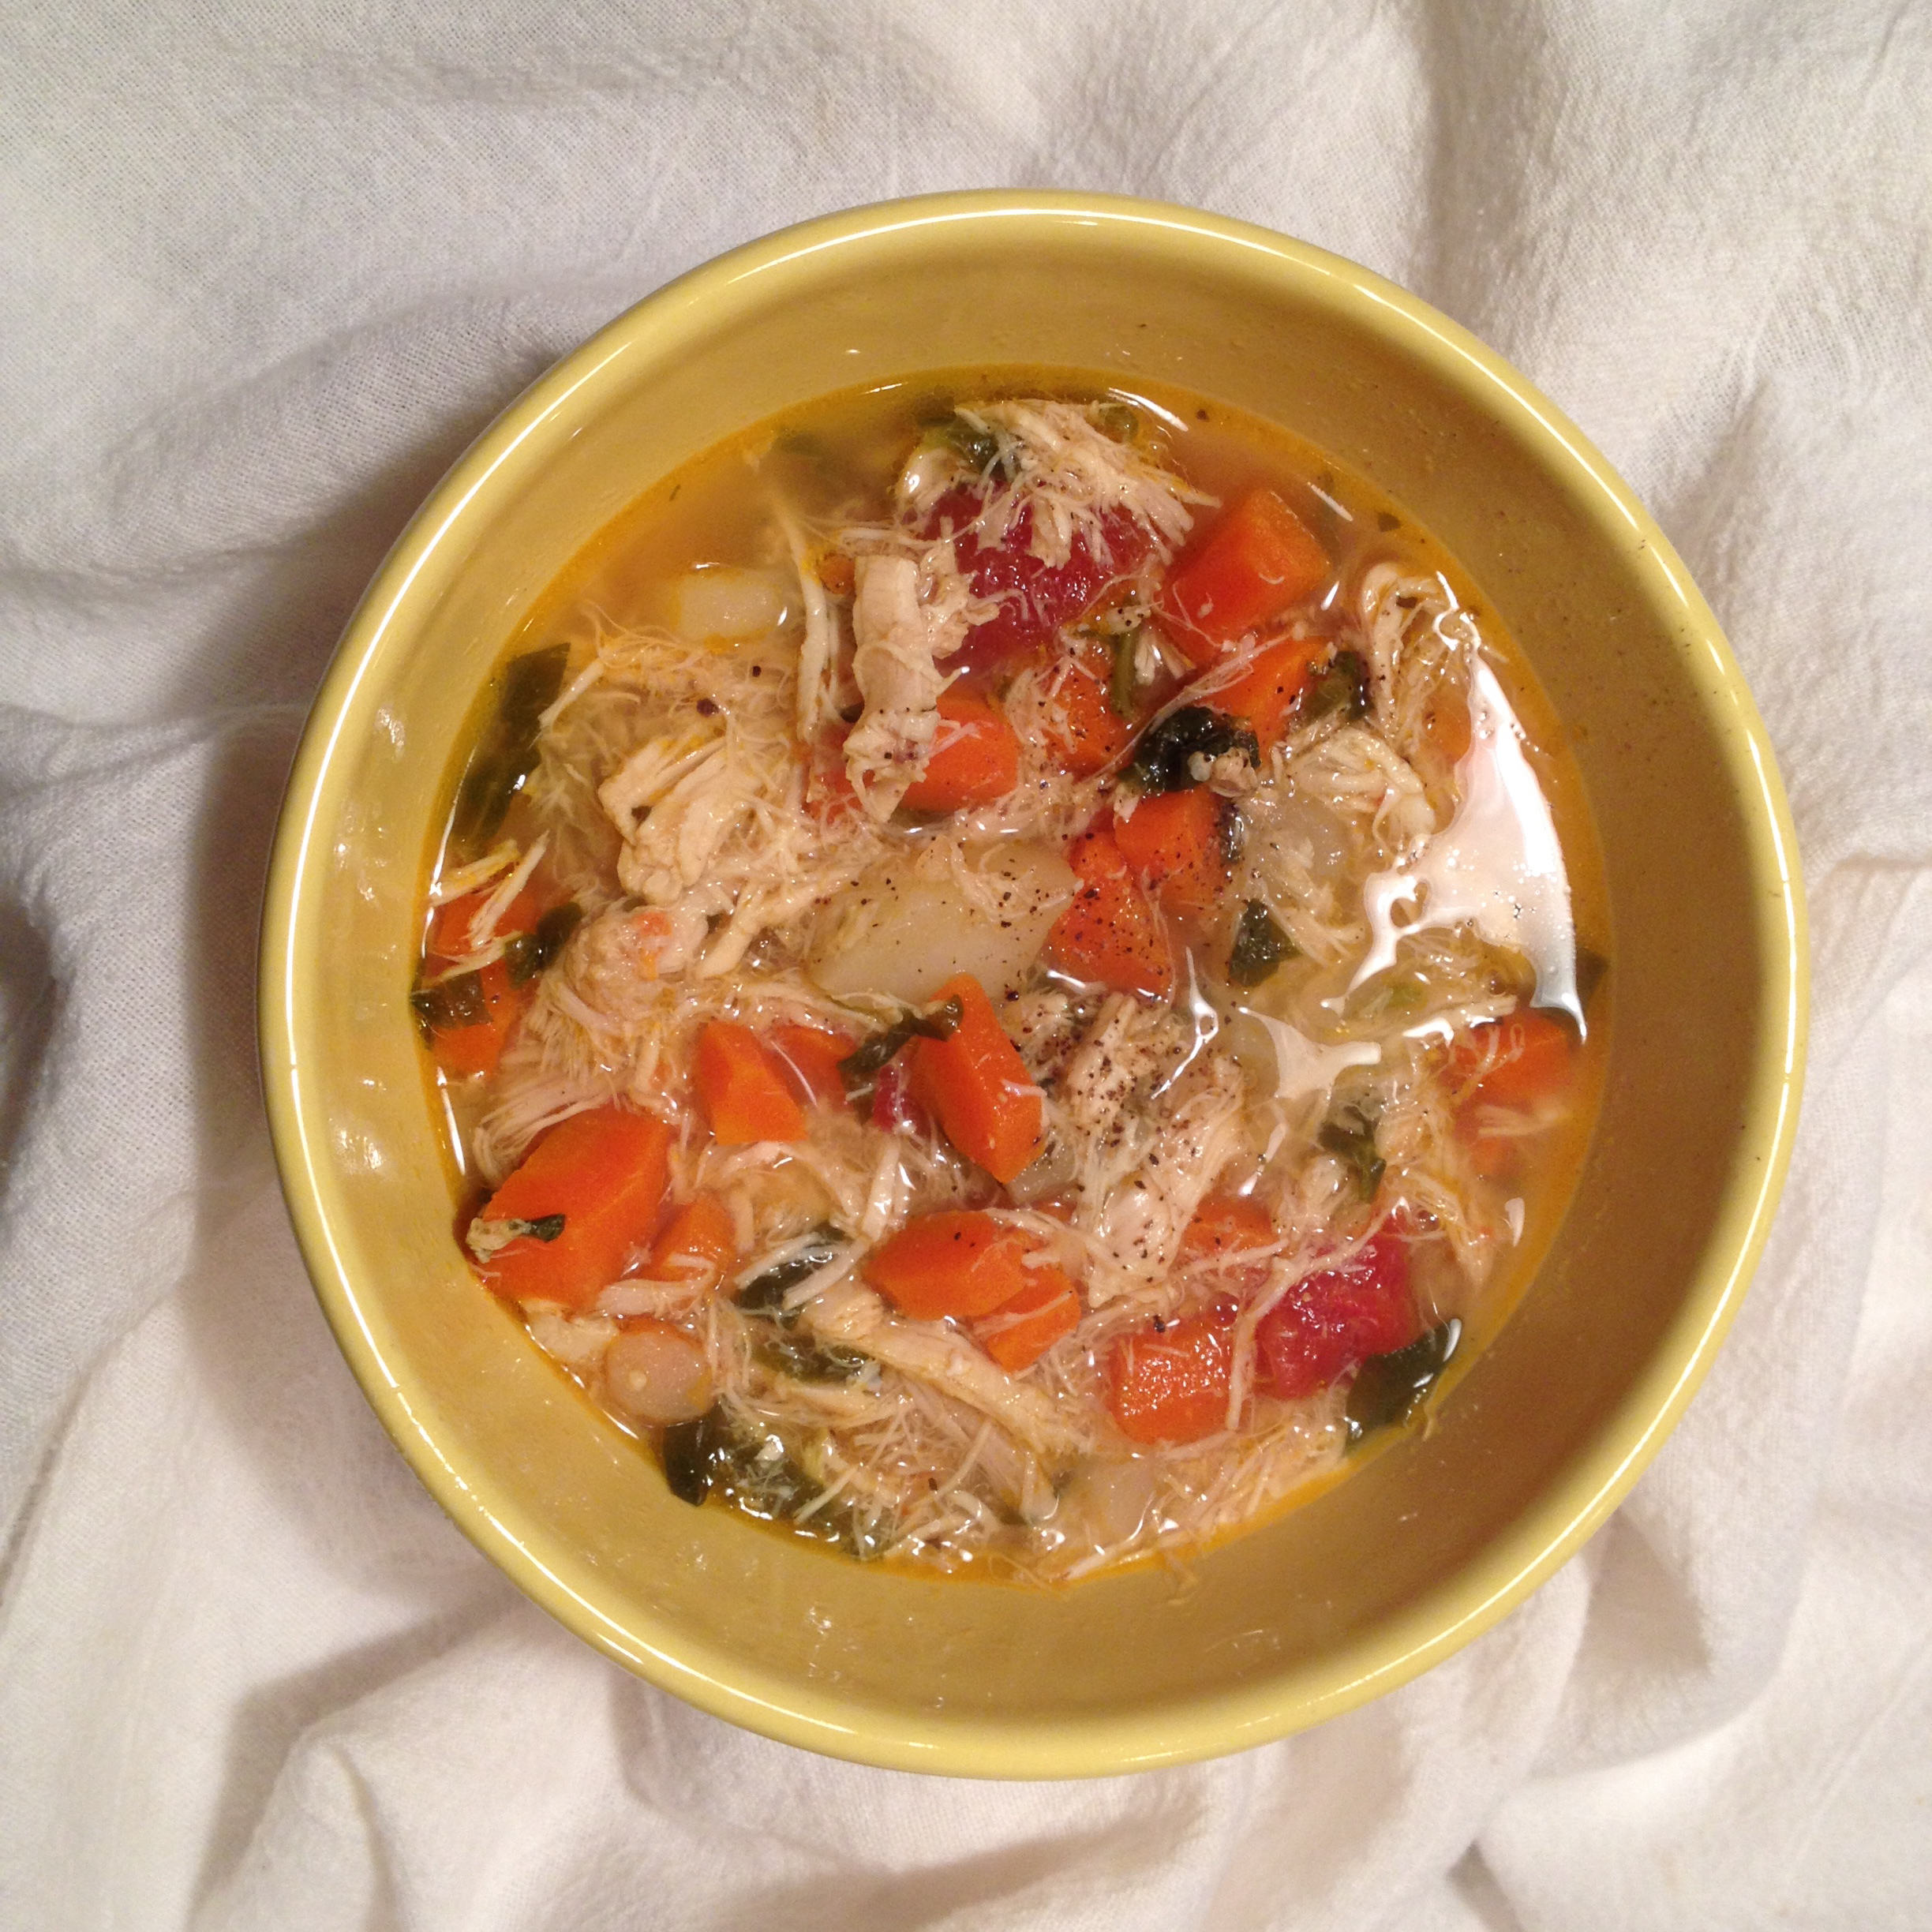
It’s getting colder outside, so let’s get warmer inside by making a large pot of soup! T.W.O. loves to cook soup during the chilly, winter nights- especially this Chicken Vegetable soup we grew up eating. We felt a little nostalgic and decided to cook it up one rainy night. It’s simple, tasty and makes for great leftovers! Give your tummy a little warmth and give this recipe a try! You won’t be disappointed.

Ingredients

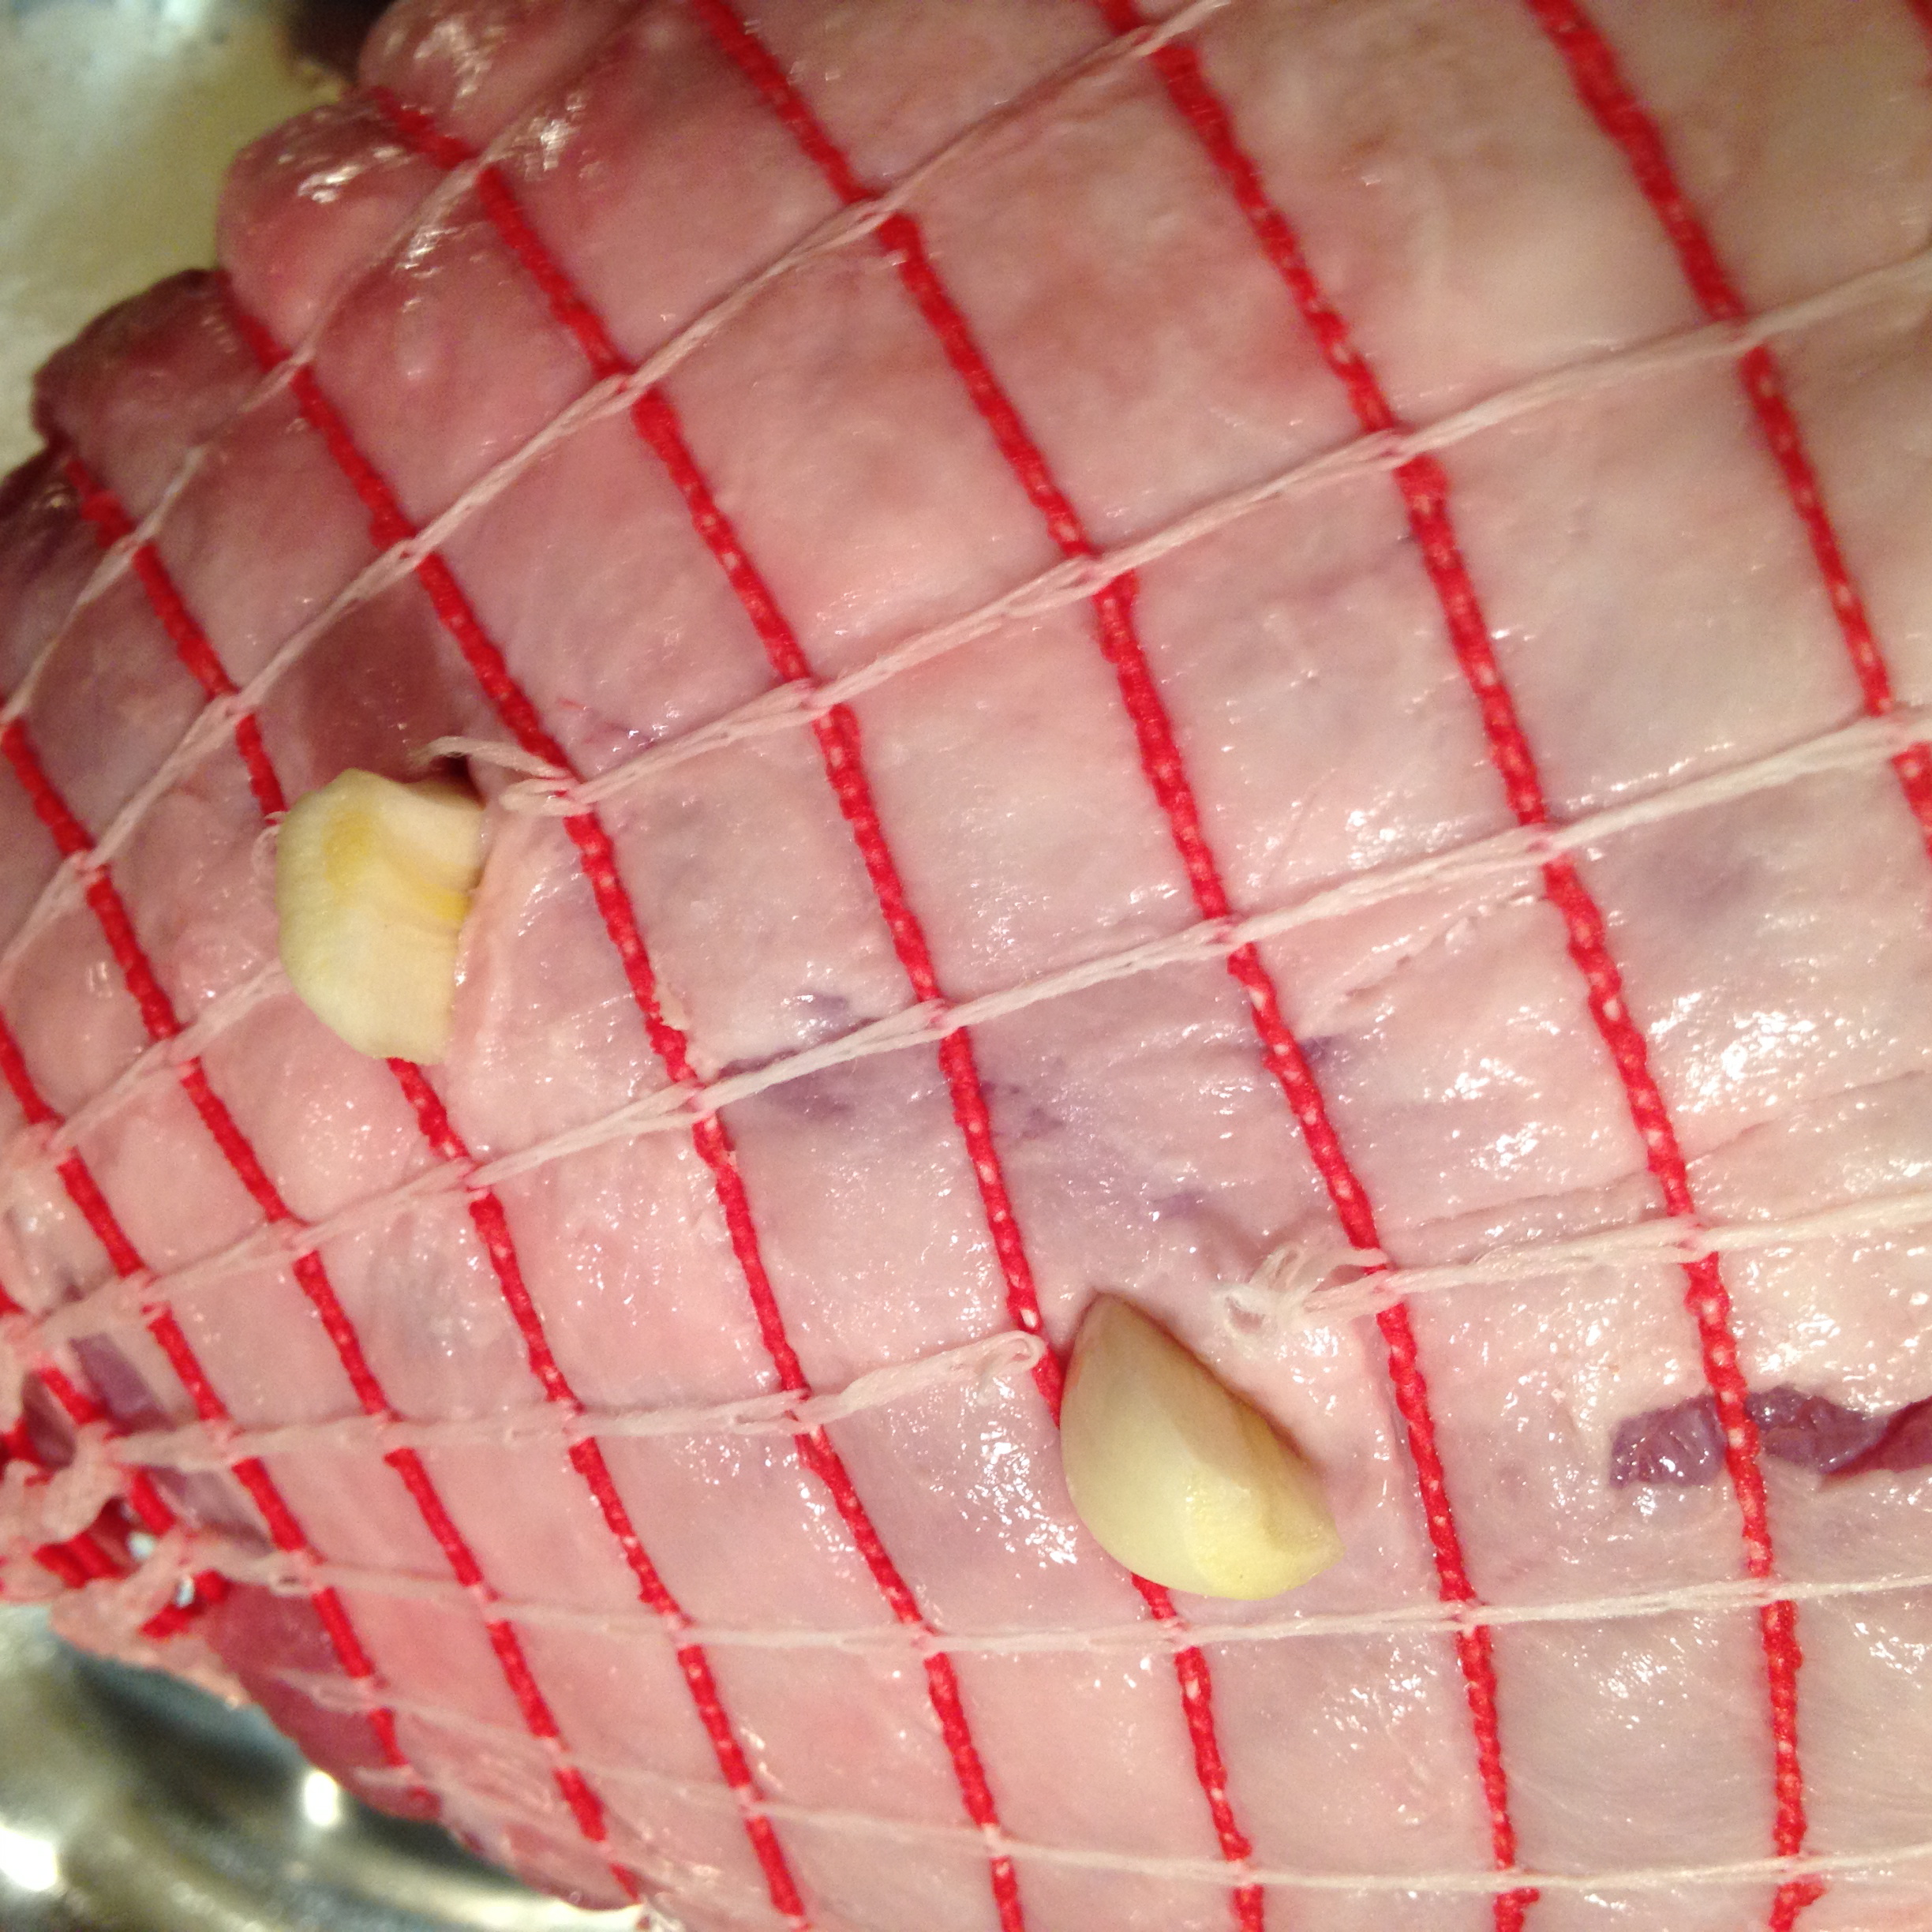
-1 whole chicken, uncooked
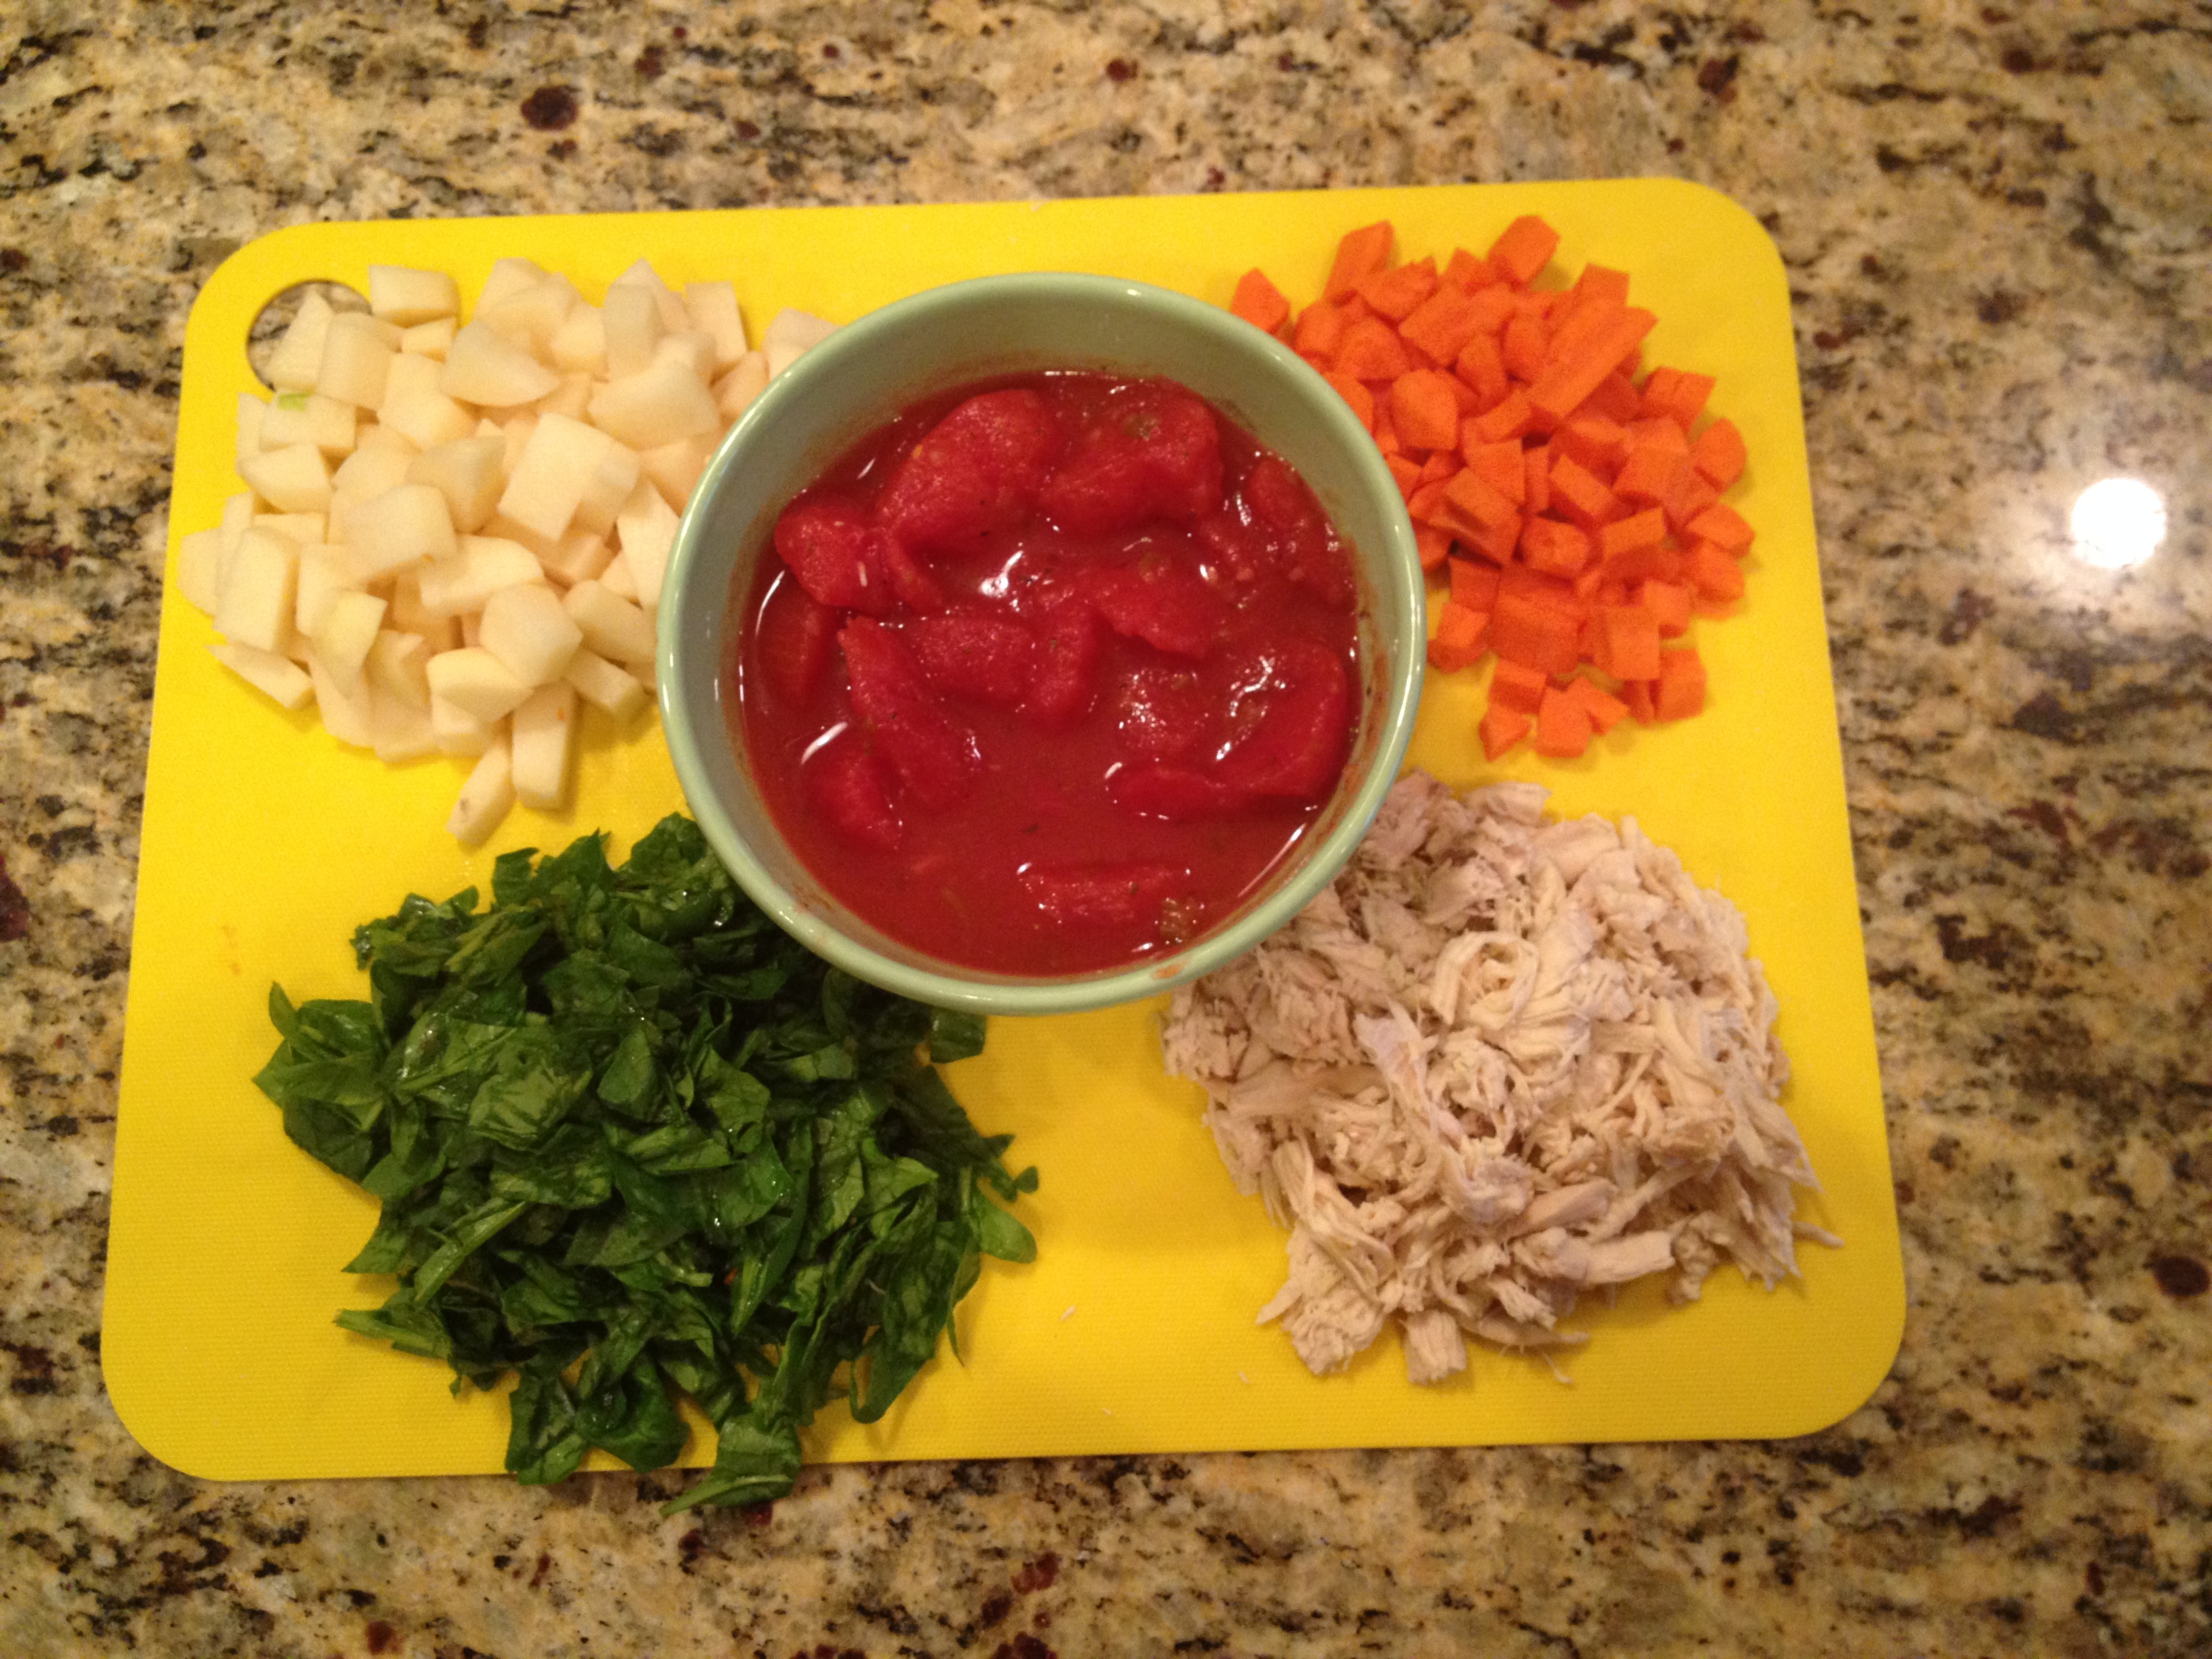
-1 can of stewed tomatoes
-5 to 6 carrots, peeled
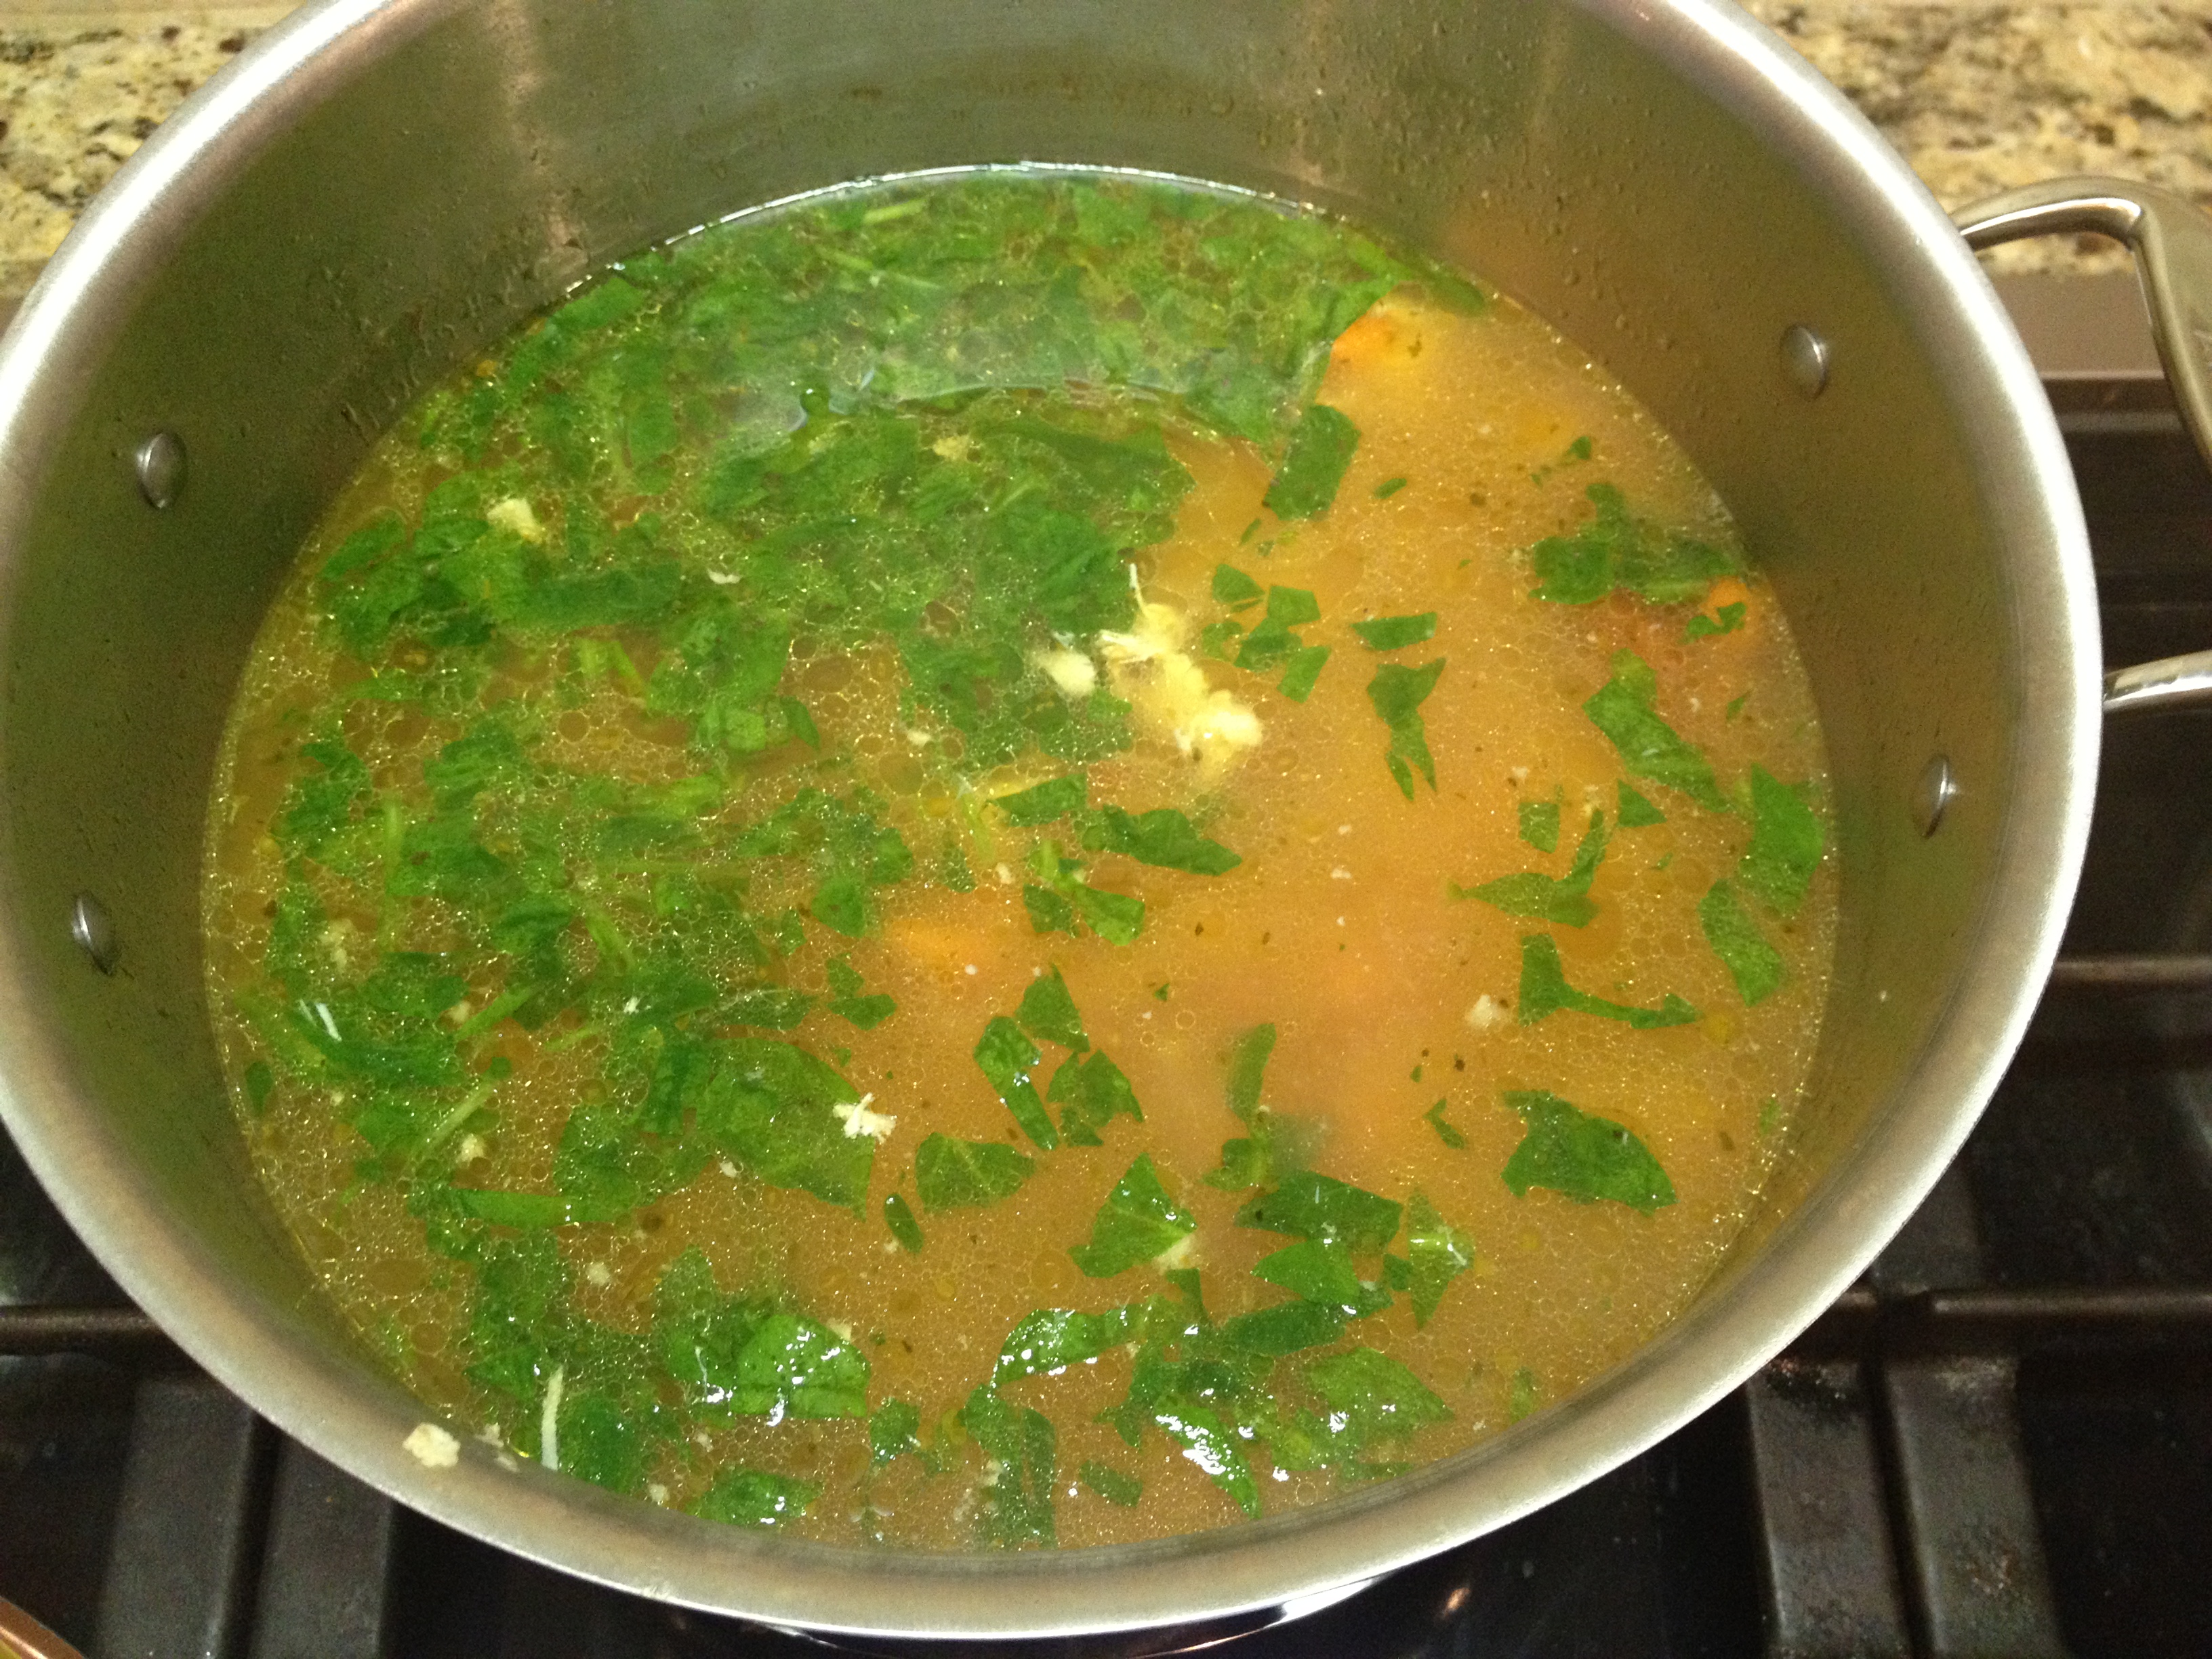
-2 to 3 cups spinach, chopped
-2 potatoes, cubed
-Lawry’s seasoning
-Italian seasoning
-Salt & Pepper

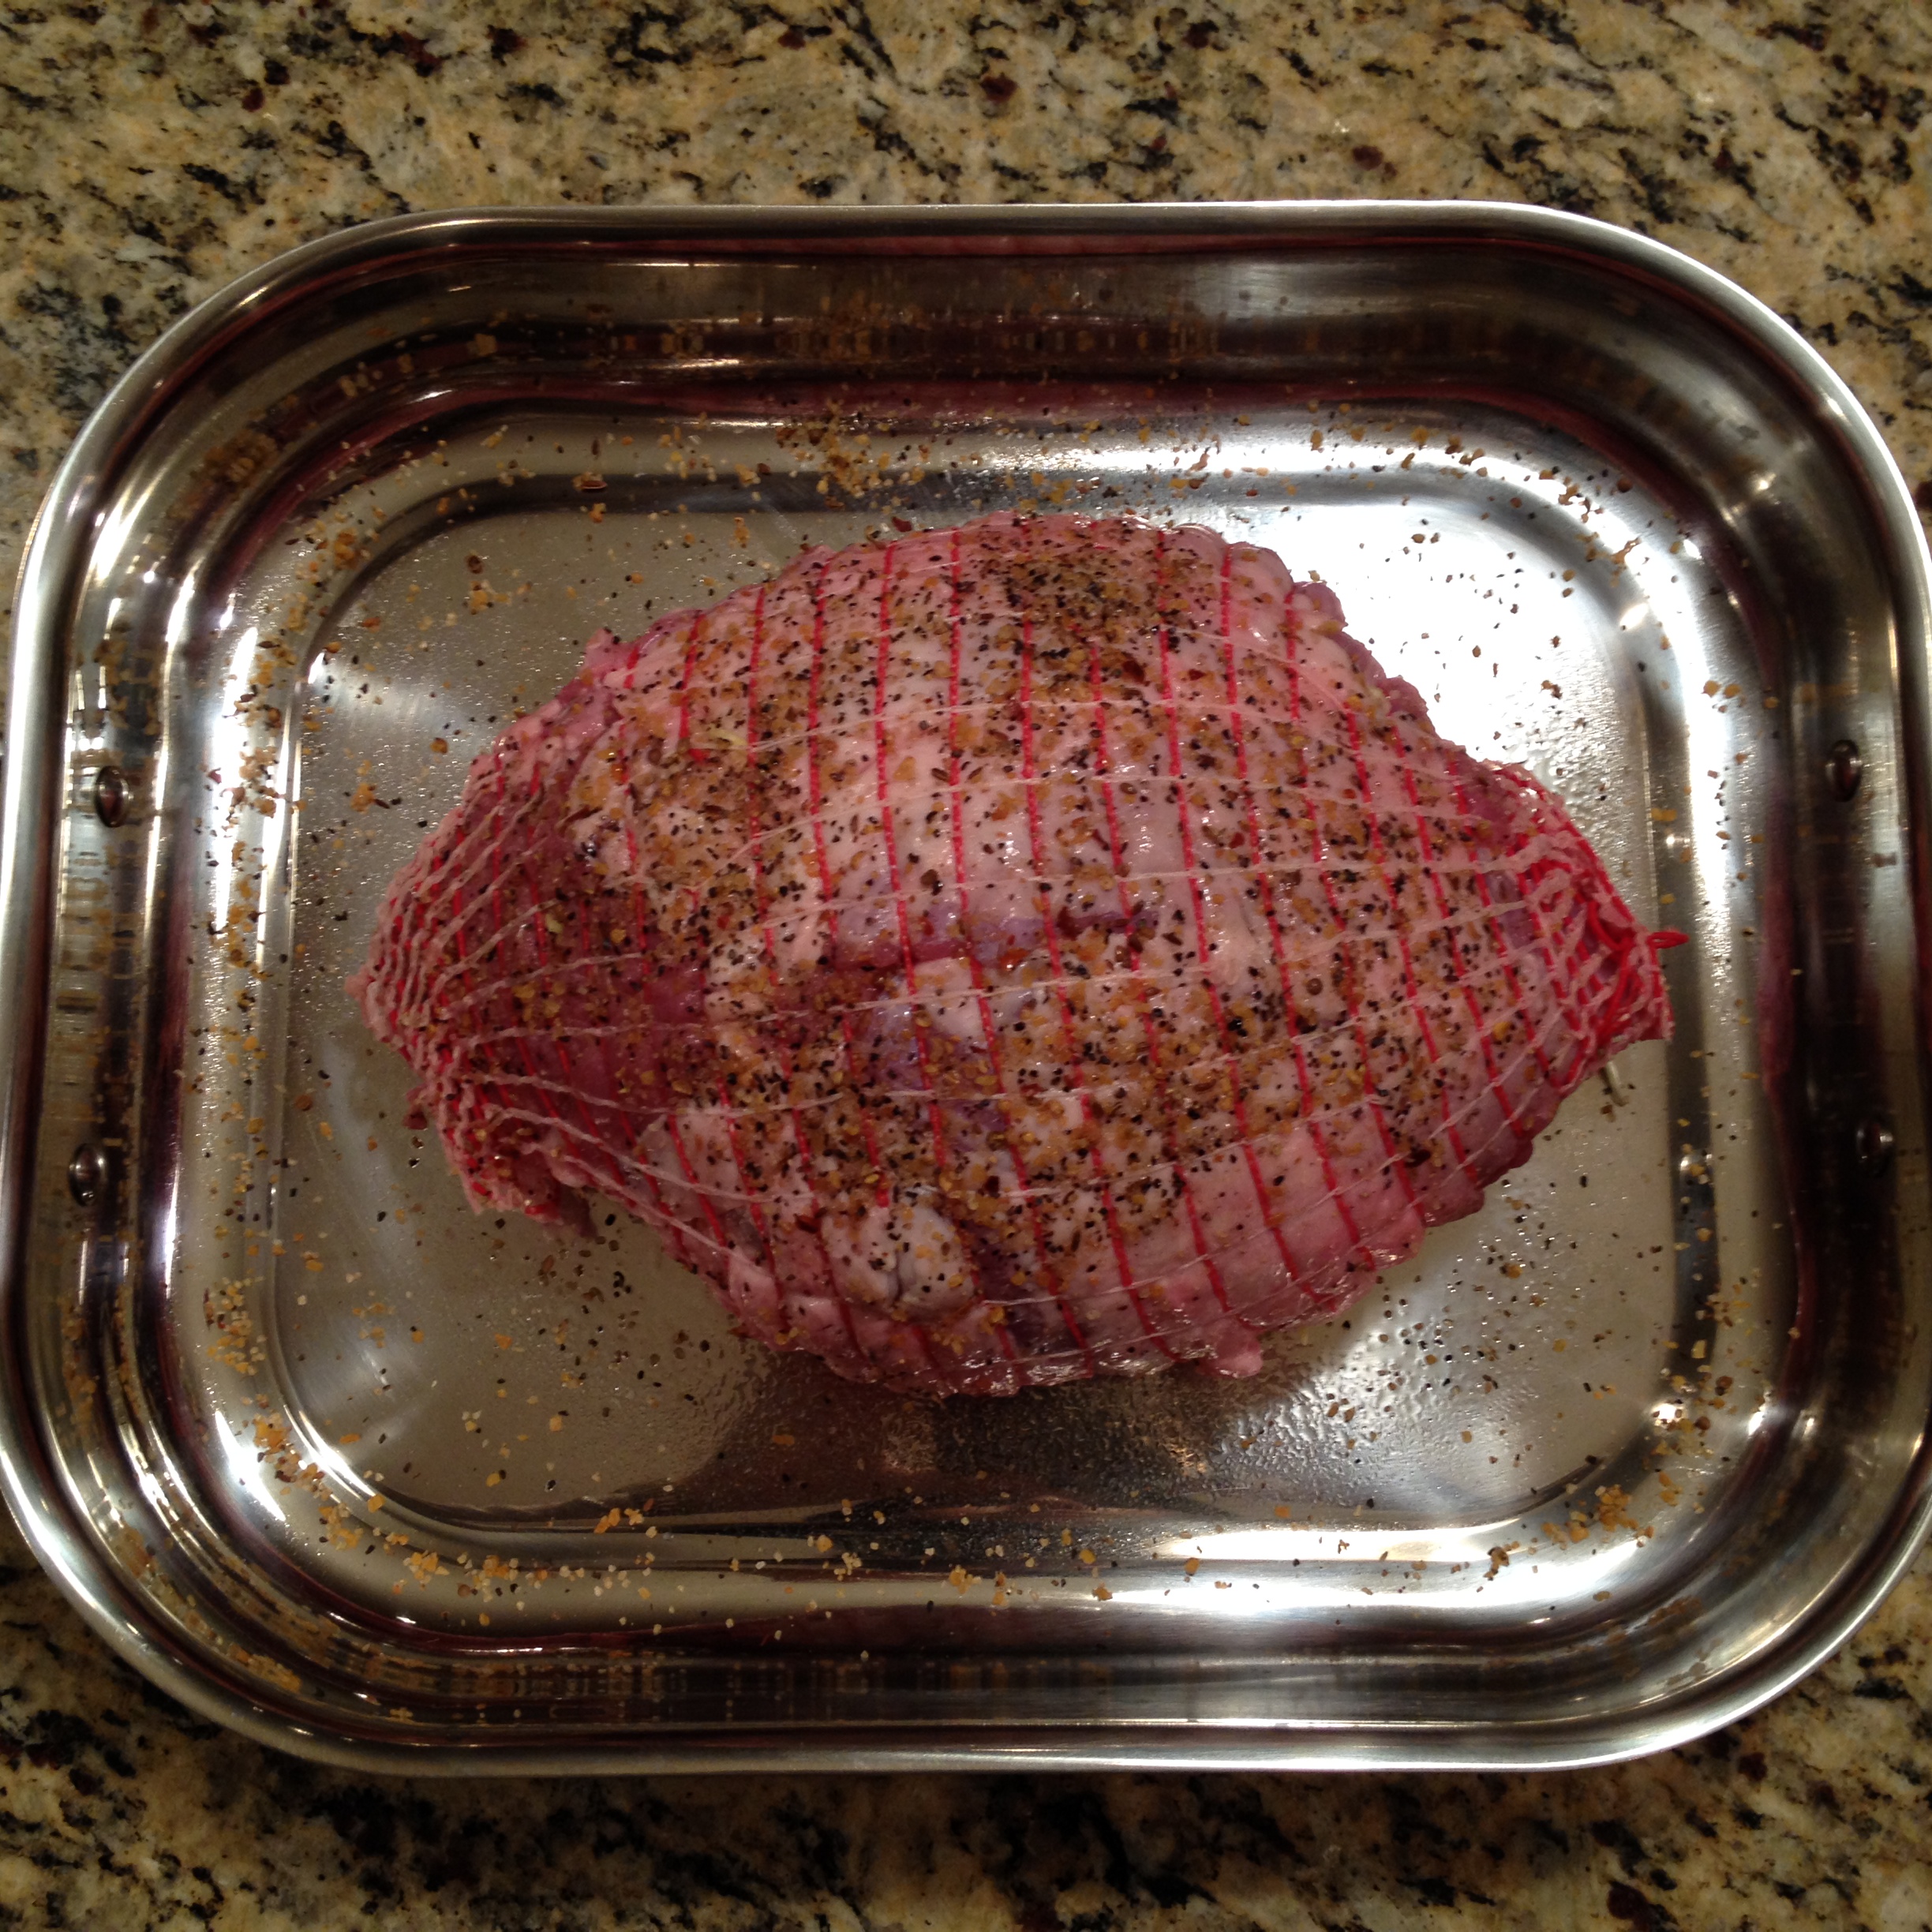
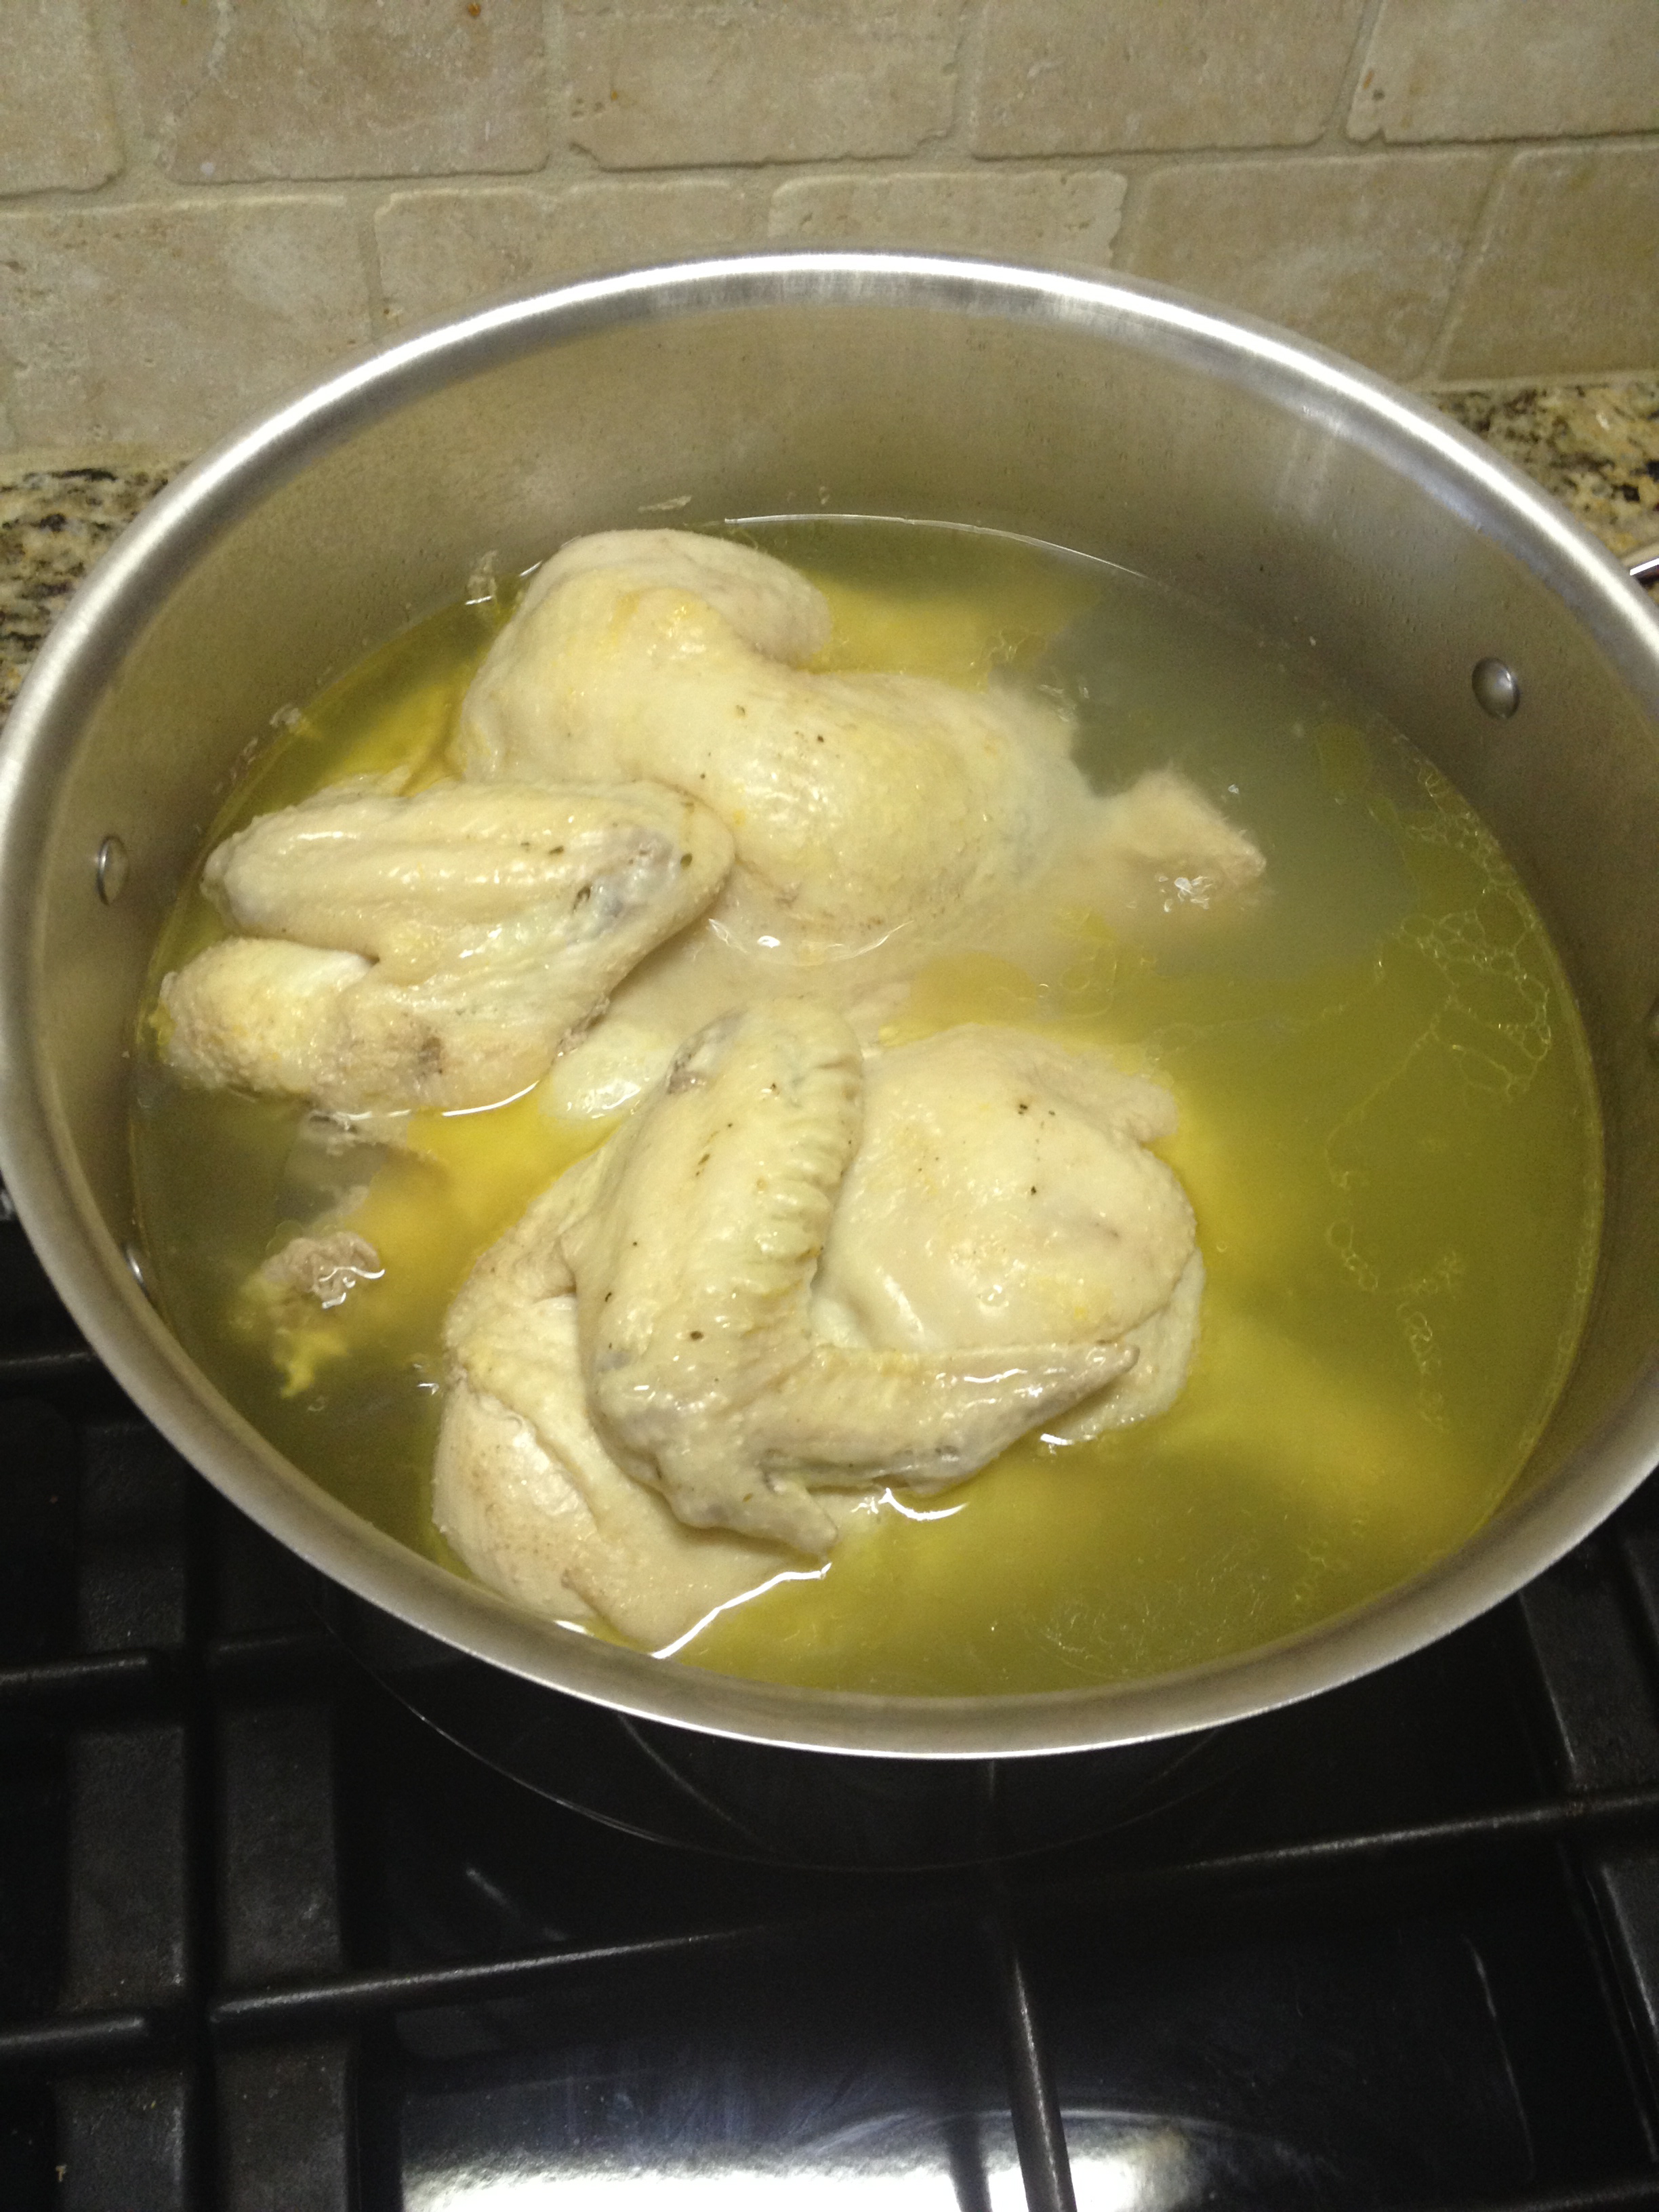
 First, wash and clean the chicken. Butterfly the chicken by cutting down the along the backbone of the chicken. Place chicken into a large pot and season chicken with some Lawry’s season, Italian seasoning, salt and pepper. Fill pot with enough water just to cover the chicken and bring to a boil.

IMG_3139

Once the water is boiling, turn down to a medium-low heat. Chicken should cook for about 1-1.5 hours or until the chicken meat pulls away from the bone.

IMG_3140

While the chicken is cooking, begin chopping the carrots, spinach, and potatoes. You also might want to cut up the tomatoes into smaller pieces if they are too large.

IMG_3149

Once the chicken is cooked, take the chicken out of the pot and allow it to cool. Strain your broth by running it through a sieve or colander.

IMG_3146

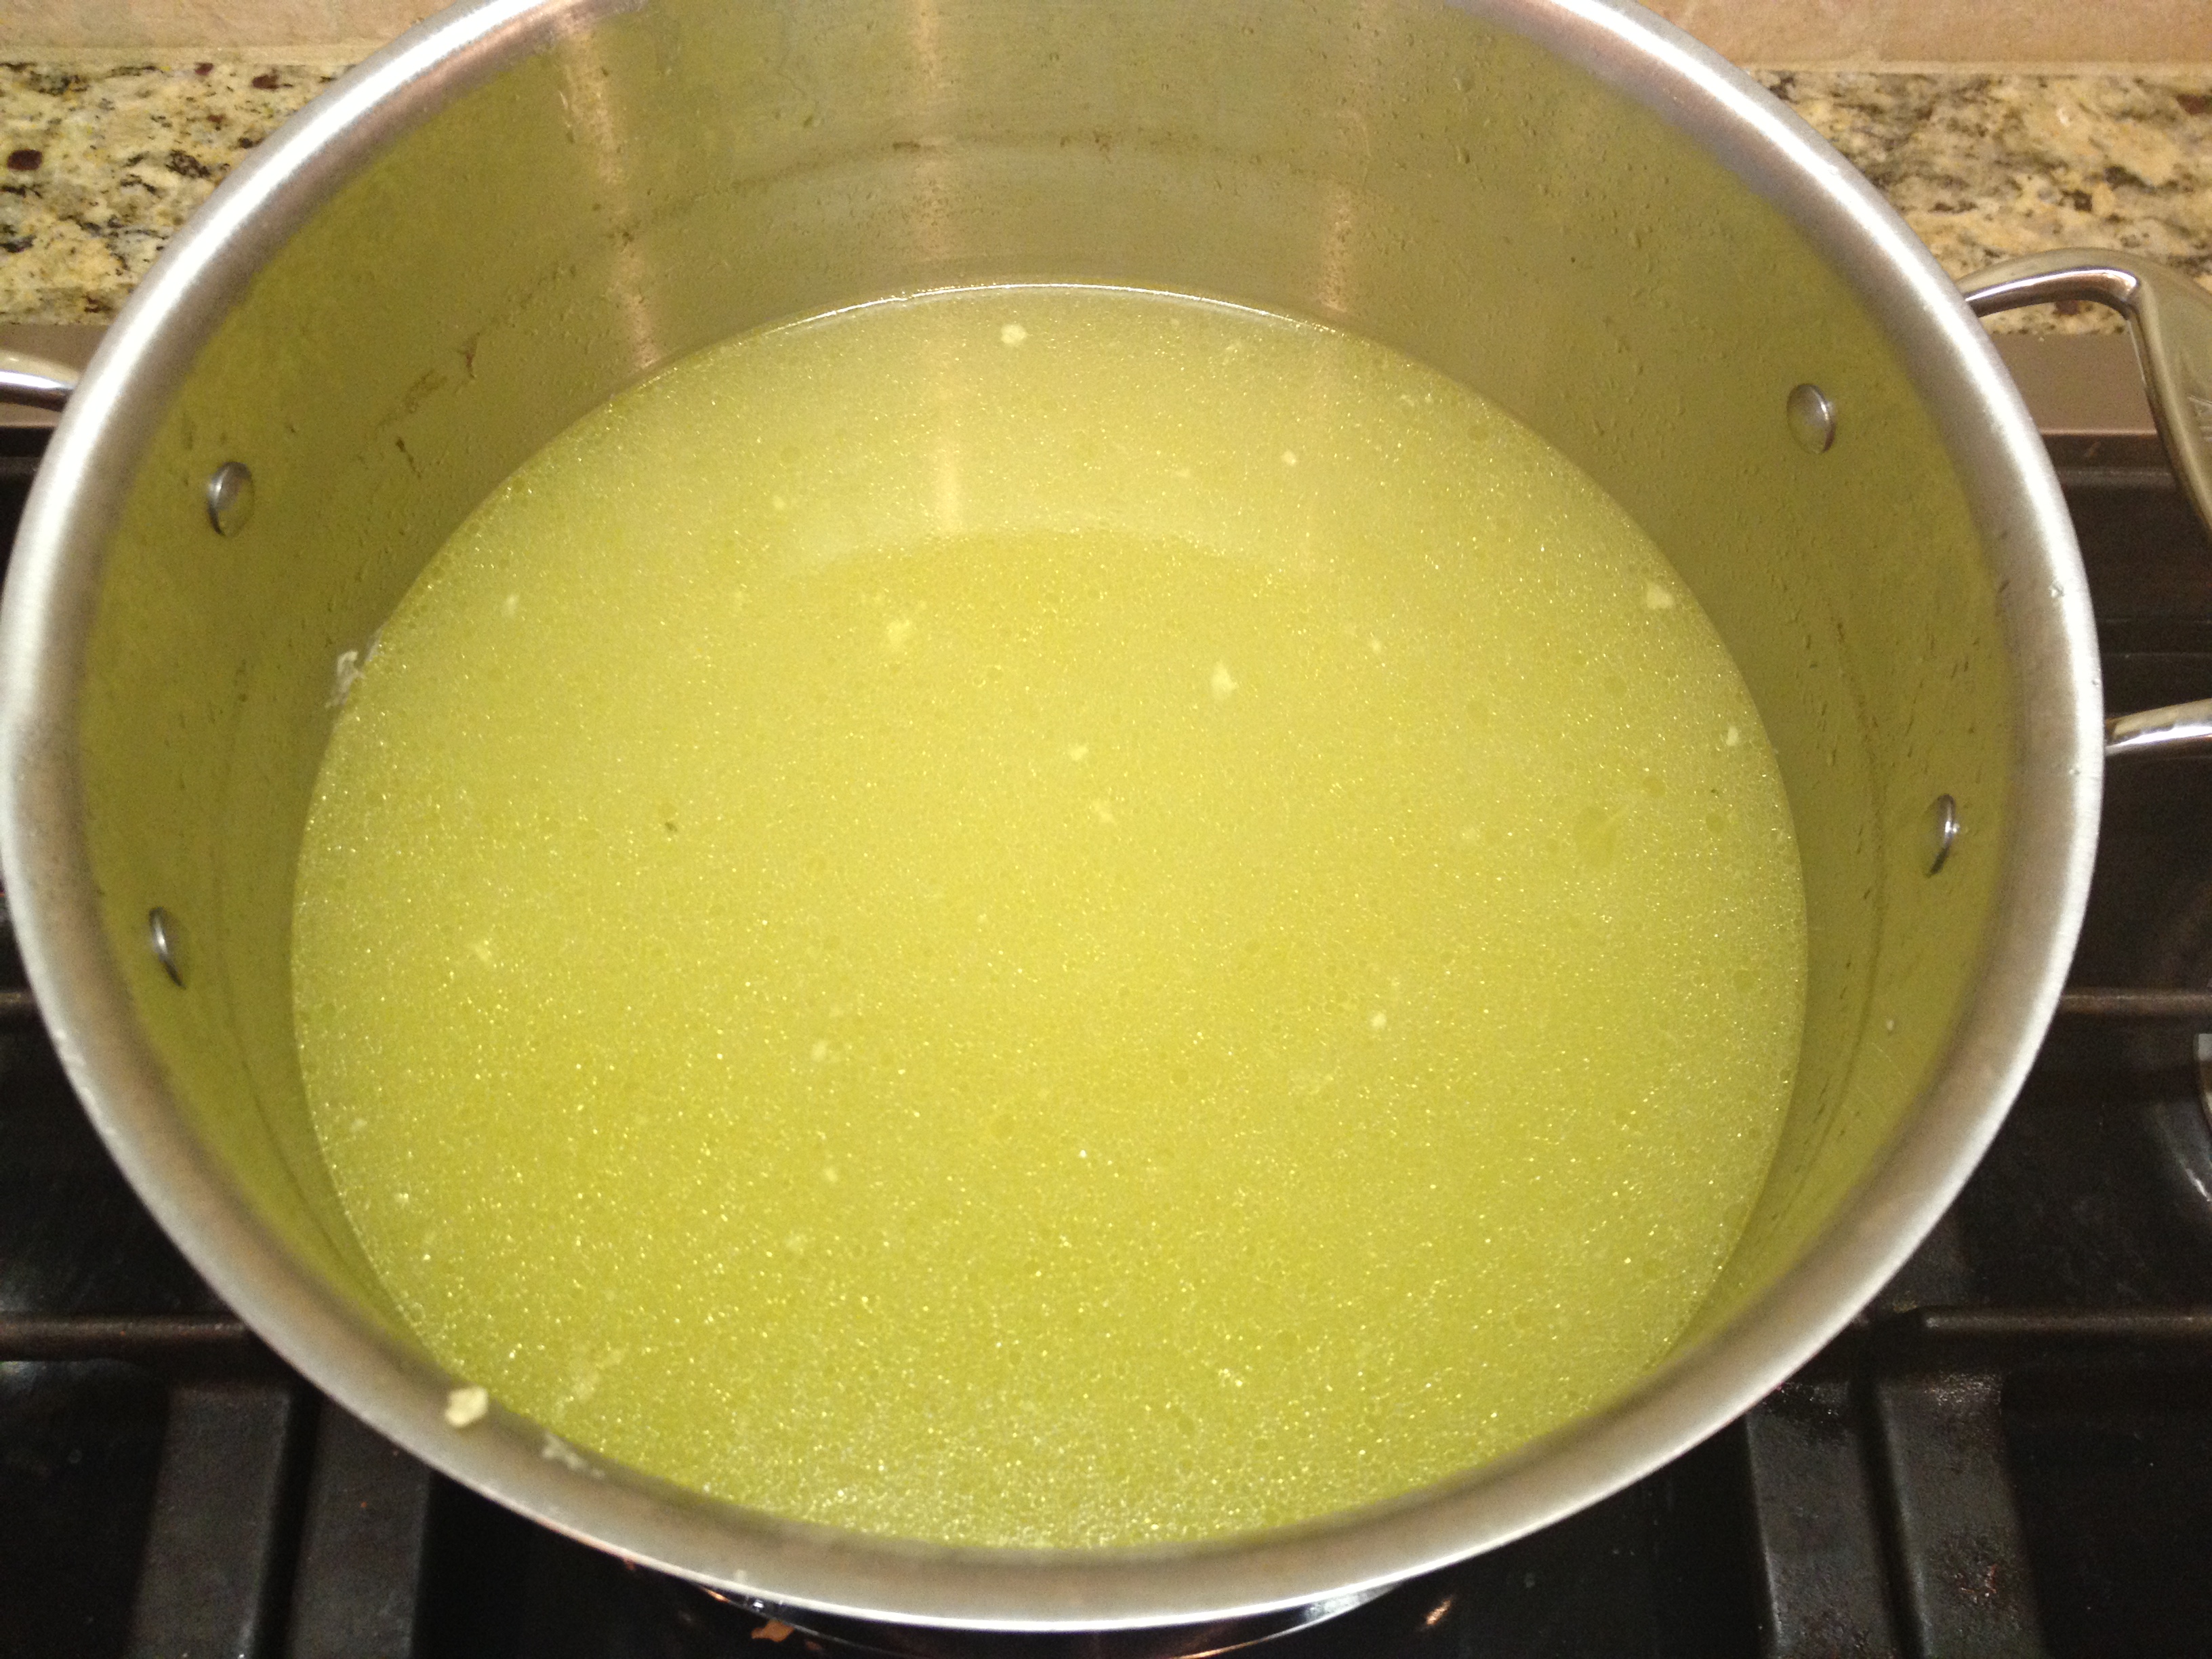
Next, cut up the chicken into chunks. Bring the broth to a boil and throw in the vegetables, potatoes and chicken. Once to a boil, reduce to a medium-low heat. Allow the soup to simmer for about 20-40 minutes.

IMG_3151

Time to serve!

IMG_3168

IMG_3166

T.W.O. signature

Cranberry, Brie & Caramelized Onion Tart

imageNext week is Christmas and T.W.O. has the perfect appetizer for you to serve! It’s a festive, light and flavorful spin on your traditional baked brie.  Check out how to make this cranberry, brie & caramelized onion tart that will be a crowd pleaser.  (Adapted from Stella Artois)

INGREDIENTS:

-1 sheet puff pastry, defrosted
-2 tablespoons unsalted butter
-1 tablespoon extra-virgin olive oil
-1 large yellow onion, diced
-¼ cup brown sugar
-¼ cup plus 1 tablespoon granulated sugar
-⅓ cup water
-1 cup fresh cranberries
-1 teaspoon oregano
-2 ounces Brie, sliced into ¼-inch-thick pieces
-Freshly ground pepper

In a large, heavy-bottomed skillet set over low heat, melt the butter. Once the butter starts to foam, add olive oil, brown sugar and ground pepper.  Cook the onions over medium heat for about 30 minutes. Stir occasionally.

image

Preheat oven to 425ºF.

In a small saucepan set over medium heat, combine sugar and 1/3 cup water.  Stir until the sugar dissolves, then add cranberries. Cook for 5 minutes, stirring occasionally.

imageimage

Drain and set cranberries aside.

While the onions are cooking, take the defrosted puff pastry and lay on a greased cookie sheet.  Using a small butter knife score a ½-inch border around the end of the square.  This will make a “crust” for the tart.

Once the onions are done, spread the evenly across the puff pastry.  Sprinkle oregano and cheese and cranberries on top.

image image

Cook the tart for 15-20 minutes.  Once done, remove the tart from the oven and let it sit for 5minutes prior to cutting.

image

Happy Cooking!

T.W.O. signature 

Peanut Butter Cups

image

The idea of making homemade candy might intimidate a lot of people. It sounds difficult, time consuming, and a lot harder than just getting in a car and driving to the market. Well put down those car keys and stay put because T.W.O. has the recipe for you!  Candy making can be easy, fun, and tastier than store-bought candy! We decided to take one of our favorite ingredients-peanut butter- and make homemade peanut butter cups! You will never want to buy store bought Peanut Butter Cups after making this recipe!

Ingredients

-1/2 cup peanut butter*
-2 Tablespoons unsalted butter
-2 Tablespoons light brown sugar, packed
-1/2 cup confectioners’ sugar
-pinch of salt
-1 Tablespoon Crisco or butter
-2 to 3 cups chocolate chips

IMG_3142

 *T.W.O. used crunchy peanut butter, but also suggests using creamy-both are delicious!

First, line a muffin pan with paper liners and set aside. Mini muffin pans can also be used for smaller candy pieces.

Next, add the peanut butter and brown sugar to a medium saucepan. Set over low-medium heat, stirring constantly until the mixture is melted and smooth. When the mixture starts to bubble around the edges, take the pan from the heat and add the confectioners’ sugar in steps, mixing well after each addition. Then add a pinch of salt and mix. Set aside to cool.

IMG_3143

While the peanut butter mixture is cooling, place about 1-1½ cups chocolate chips into a microwave safe bowl. Add the Crisco or butter to the chocolate chips and microwave for about 30-45 seconds. Take the bowl out of the microwave and mix. If the chocolate chips are not fully melted, place back into the microwave for a very short time. You don’t want them to burn!

IMG_3144

Once melted, spoon the melted chocolate into one well of the prepared muffin tin. Use a paintbrush or the back of the spoon to spread the chocolate about ¾ of the way up the sides of the paper liner. Fill one well at a time so the chocolate doesn’t set before you have time to spread it. Once all the liners have a chocolate coating, place the muffin tin into the freezer for about 10 minutes or until the chocolate has set.

IMG_3145

While the chocolate is setting, begin shaping the peanut butter filling. Take about 1 tablespoon (1 teaspoon if using the mini muffin tins) of the peanut butter mixture and roll into a ball.

IMG_3150

Then flatten into a patty with a size a little smaller than the diameter of the muffin well bottom. Repeat with the remaining peanut butter mixture and then chill in the freezer for about 5-10 minutes. Once chilled, remove the muffin pan and peanut butter patties from the freezer. Place one patty in each chocolate cup.

IMG_3153

Next, place the bowl of chocolate (if left over) plus the remaining chocolate chips back into the microwave to melt. When the chocolate is melted, pour it over each of the peanut butter patties until covered. Once each well is filled with chocolate, put the muffin pan into the freezer for about 15-20 minutes to chill and harden.

IMG_3154

When this time is up, take the pan out of the freezer and allow to sit for 3 minutes. Then it is time to take the peanut butter cups out and enjoy!!! There is no doubt you will be enjoying T.W.O. of these!

IMG_3160

IMG_3161

image

Enjoy!

T.W.O. signature

Roasted Brussels Sprouts

IMG_3131

Indications to modern Brussels sprouts were likely cultivated in ancient Rome. Brussels sprouts, as we call them now, we grown as early as the 13th century in what is now Belgium.  Brussels sprouts have made their way into the American cuisine. Today, they have become a popular item on restaurant menus as well as in households. These “mini cabbages” are full of nutritional benefits and have often been considered a power food. Whether they are boiled, roasted, or shredded- they will make for a great meal.

Ingredients

-20 to 30 brussels sprouts -1 to 2 tablespoons of olive oil -1/3 cup balsamic vinegar -1/4 cup spicy or Dijon mustard -Garlic powder -Salt & Pepper

IMG_3116

Preheat oven to 400°F. Begin by washing the brussels sprouts and cut each in half.

IMG_3117

Place the cut brussels sprouts in a bowl.Next, pour the olive oil, balsamic vinegar, mustard, garlic powder, salt and pepper over the brussels sprouts and mix.

IMG_3119

After the brussels sprouts have been coated well, spread them on a foil lined cookie sheet.

IMG_3120

Place in oven for about 15-20 minutes. The last 2-3 minutes, put the oven on broil to crisp them. Make sure to watch them closely, for you don’t want them to burn!

Time to eat!

IMG_3131

 T.W.O. signature

Leg of Lamb

IMG_3128

With the holidays in full swing, there are parties to attend and parties to host. And with hosting a party, it might mean that you are responsible for the meal. You are in luck-T.W.O. has a fabulous recipe for your main entrée- Leg of Lamb! We absolutely love this dish- it is easy, full of flavor and perfect for a group of people. Plus, it makes for great leftovers!

Ingredients

-4 ½ lb. boneless leg of lamb
-5 garlic cloves, halved
-Montreal Steak Seasoning
-Apricot preserves

Preheat oven to 425°F. Begin by washing the leg of lamb. Place leg of lamb in a roaster pan. Using a knife, poke holes in the leg of lamb for the garlic cloves. Make sure to do this for the bottom of the lamb. Take garlic and stick into each hole.

IMG_3103

IMG_3104

Next, season both sides with Montreal Steak seasoning.

IMG_3105

When the oven has reached its temperature, place the lamb in. Roast for 15 minutes at 425°F. After 20 minutes, turn heat down to 325°F for the remainder of the time. Leg of lamb should be roasted for about 20 minutes per pound or reach an internal temperature of 145°F. A 4 ½ pound lamb takes about 1 hour and 15 minutes.  About 15 minutes before the lamb is ready, cover spread apricot preserves on the lamb. Make sure to put a good amount on the top and sides.

IMG_3128

Once the lamb has reached an internal temperature of 145°F, take it out and cover with foil. Let the lamb sit for about 10 minutes.

IMG_3129

After it has had time to sit, you are ready to slice and service!

IMG_3130

IMG_3133

 Bon appetite!

T.W.O. signature

Fig & Brie Pizza with Caramelized Onions and Spinach

image

It’s Friday Night Pizza Night with T.W.O.!! This time, it wasn’t just us cooking in the kitchen – it was some of the most important women in our lives that helped us prepare this meal. Thank you to our Mom, Aunt and Sister In-Law who made this one of the best pizza making nights for the books!!! Soo – what was on the menu? Well, we had six different pizzas all made with what we had in the refrigerator. Yep, that’s right – there was no last minute rush to the market to get the ingredients. Today we are featuring the Fig & Brie Pizza with Caramelized Onions and Spinach. Check out how to make this mouth-watering, savory pizza.

image

Now Show Me How Much Fun You Are Having!

image

Ingredients

– Pizza Dough*
– Cornmeal
– Flour
– ¾ cup fig jam**
–  ¾ cup caramelized onions
– 6 slices brie cheese
– 2 cups spinach salad tossed in THIS dressing

*T.W.O. used pizza dough from Lucci’s Deli.
** The fig jam was homemade and jarred by our Aunt.

image

Preheat oven to 425ᴼF. Roll out the pizza dough on a floured/ cornmeal surface. Once the dough is evenly rolled out, transfer the dough to a greased cookie sheet. Next take the fig jam and spread it on the dough, making sure you reach all the edges. Sprinkle caramelized onions evenly on top of the fig jam.

image

Next add the slices of brie cheese to the top of the pizza. If you want your pizza to have more cheese, T.W.O. isn’t stopping you –go ahead!

Let the pizza rise for about 15 minutes. Note – you don’t want to put the pizza in a cold oven, so make sure your oven reaches 425ᴼF.Once the oven is ready, place the pizza in the oven and watch closely. Do not open the oven door, as you want to keep the heat in. The pizza will take 15-20 minutes. Once done, take the pizza out of the oven and let it sit for 5 minutes prior to cutting.

image

Add the salad to the top of your pizza and you our friend have the perfect pizza!

image image image

Happy Friday Night Pizza!

T.W.O. signature

Cheese-Filled Pastry

image

Waking up in the morning and enjoying a cup of coffee along with a fresh piece of pastry is typical of the European lifestyle. T.W.O. would love to take on that same tradition and bring it to the States. Every day is a vacation, right? Well not exactly, but T.W.O. can help out in the pastry department. Learn how to make this scrumptious cheese pastry that will “WOW” a crowd!

Ingredients

For the Dough:
-2 ¼ teaspoons instant yeast
– ¼ cup water, lukewarm
– ½ cup 2% milk, lukewarm
-¼ cup unsalted butter, melted
– ¾ cup granulated sugar
-1 Tablespoon vanilla
– 1 egg
– 3 cups unbleached all-purpose flour

 For the Filling:
-8 ounces cream cheese or Neufchâtel, room temperature
-½ cup granulated sugar
-1 egg
-1 Tablespoon vanilla extract
– 2 teaspoons lemon zest or orange zest
-3 Tablespoons flour
– 1 cup of your favorite fruit jam or chocolate chips*

*T.W.O. doubled the recipe and made 3 large braids. They used apricot jam, boysenberry preserves and chocolate chips.

image

In a small bowl, mix the lukewarm water and the yeast together. Set aside. Mix all the dough ingredients together in a large bowl. (It’s best to use a mixer or a pastry blender) Mix in the water/yeast mixture. The dough should form a soft, smooth ball. Set aside and cover for about 2 hours or until the dough has doubled in size.

image

While the dough is rising, start making the filling. Using a KitchenAid or handmixer, mix the cream cheese until fluffy. Add the egg, sugar and vanilla. Mix well. Finally, add the lemon/orange zest and flour. Place the filling in the refrigerator to chill.

image

After the dough has doubled in size, place the dough on a floured surface and divide in half. Roll each dough out into a long rectangle making sure it is rolled out evenly.

image image

Spread the cream cheese filling in the middle of the dough. Top with your favorite jam or chocolate chips. Cut 1 inch wide strips around the edge of the dough. Fold the strips towards the middle to create a lattice top.


Click the thumbnails for a larger photo

Once completed, cover the pastries and set aside to rise for about 1 hour.

Preheat oven to 350ᴼF.

Right before the pastry is ready to go in the oven, brush the dough with egg whites. Sprinkle with sugar. The pastries will bake for about 30 minutes, but watch them closely so your dough doesn’t get brown.

Ready yet? I think so! Now it’s time to pour yourself some coffee and enjoy your pastry! T.W.O. suggests eating the pastry warm. If you want to reheat the pastry, cover it with foil and place it in a 200ᴼF oven for about 15 minutes.

image image image image image image

Happy Baking!

T.W.O. signature

French Silk Pie

image

Are you a chocolate lover? Are you a pie lover? Well, you are in luck! T.W.O. has the perfect recipe for your –French Silk Pie. It’s a rich, fluffy, dense mousse pie that will be great for your next dinner party!

Ingredients:

-4 oz. bittersweet or semisweet chocolate
-1 teaspoon butter or shortening
-1 cup unsalted butter, softened
-1 ½ cups granulated sugar
-2 tablespoons vanilla extract
-4 eggs, room temperature
-1 fully pre-baked 9 inch pie shell (See recipe HERE)
-3 cups whipped cream

 Preheat oven to 350°F.

In a microwave safe bowl, head the chocolate and butter/shortening in 20-second intervals, stirring between each interval until completely melted. Cool for 10 minutes.

image

With a KitchenAid or handmixer, cream together butter, sugar until fluffy. Add the melted chocolate gradually until mixed well. Add vanilla.

Using a whisk or the whisk attachment, add one egg at a time. Each egg should be beat for 5 minutes, totaling 20 minutes. The filling should be thick and fluffy. Once you get the consistency, add the filling to a pre-baked pie shell.

image

image

Place the pie in the oven and bake for 30 minutes or until a butter knife comes out clean. Let the pie cool for about 30 minutes. Once cooled, place the pie in the refrigerator for a minimum of 4 hours. It’s best to make this pie the night before.

Just when you are ready to serve, put the whipped cream on top of the pie. Garnish the top of the pie with shaved chocolate.

By this time, I am sure you are ready to taste this delectable, chocolaty pie!

imageimage

Happy Baking!

T.W.O. signature

Pear & Almond Galette

image

Galette’s are a quick and easy alternative to making a pie or tart. It doesn’t require a special pan or master technic. Check out how to make this pear & almond galette.

Ingredients

*Flaky Crust:

-2 cups flour
-¾ cup shortening (T.W.O. uses butter flavor)
– 2-3 Tablespoons sugar
– 5-6 Tablespoons cold water
-1 egg white
*Please note this recipe usually makes two pie crusts, so adjust accordingly based on the size you want your galette

Filling:

– 7 ounces almond paste
– 5 Comice Pears, peeled & sliced
– ¼ cup granulated sugar
– 2 Tablespoons cinnamon
– 2 Tablespoons nutmeg
– 2 Tablespoons cornstarch

image

Preheat oven to 425ᴼF. In a bowl mix the flour, shortening, sugar and cold water. T.W.O. uses a pastry blender to mix the dough together until you form it into a ball. Set aside.

In a bowl, carefully mix the sliced pears, sugar, cinnamon, nutmeg and cornstarch. Be careful not to break the pears while mixing.

image

To roll out the dough, make sure your surface is floured so that the dough doesn’t stick to your countertop or mat. Using your rolling pin, roll the dough out evenly in a circular shape. With the assistance of a spatula, move the rolled out dough into the oiled or “PAM’ed” baking pan or cookie sheet. Next, add the almond paste to the center of the dough. You want to make sure the clumps of paste are distributed evenly, leaving a 1 inch border around the edge of the circle. Next add the pear mixture on top of the almond paste.

Using a knife, cut ½ thick strips along the edge of the dough. Next, take each strip and fold over to make a crust. Each strip should be crisscross. Brush the crust with the egg white and sprinkle sugar on top.

image image

Bake the galette for about 35 minutes or until the fruit mixture is bubbling. Check the crust at 15 minutes and if the pie crust is getting brown, cover with foil. Remove the galette and let it sit for 15 minutes before serving. If you don’t plan to eat the galette right away, T.W.O. suggests warming it up prior to eating. Add a scoop of ice cream and you have yourself a gourmet dessert!!!

image image image

Happy Baking!!

T.W.O. signature

Harvest-Stuffed Chicken Breasts

image

Chicken likes to be stuffed “T.W.O.!” It may not replace your Thanksgiving dinner, but definitely is a great dish that all your guests will enjoy before or after Thanksgiving week! It’s simple, healthy, and will make your next dinner party a hit!

Ingredients

– 2 Boneless, skinless, chicken breasts
-Salt & Pepper
-Red Quinoa
-1 Sweet potato, cooked
-Crimini mushroom’s, chopped
-Spinach, chopped
-Dried cranberries
-Goat cheese

image

First cook your quinoa. Start by bringing 2 cups of water to a boil. Next, add your quinoa into the water. Add salt, pepper, or even garlic powder to the mixture. Once to a boil, reduce quinoa to a low heat. Next, chop up your vegetables, including the yam/sweet potatoes.  Add the vegetable mixture and quinoa together.

image

Next, slice your chicken breast in half.

image

Stuff each breast with quinoa mixture and wrap.

image

Secure breast with rotisserie warp. Repeat once again. Place chicken into Pyrex and bake for about 25 minutes or until cooked all the way.

image

image

image

Bam! It’s all about the stuffing!

T.W.O. signature