Goat Cheese, Honey & Pistachio Mini Cheesecakes with Meyer Lemon Curd

image

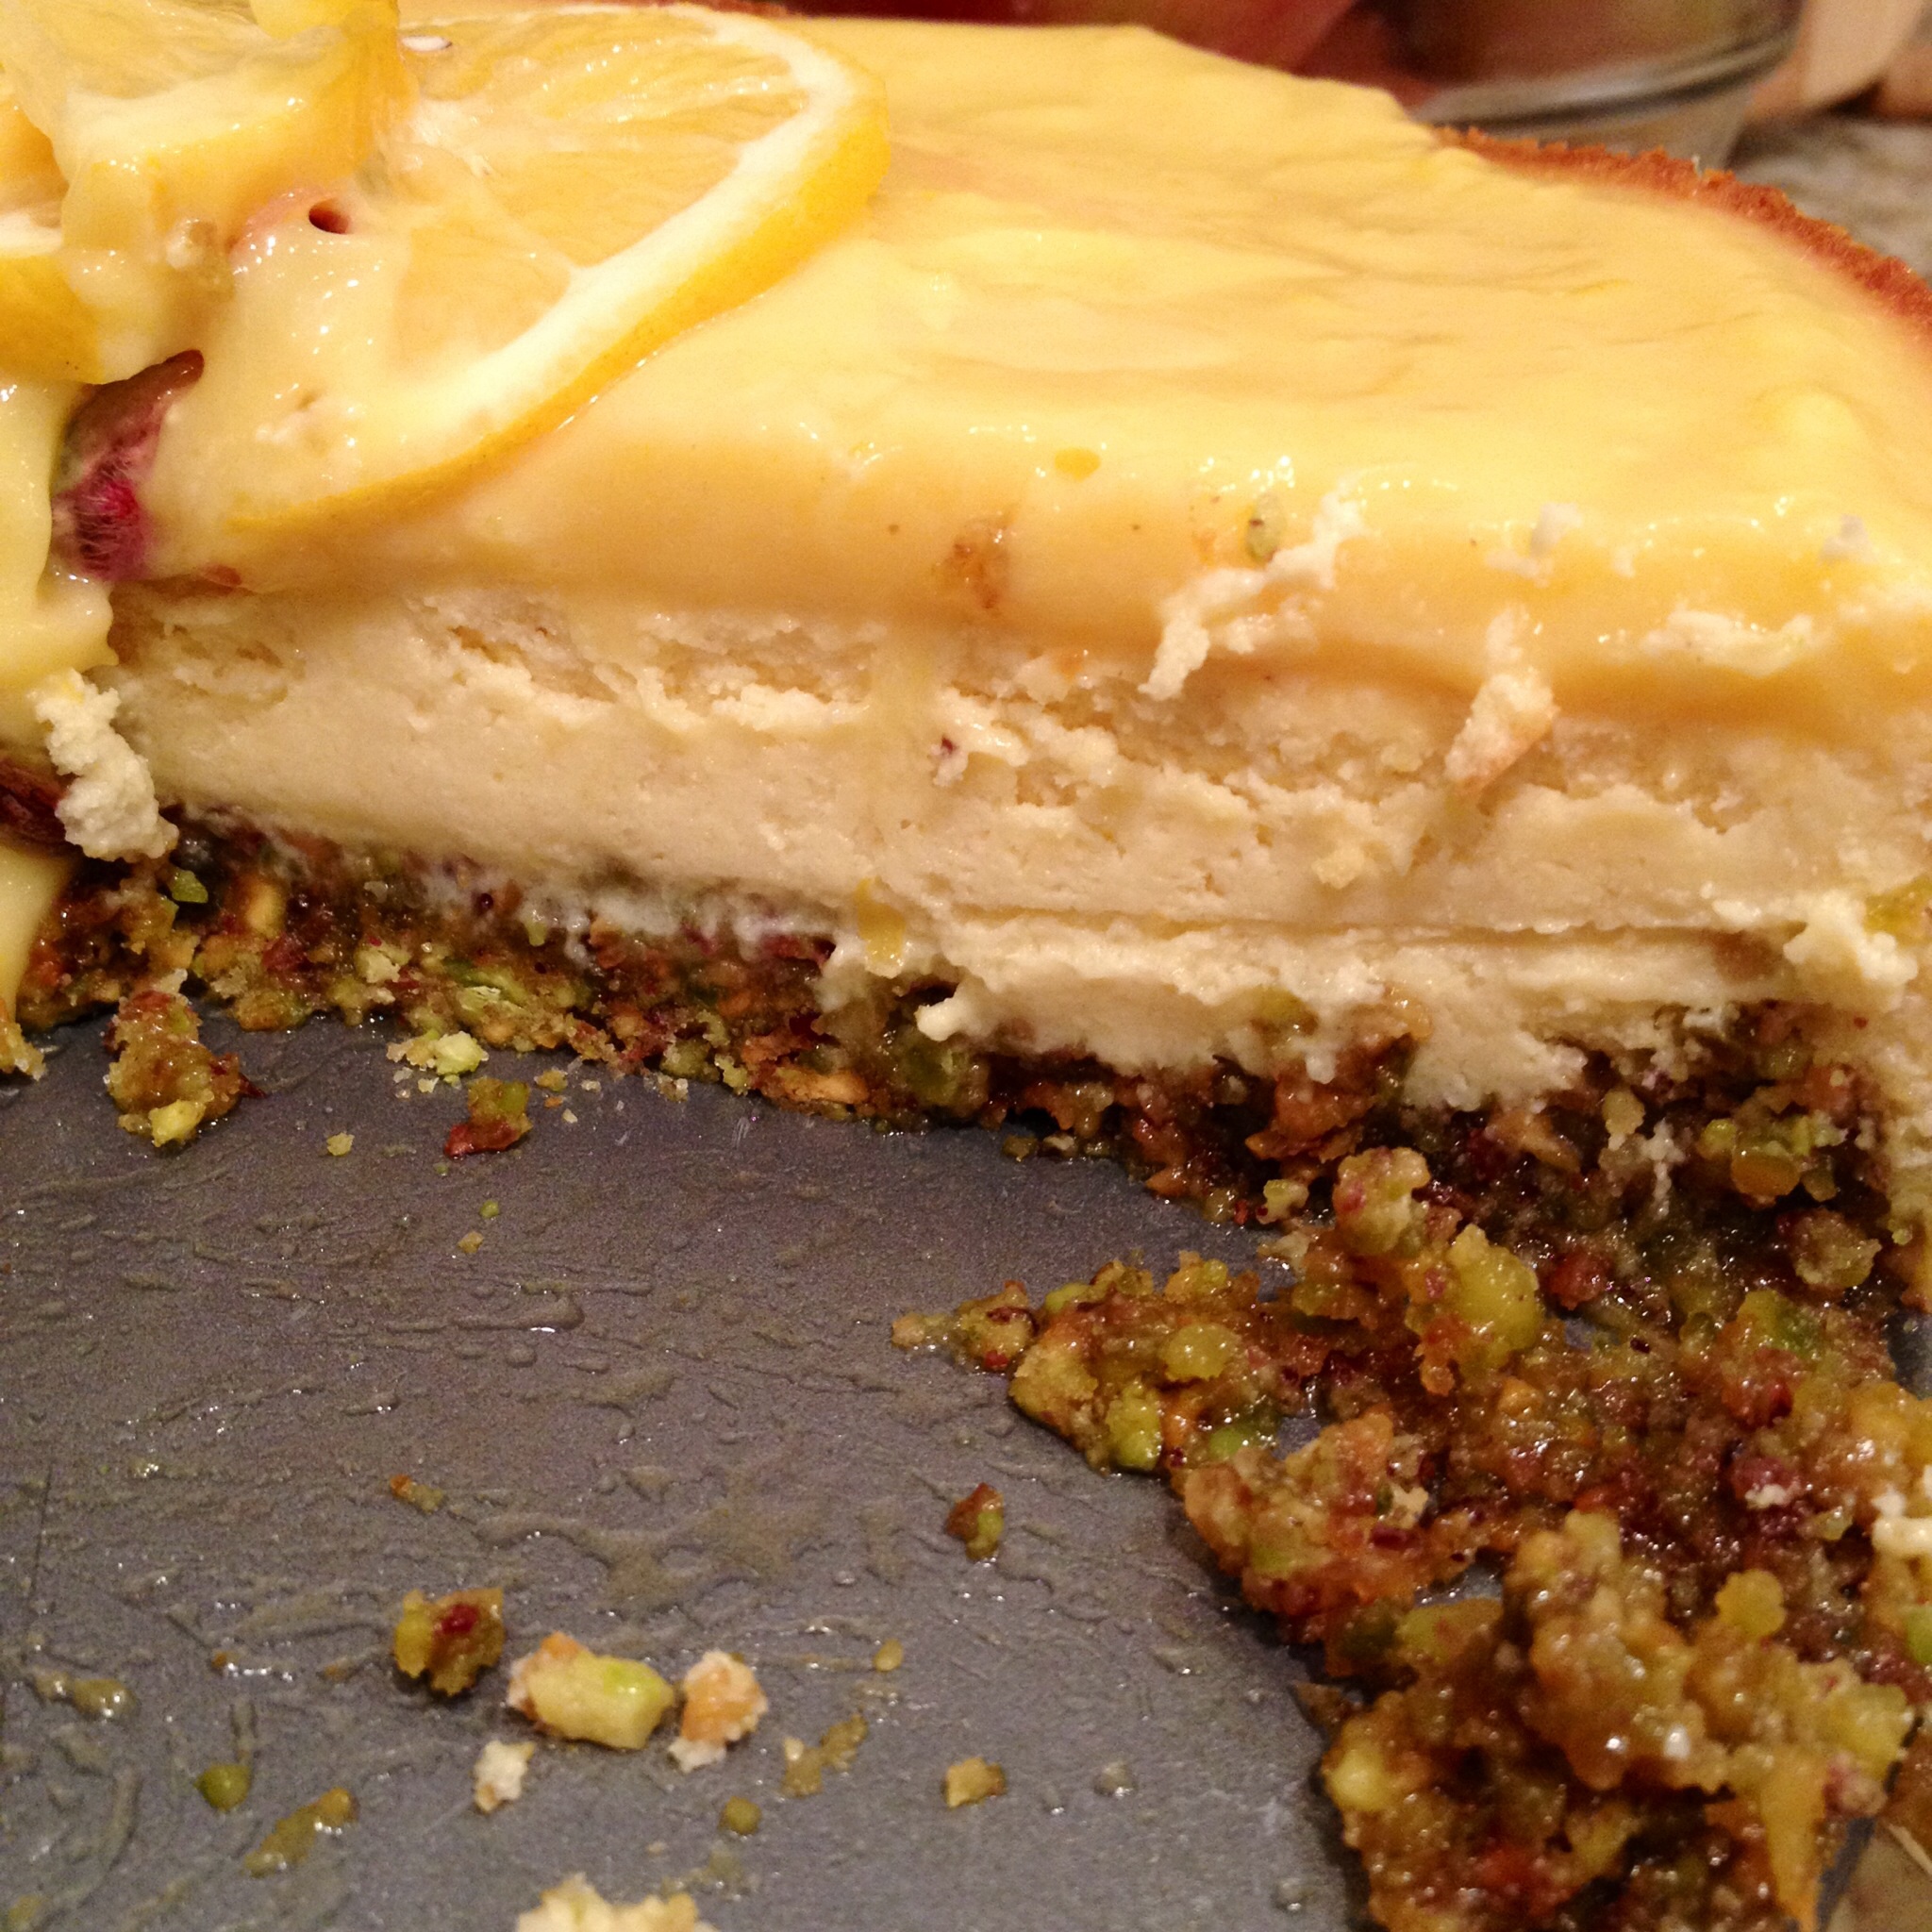
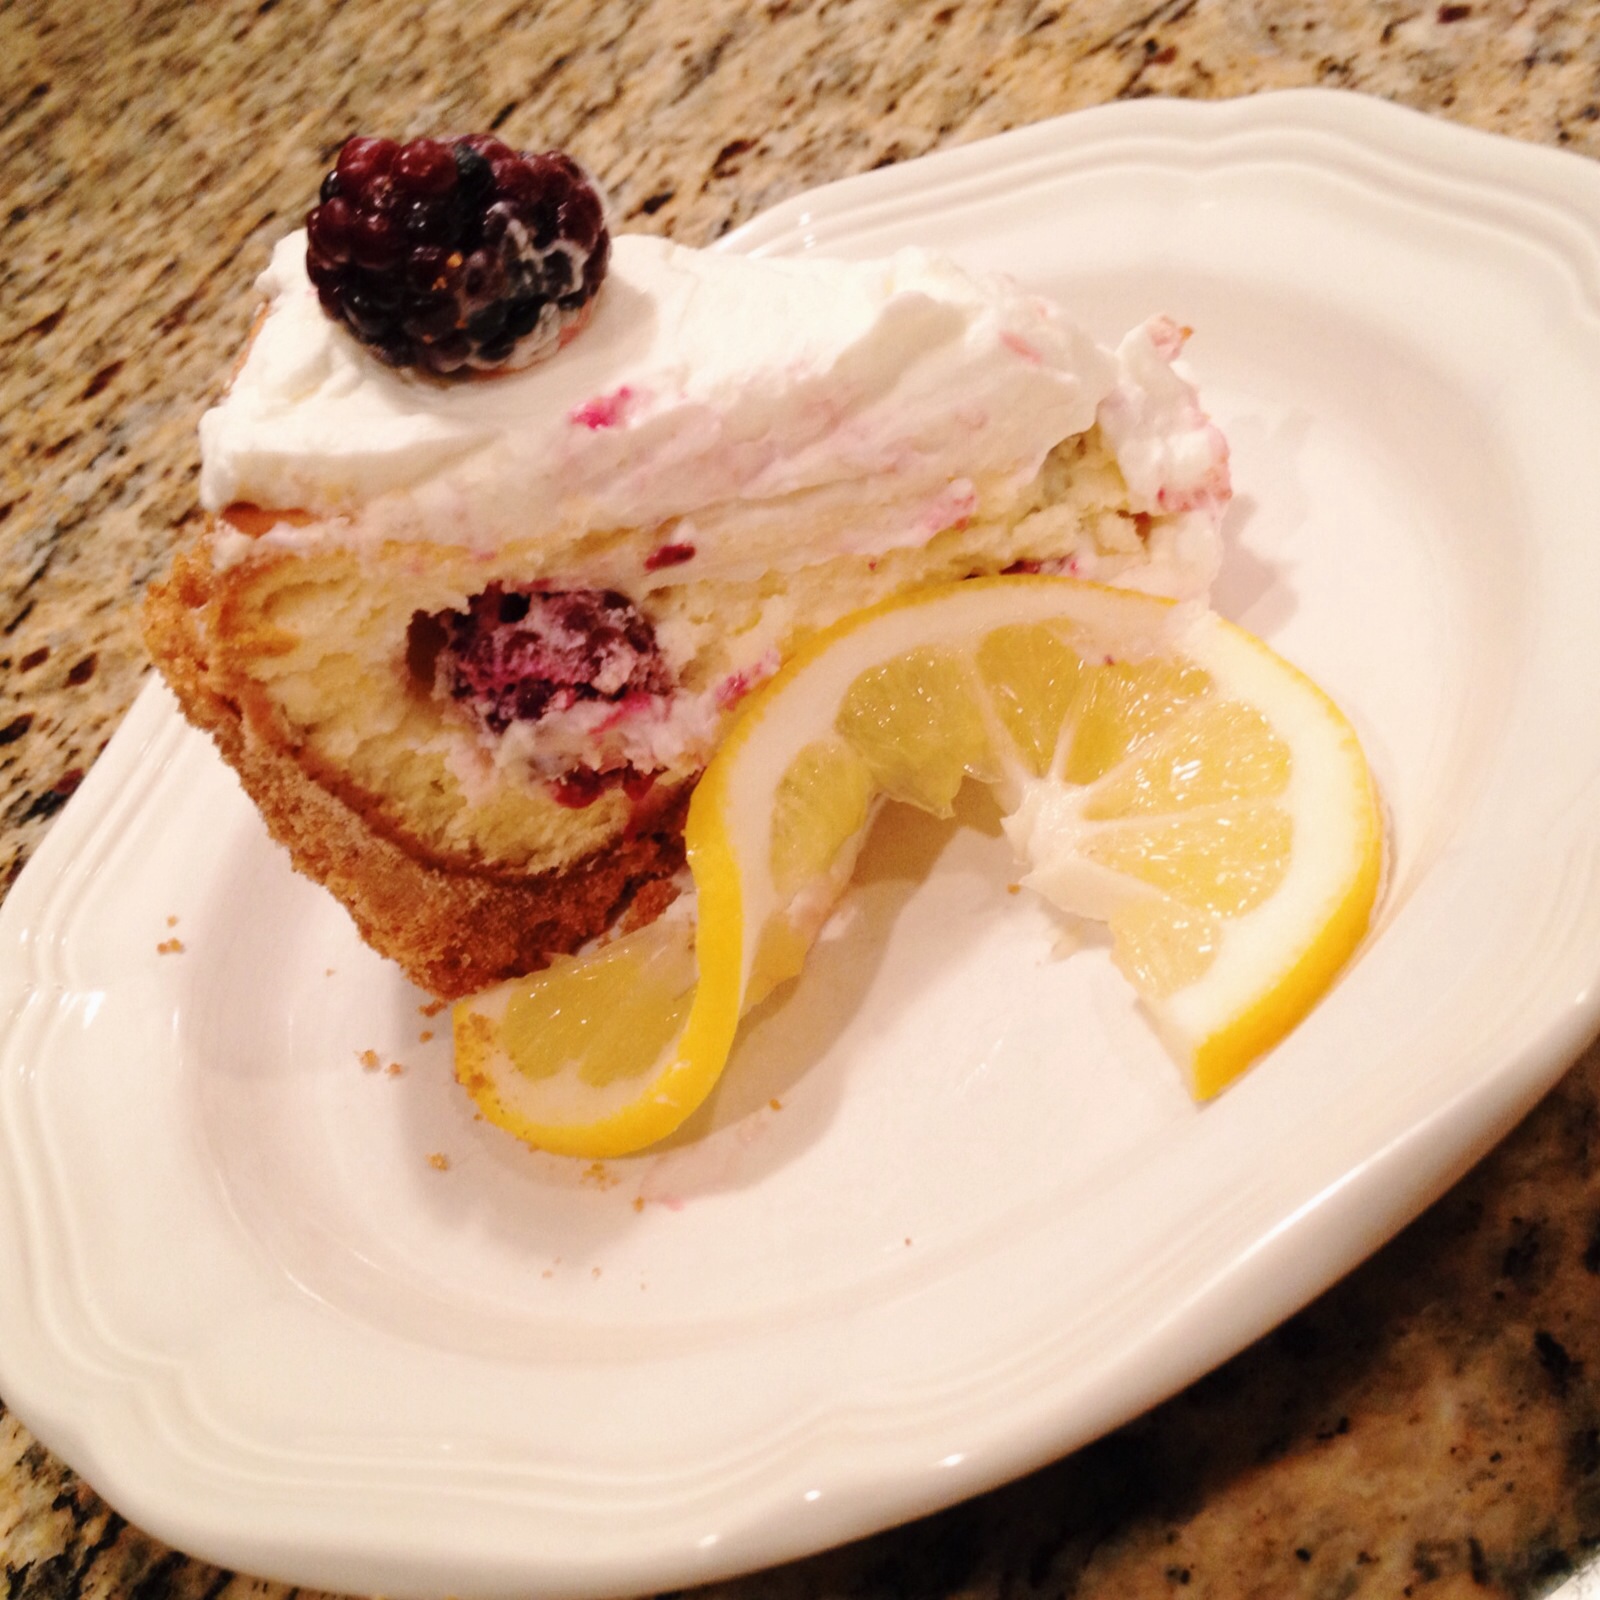
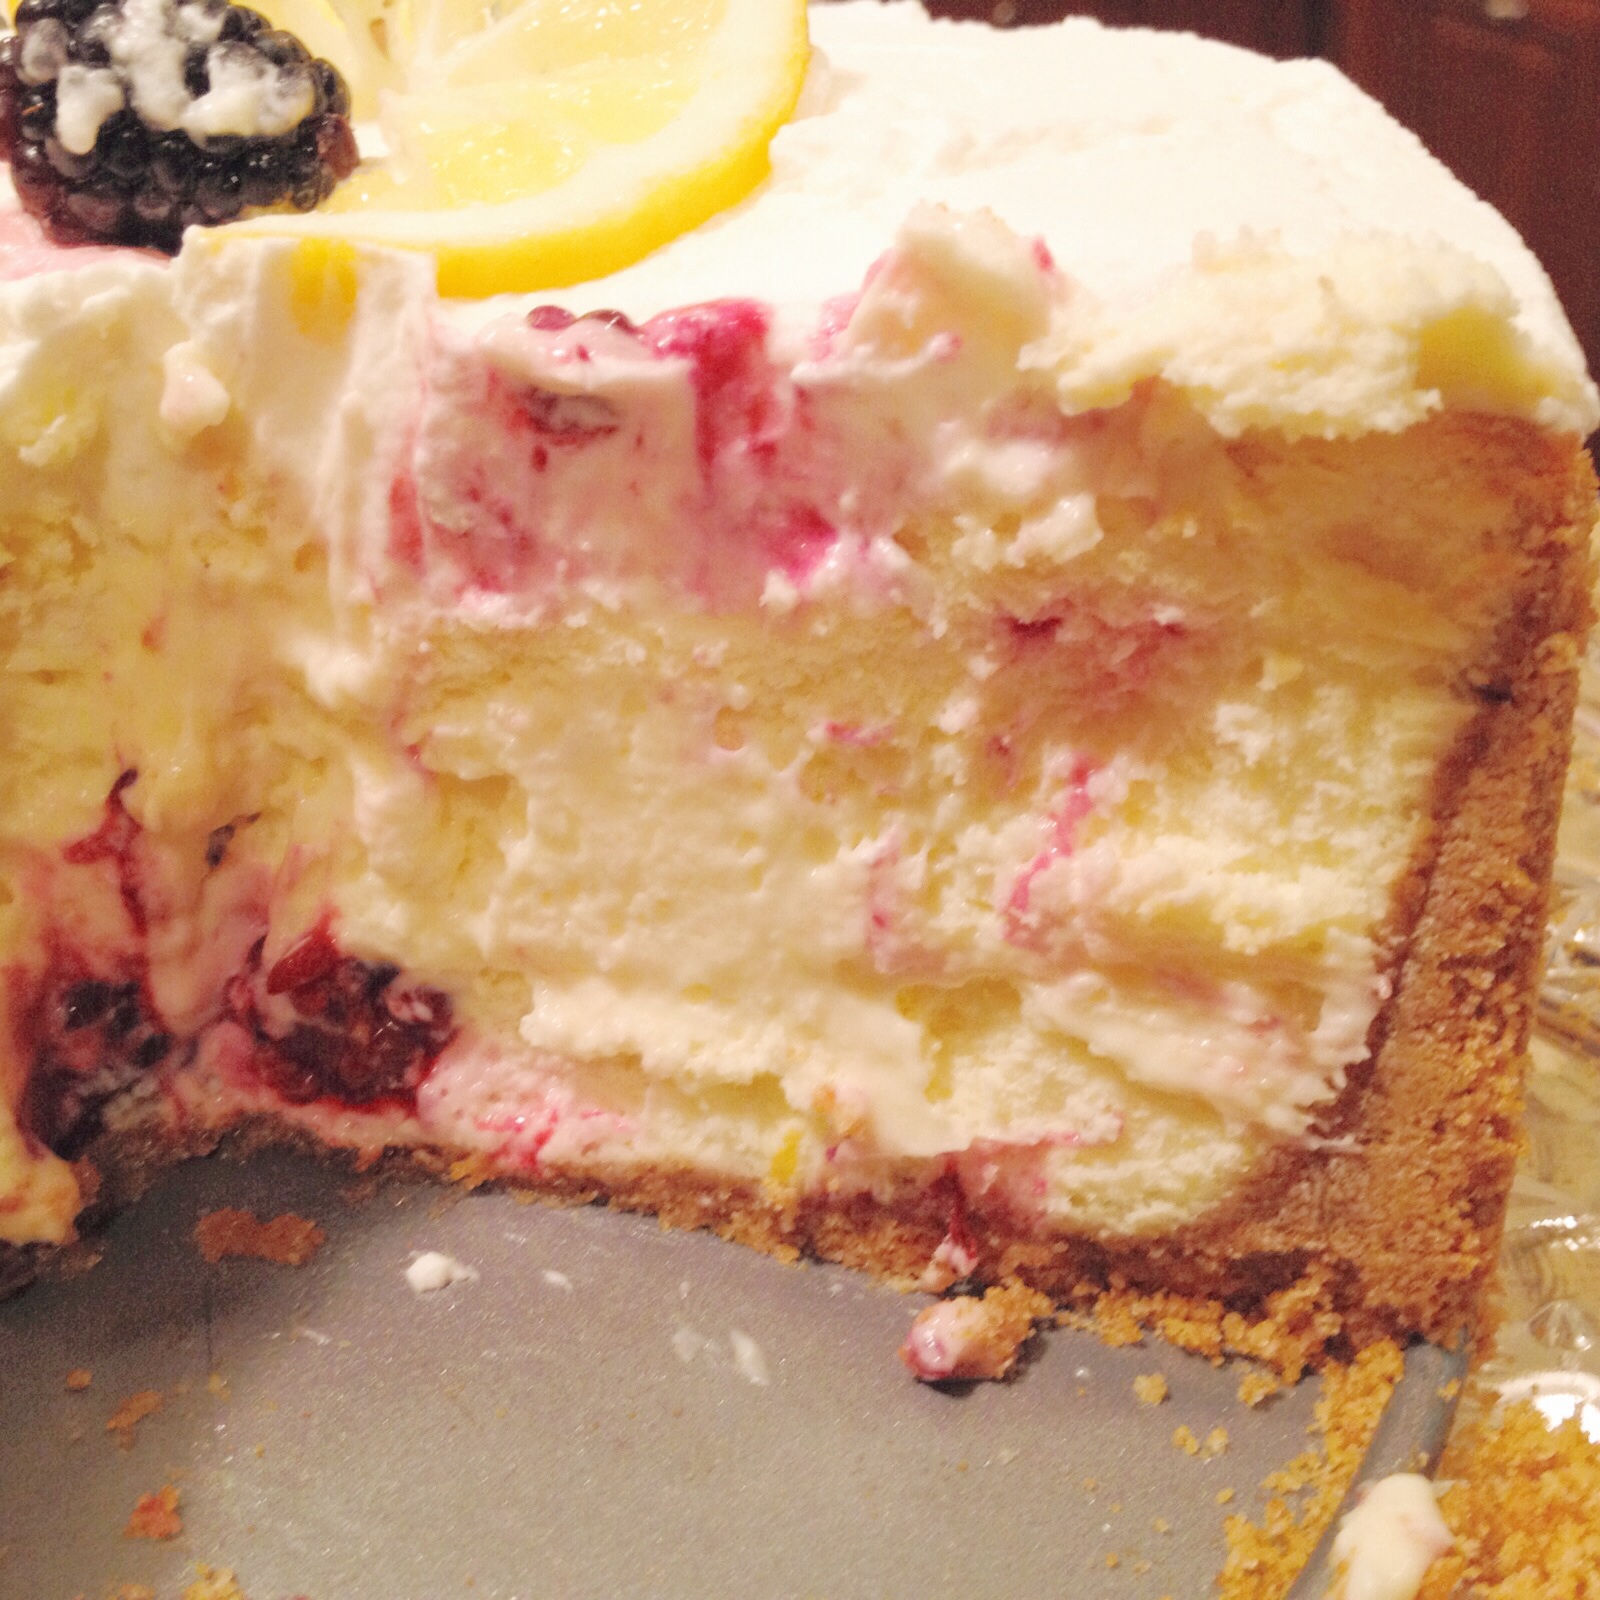
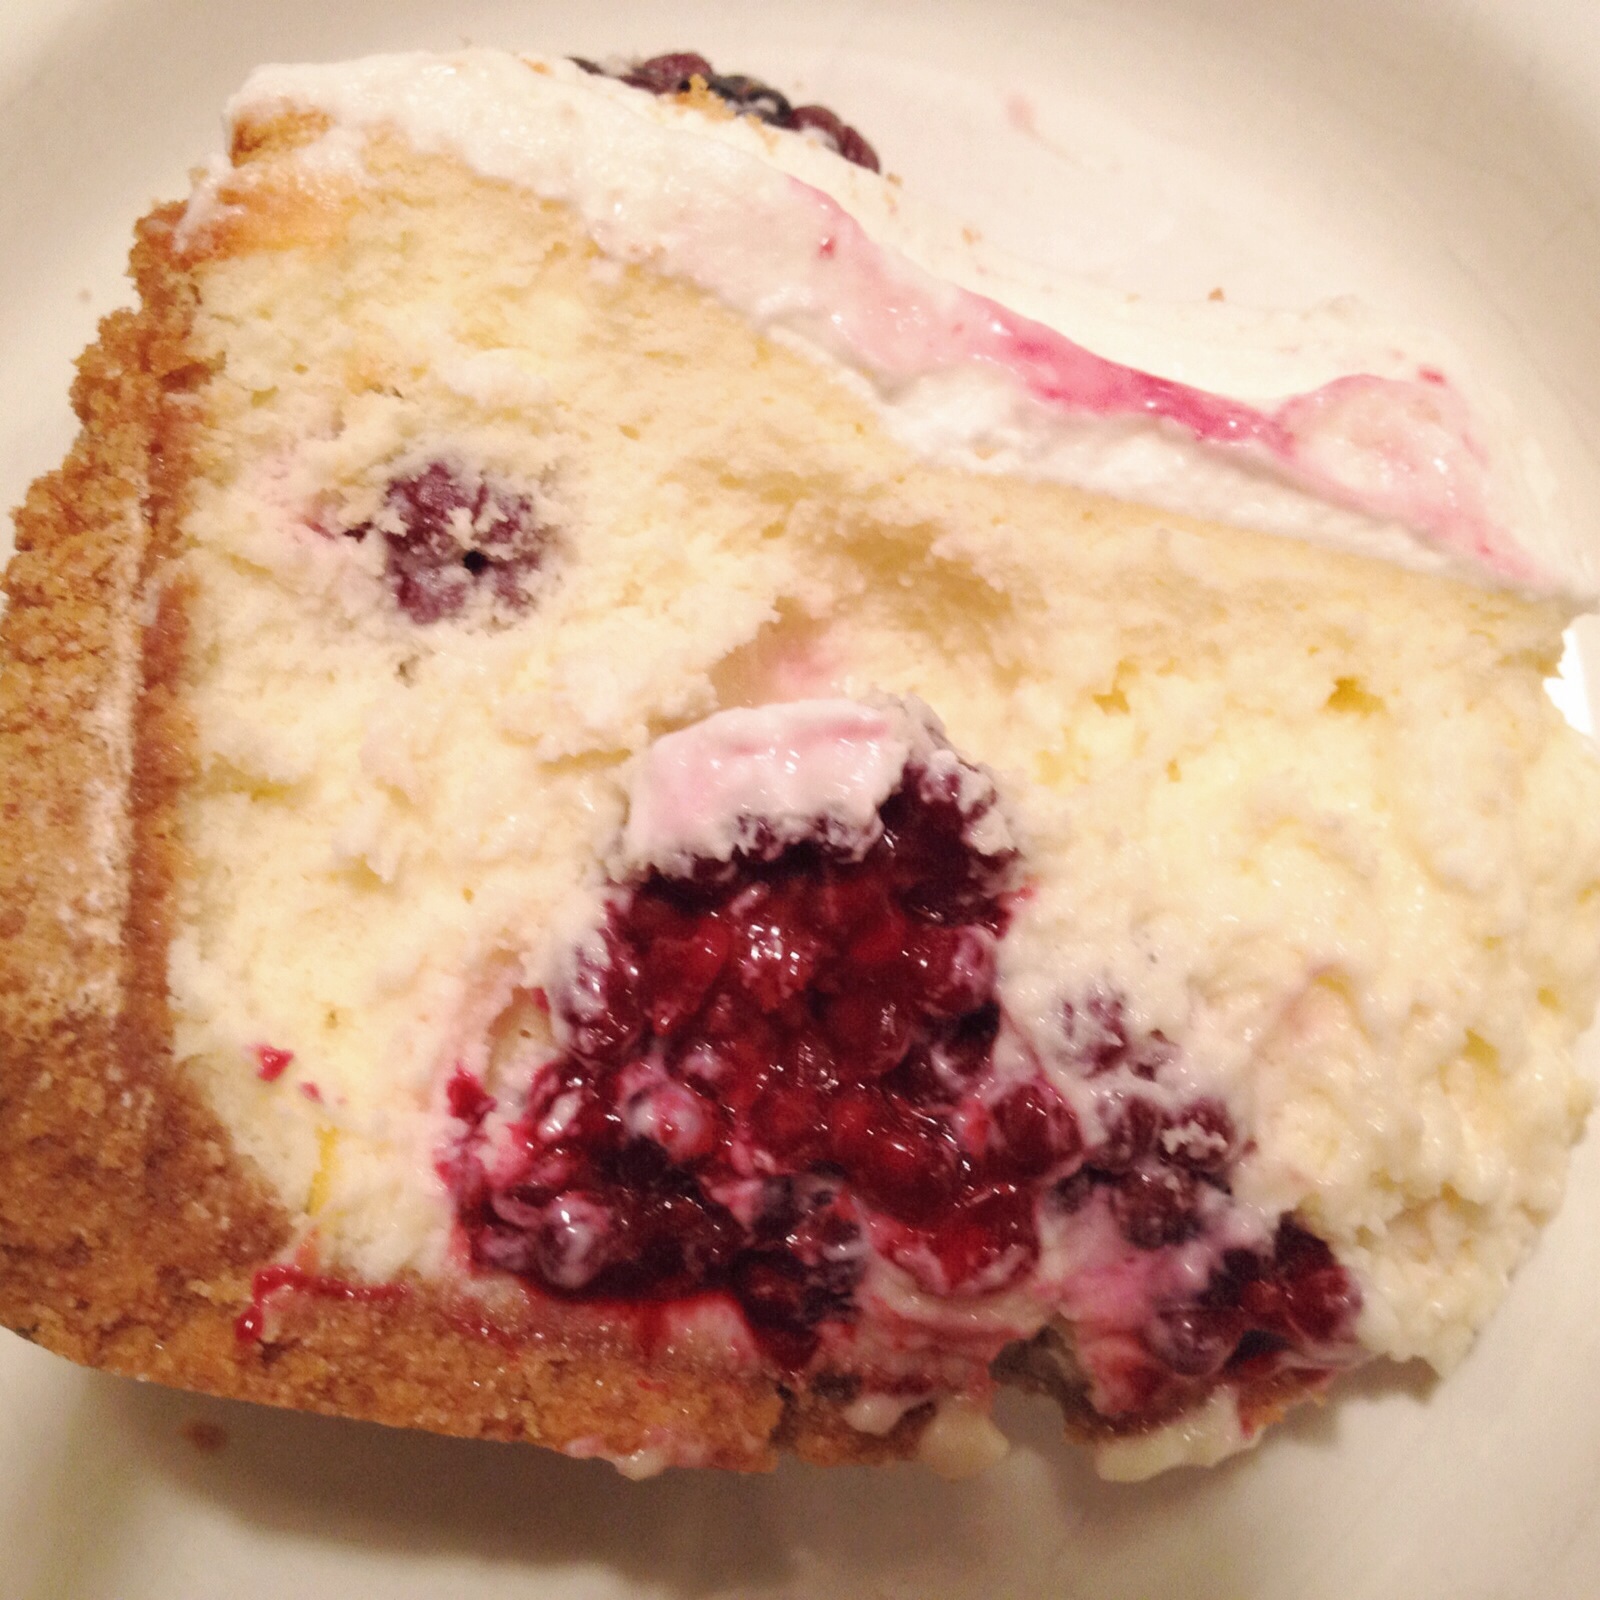
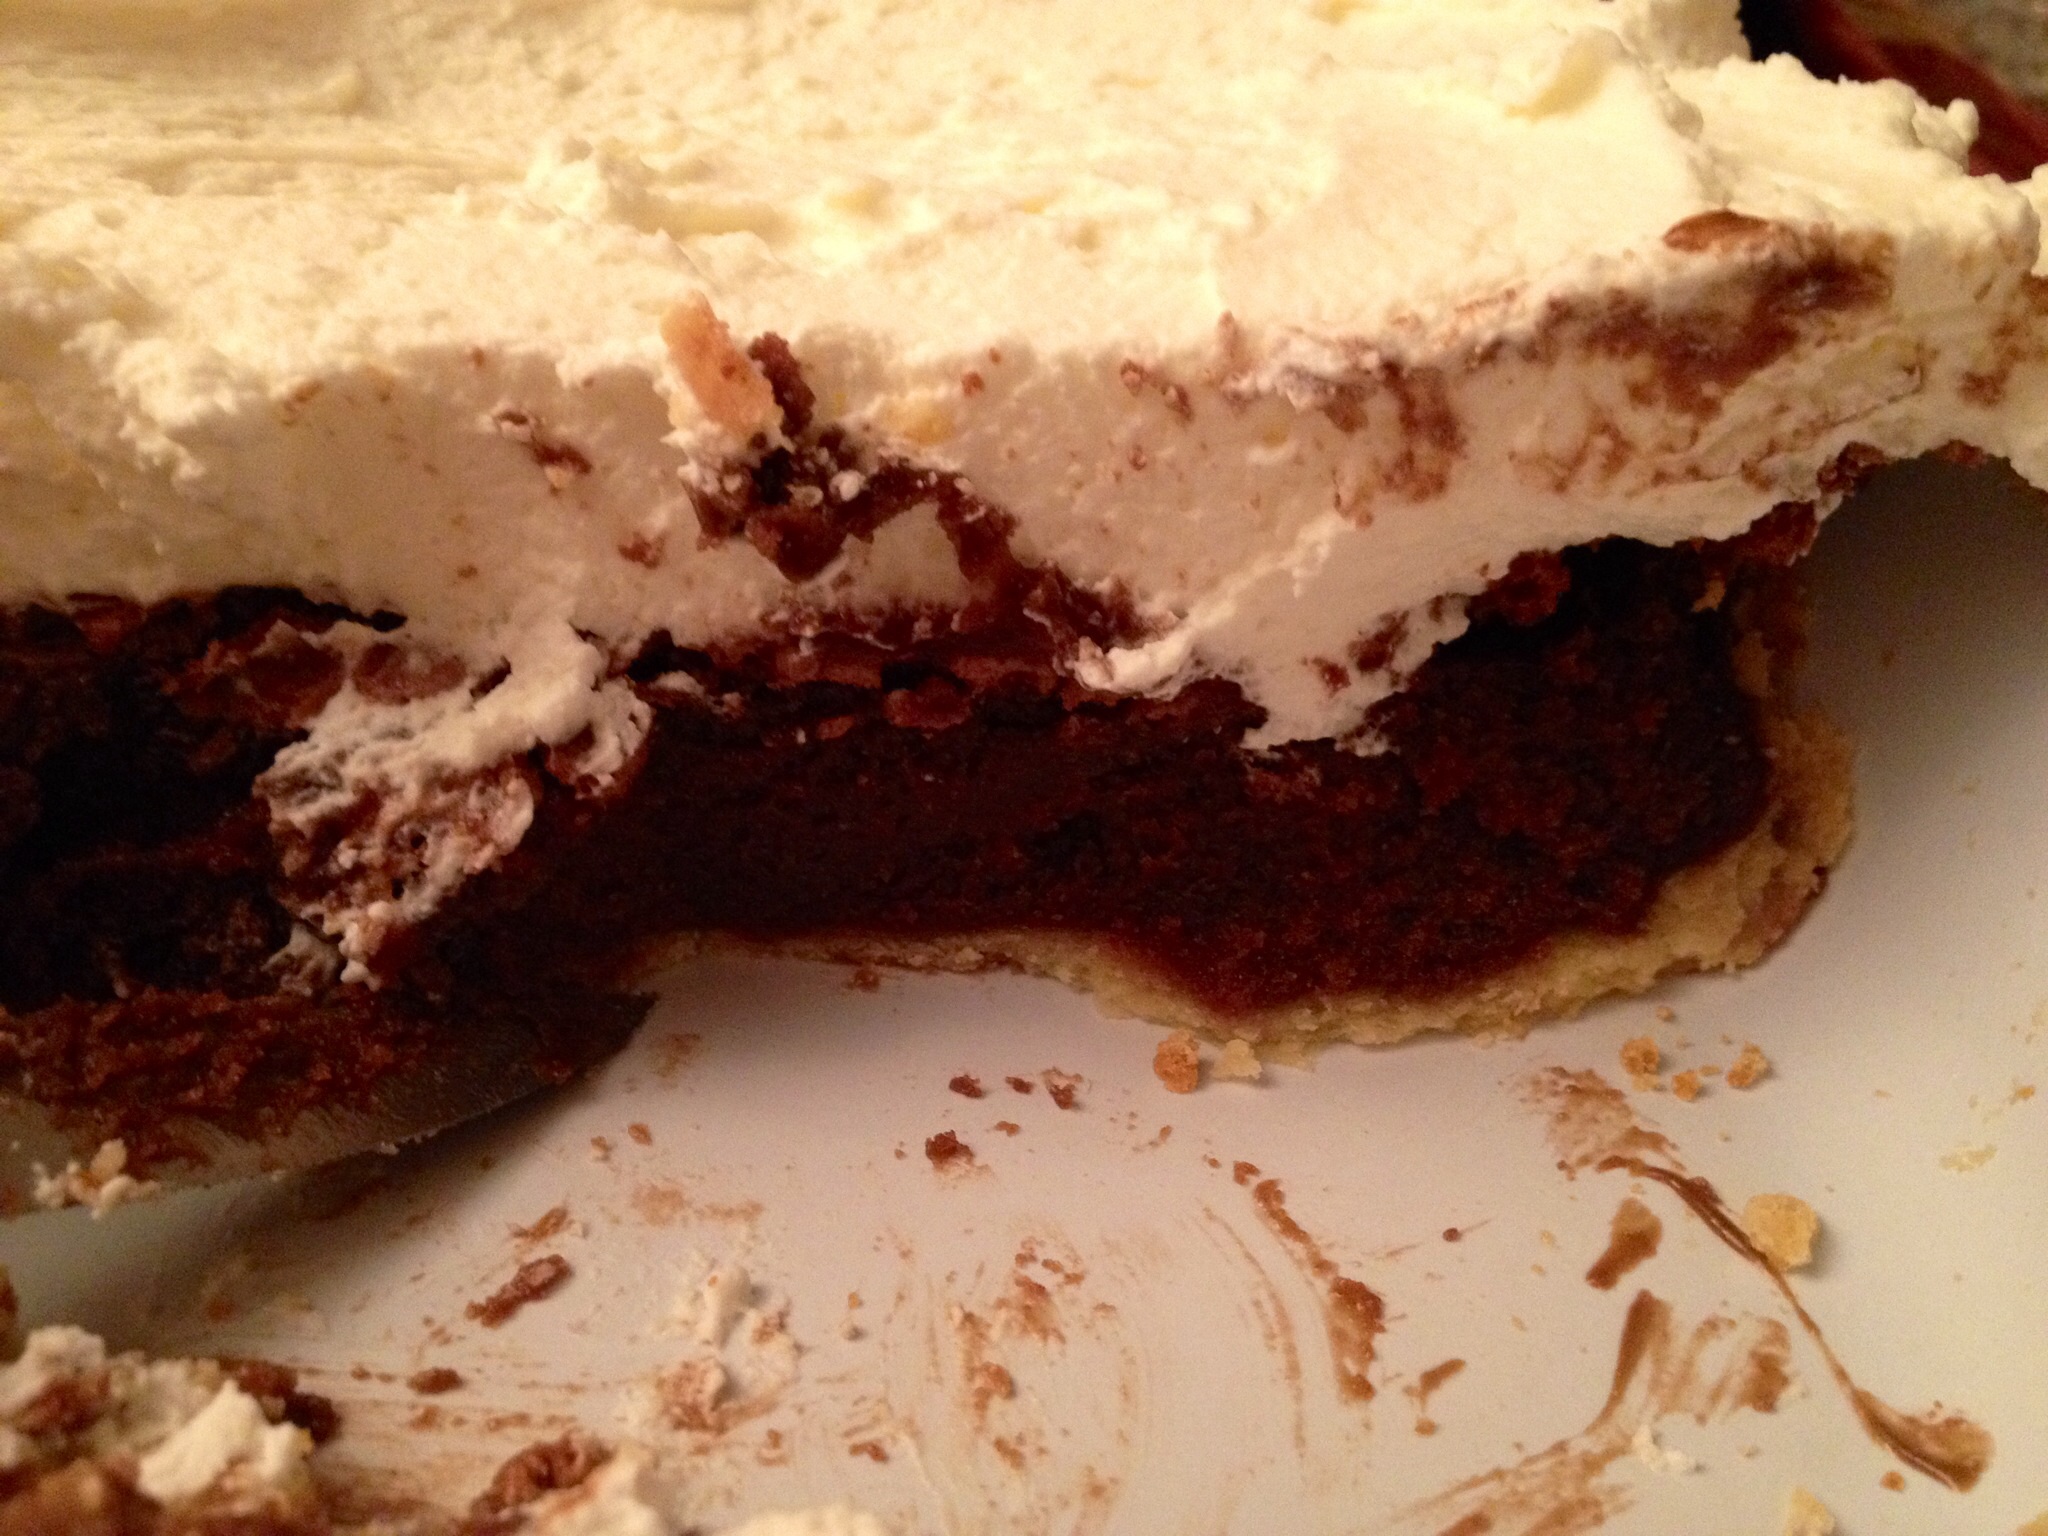
Cheesecake – they come in all different flavors, sizes and presentations.  Bet you haven’t had a cheesecake with pistachio, goat cheese, honey, lemon curd and crème fraîche. Well if you have – – you are pretty lucky! If you haven’t…don’t worry, T.W.O. has this delicious, flavorful, satisfying Spring dessert recipe for you!


Goat Cheese, Honey & Pistachio Mini Cheesecakes with Meyer Lemon Curd

Ingredients:

For the pistachio crust:
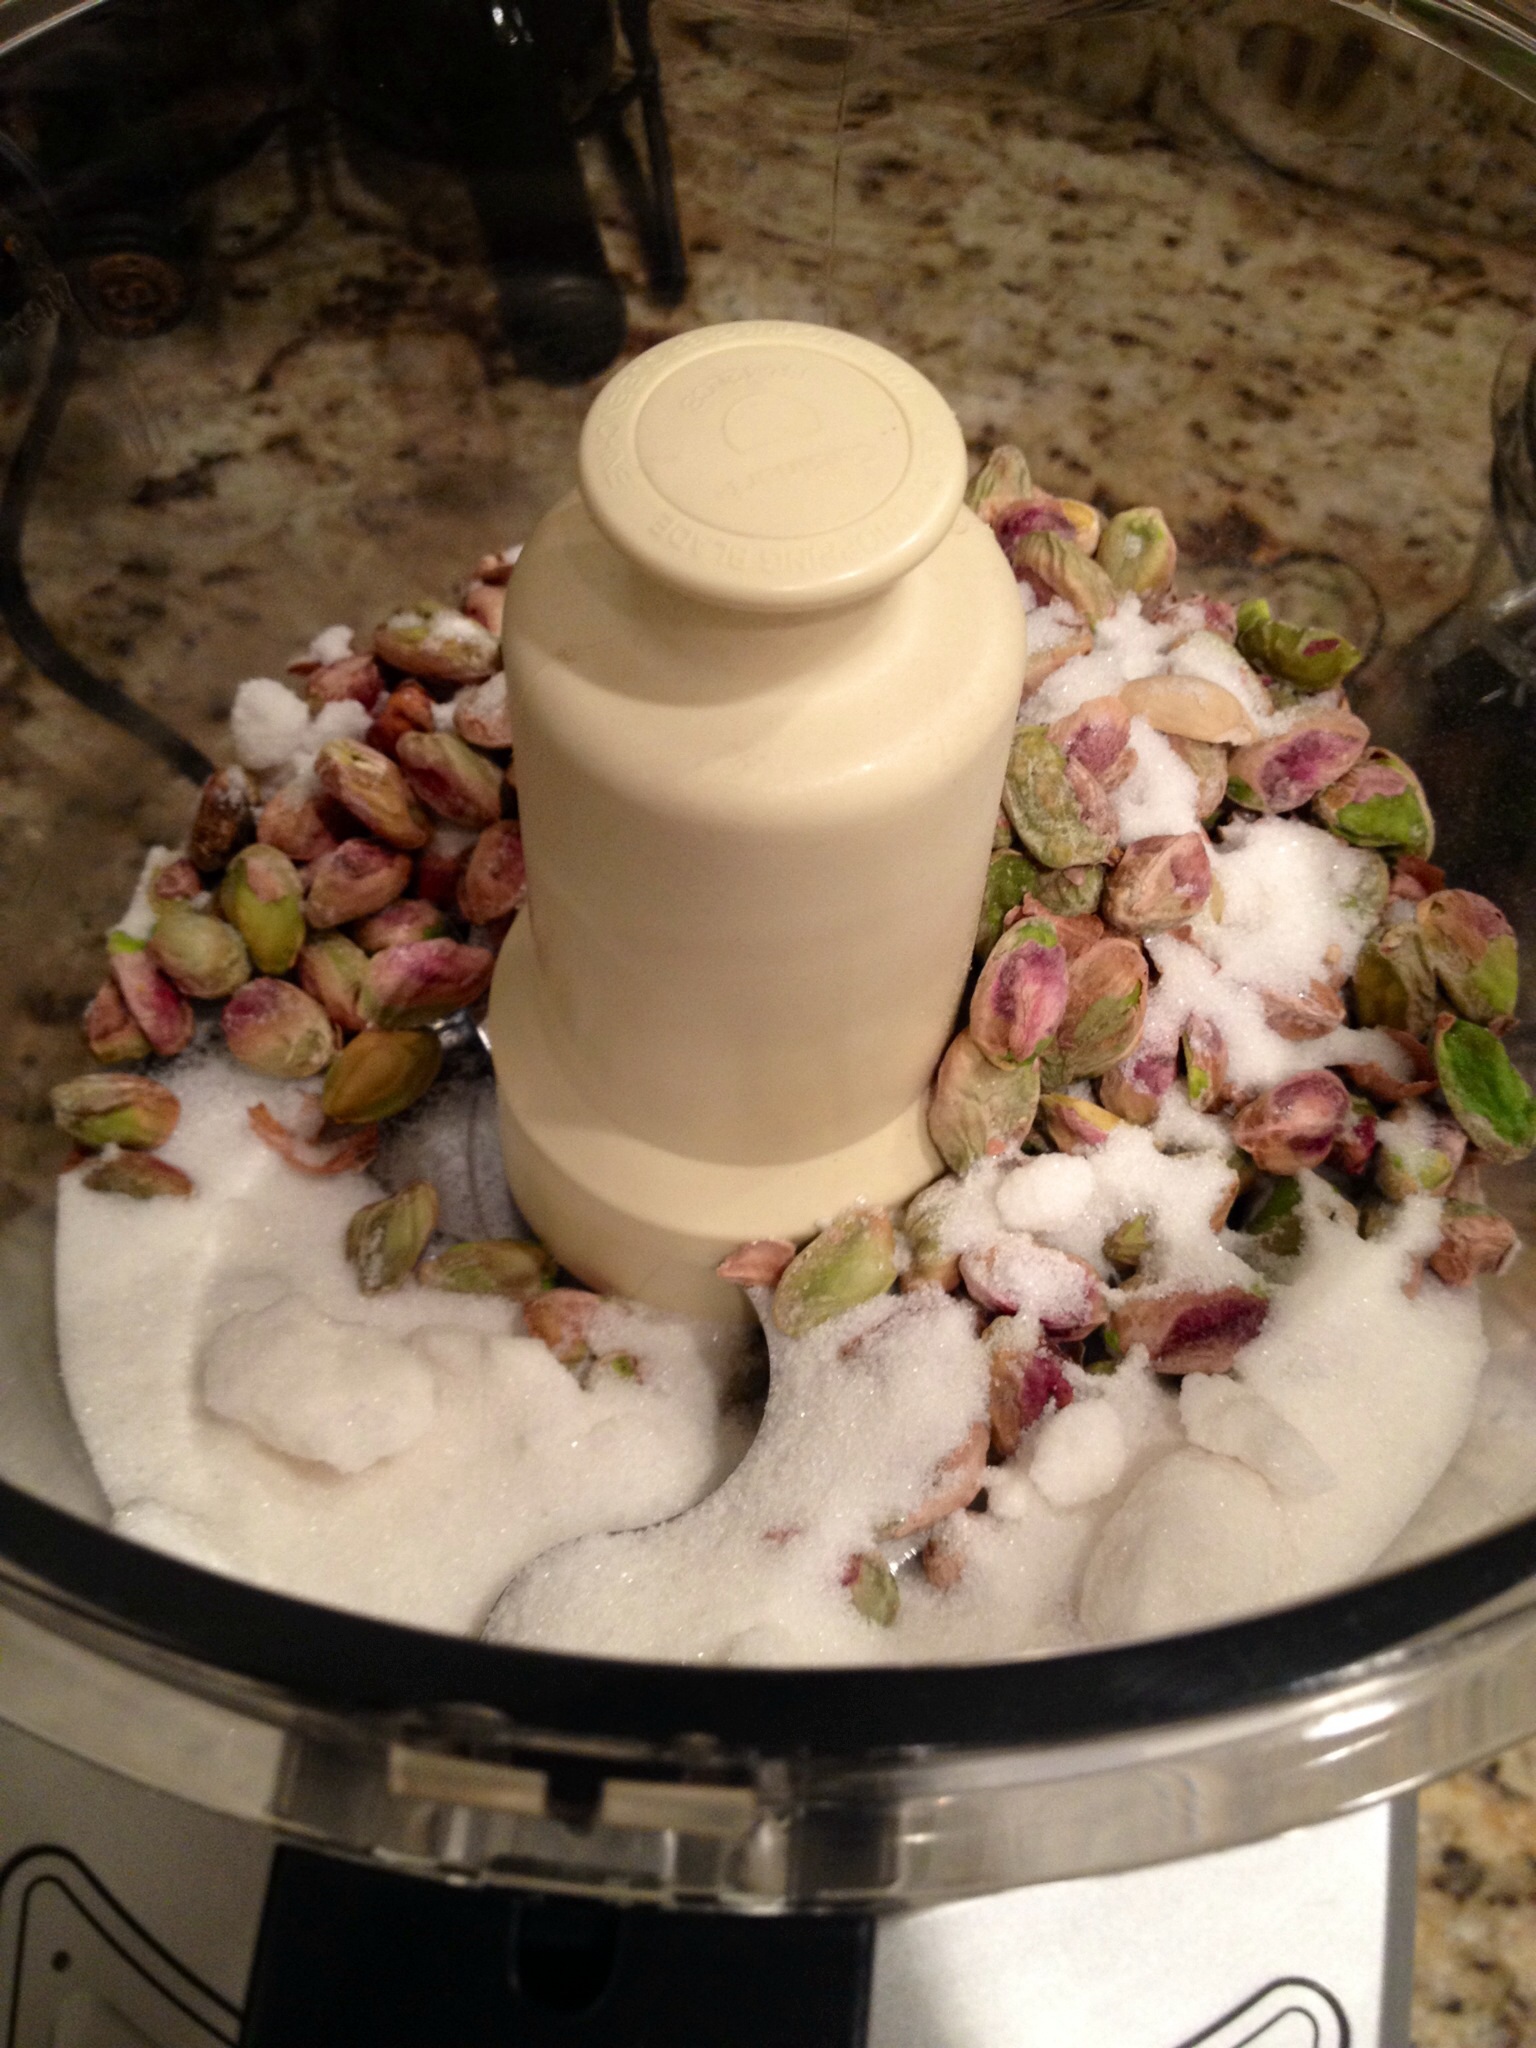
– 1 heaping cup de-shelled, roasted, and salted pistachios
– 1/4 cup granulated sugar
– 3 tablespoons unsalted butter, melted

For the filling:
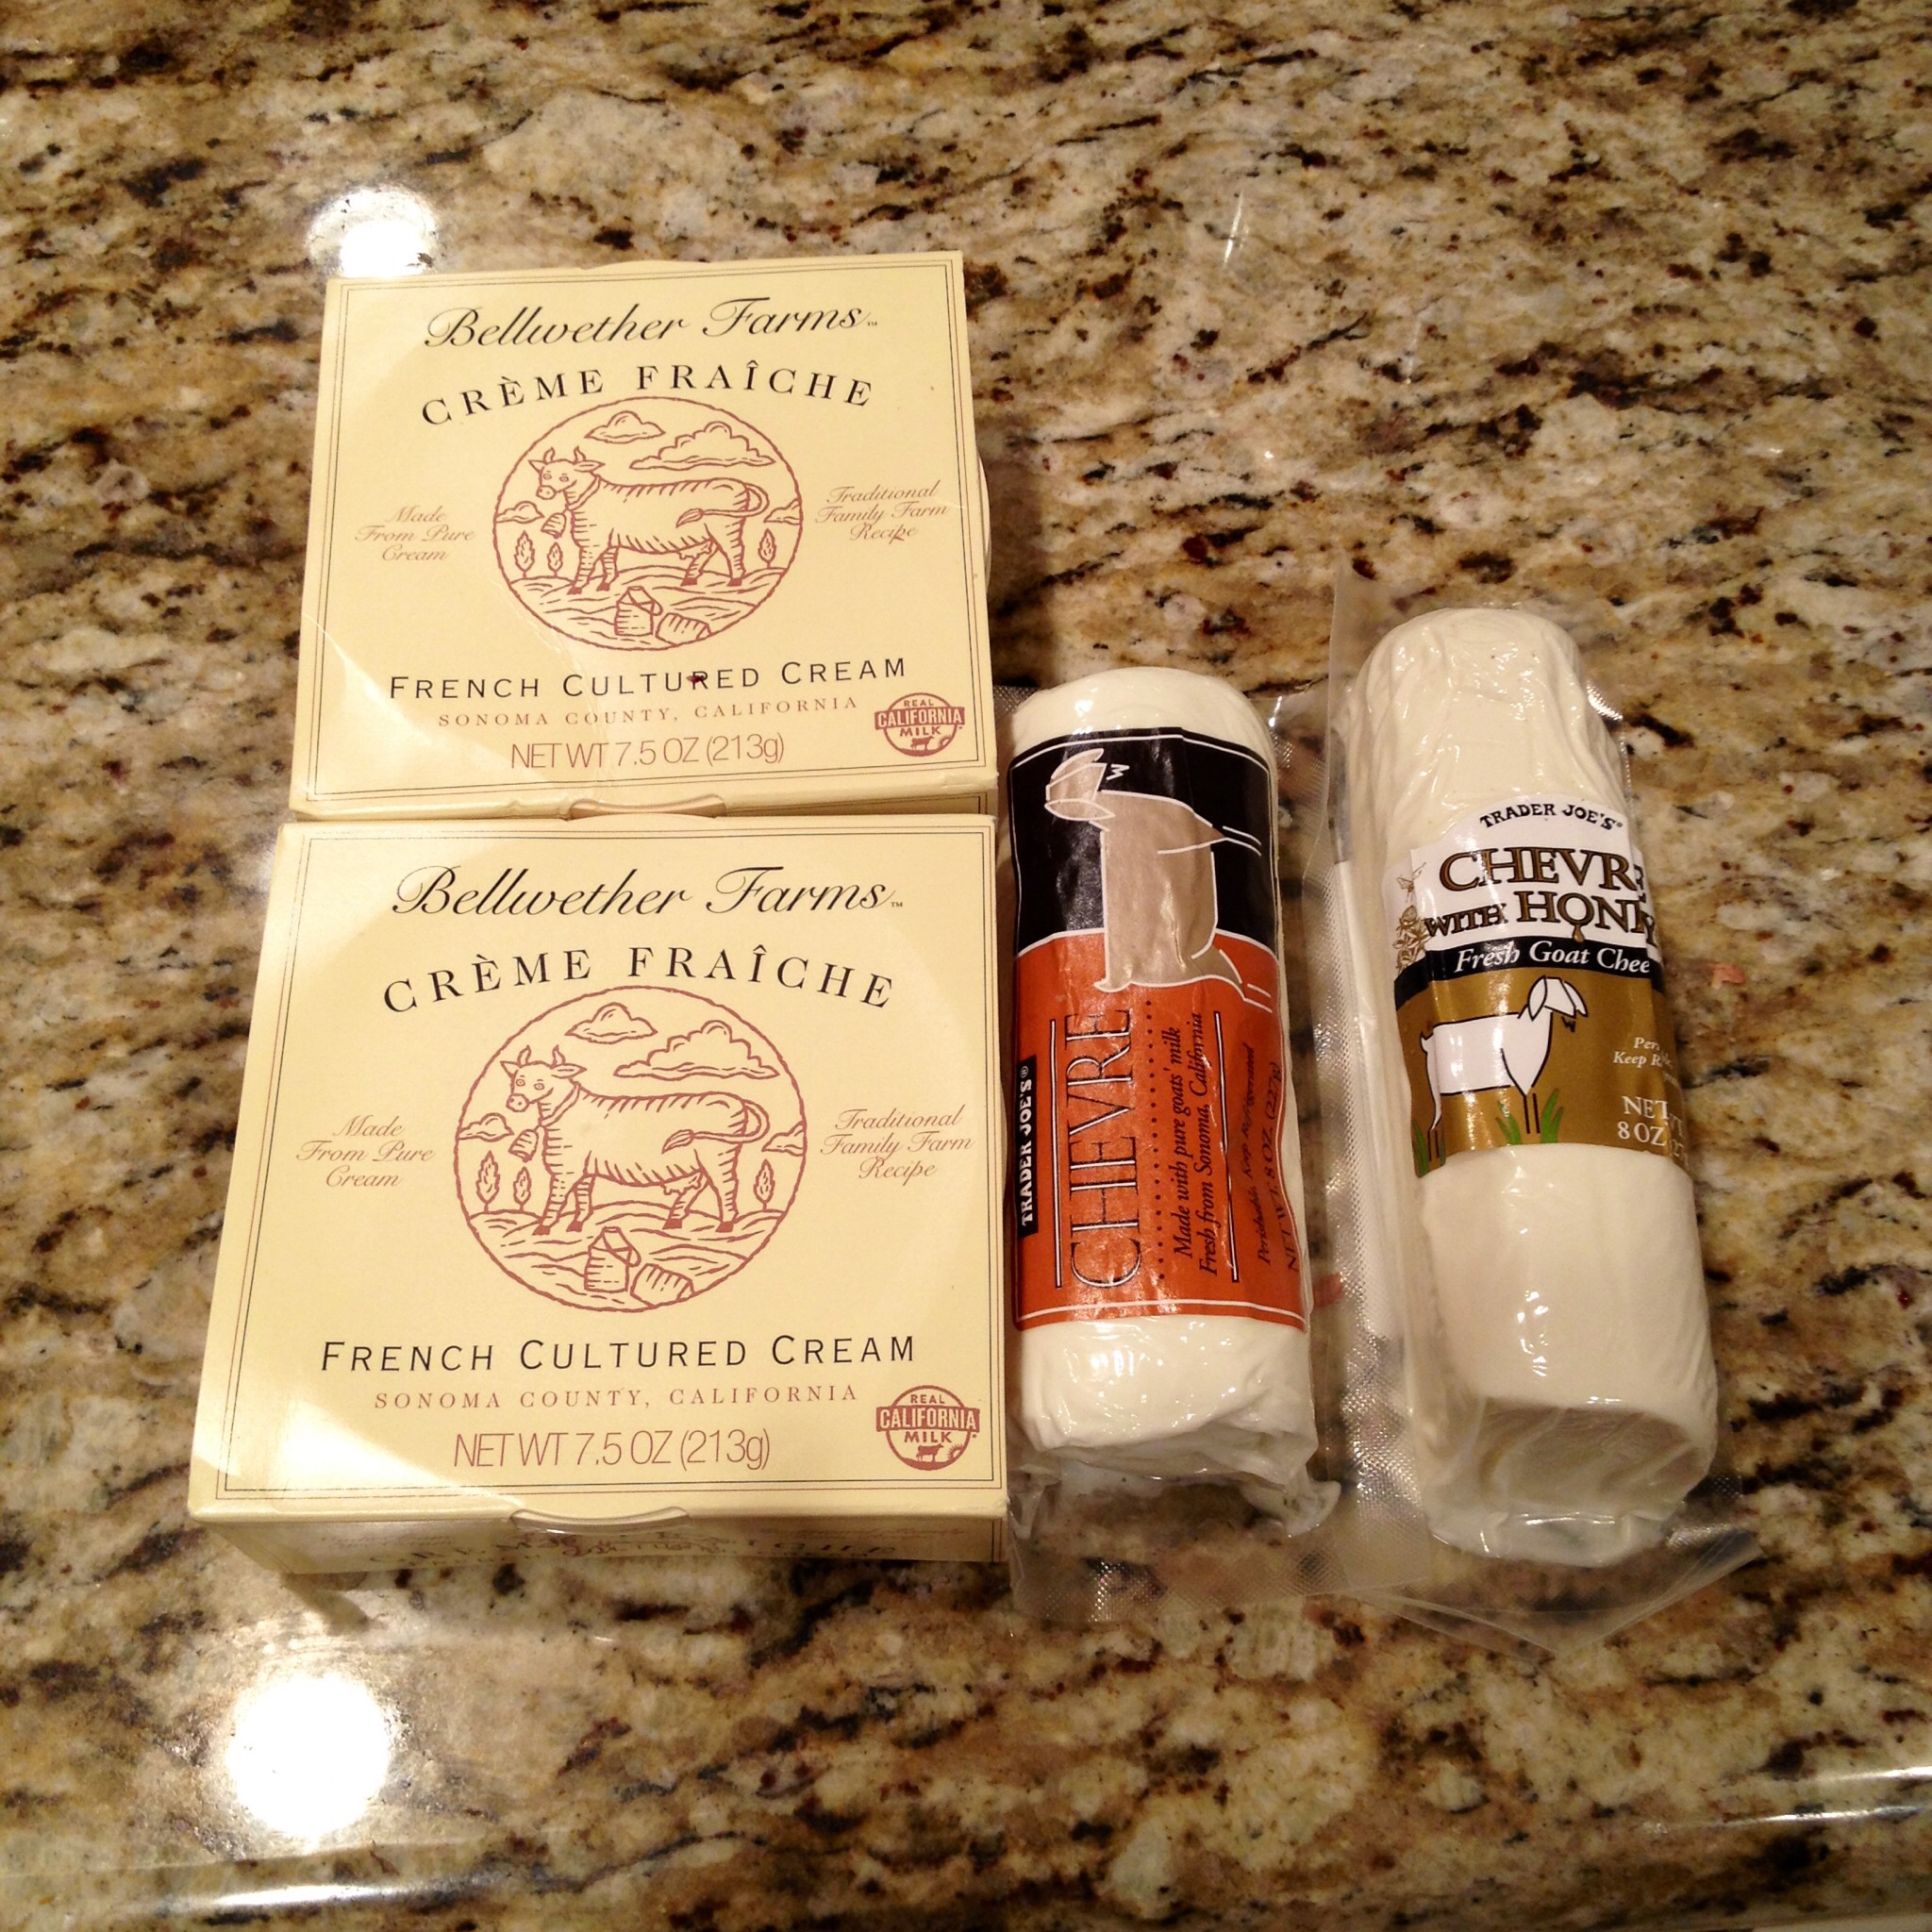
– 1 (11-ounce) log mild goat cheese, room temperature
– 1 (11-ounce) log mild honey goat cheese, room temperature
– 1/2 cup granulated sugar
– 1 cup crème fraîche room temperature
– 3 tablespoons good-quality honey
– 1 teaspoon vanilla extract
– 6 large eggs

For the Meyer lemon cream:
– 1 stick (8 tablespoons) unsalted butter, room temperature
– 1/2 cup granulated sugar
– 2 large eggs
– 2 large egg yolks
– 3 teaspoons Meyer lemon zest
– 3/4 cup Meyer lemon juice
– 1/4 teaspoon vanilla extract

Directions:
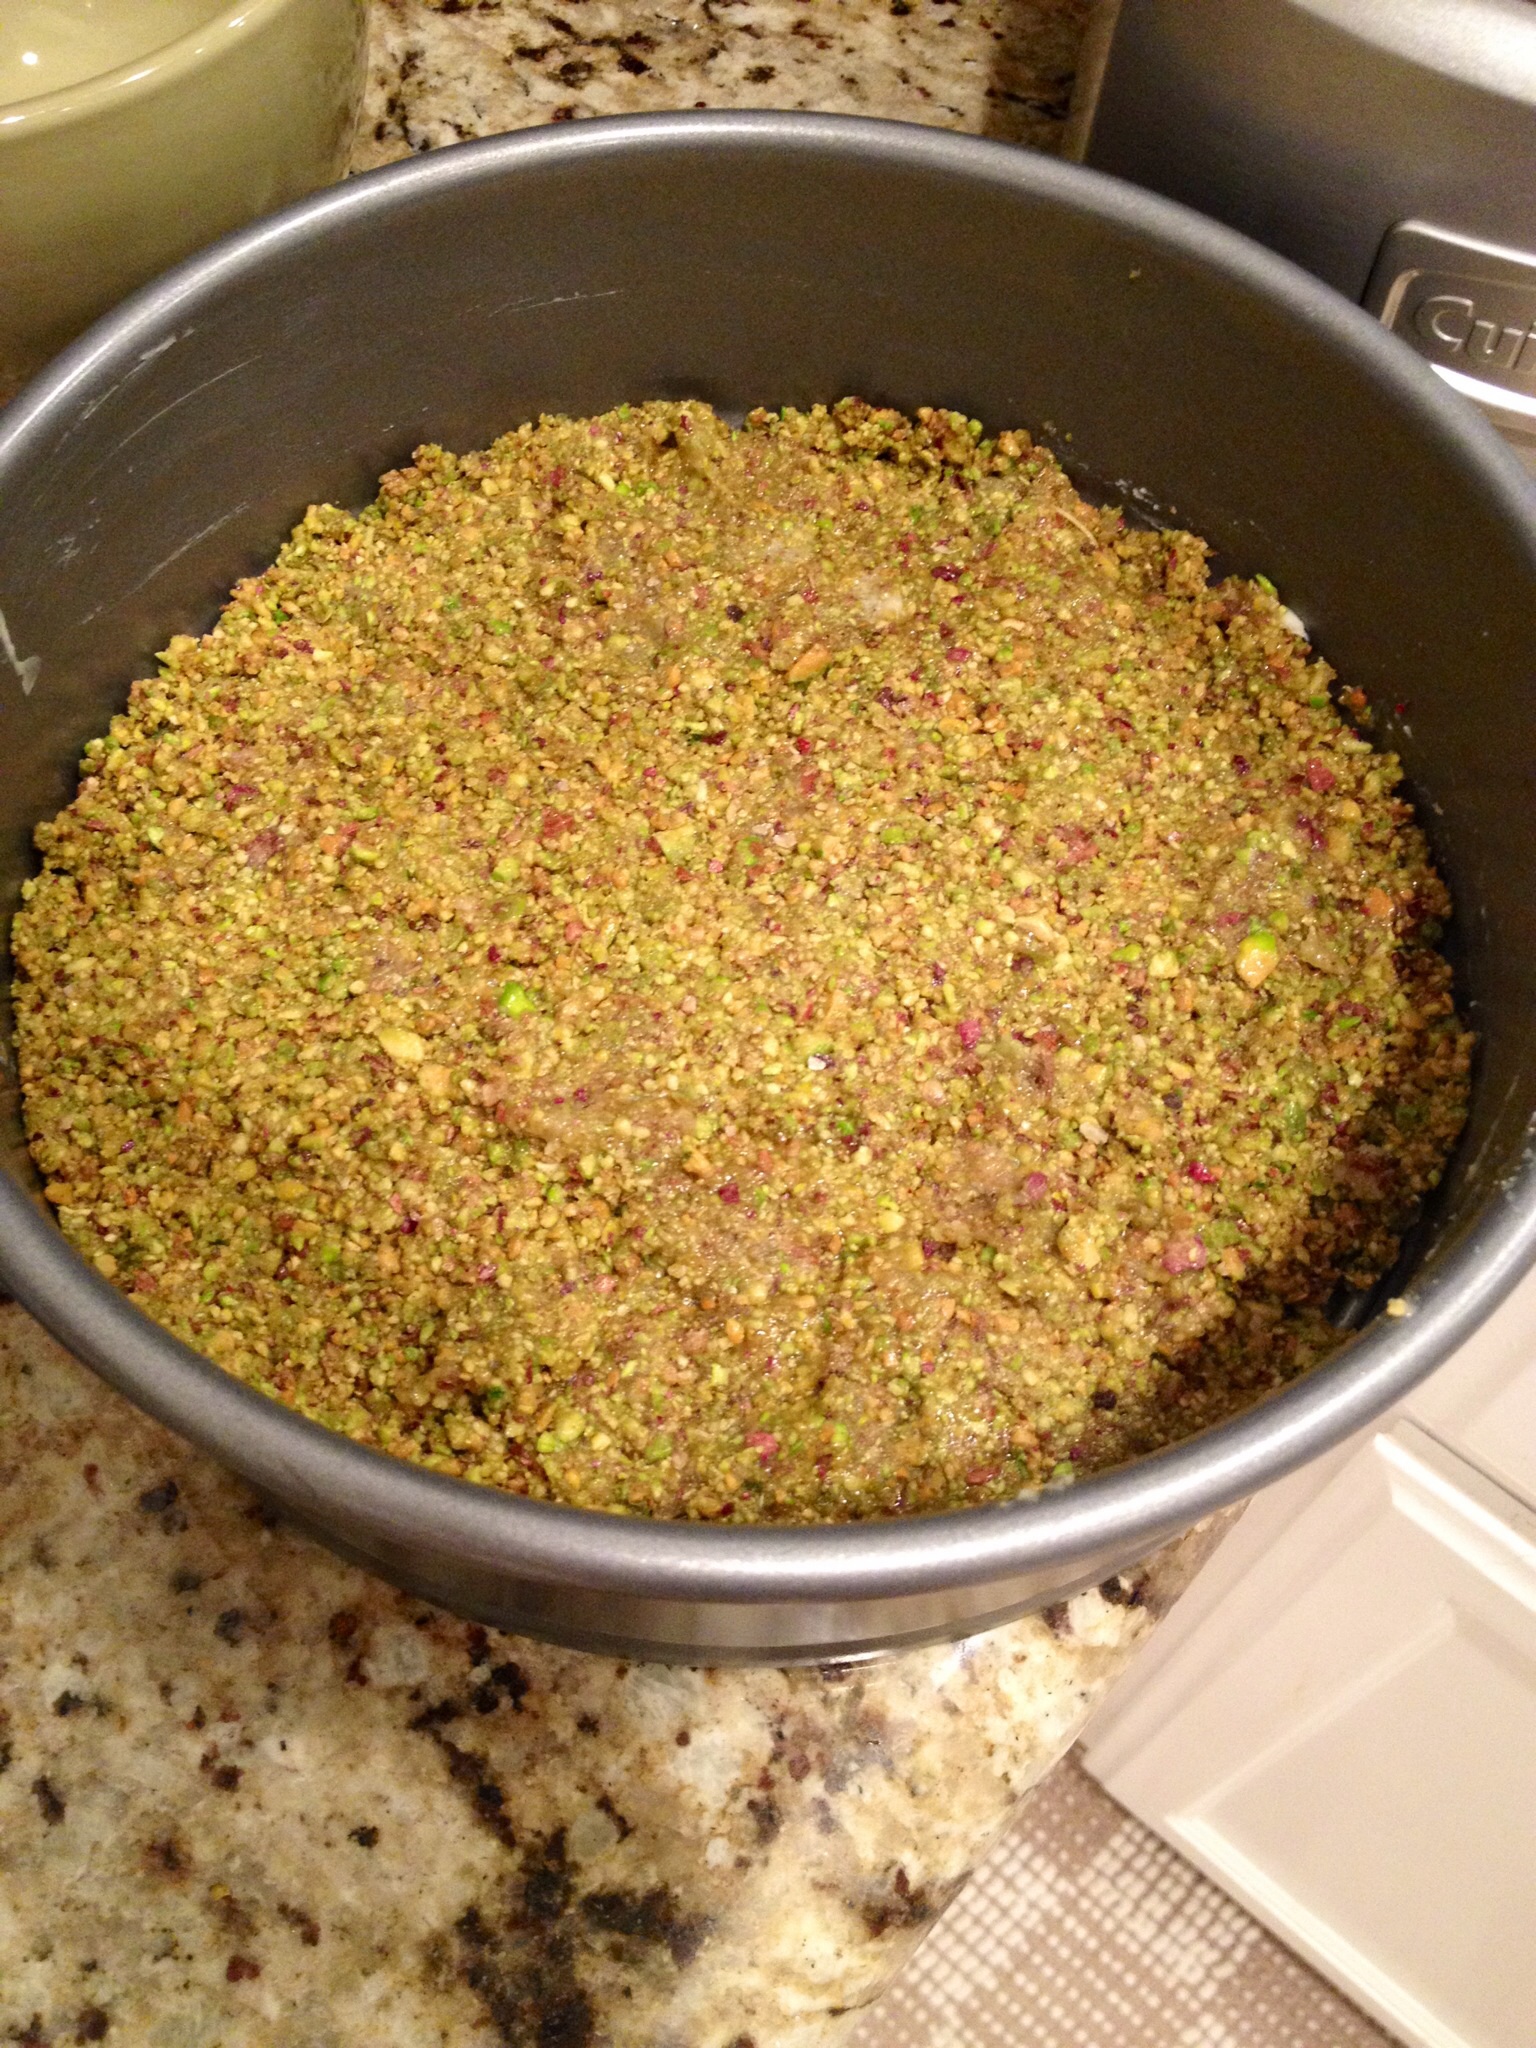
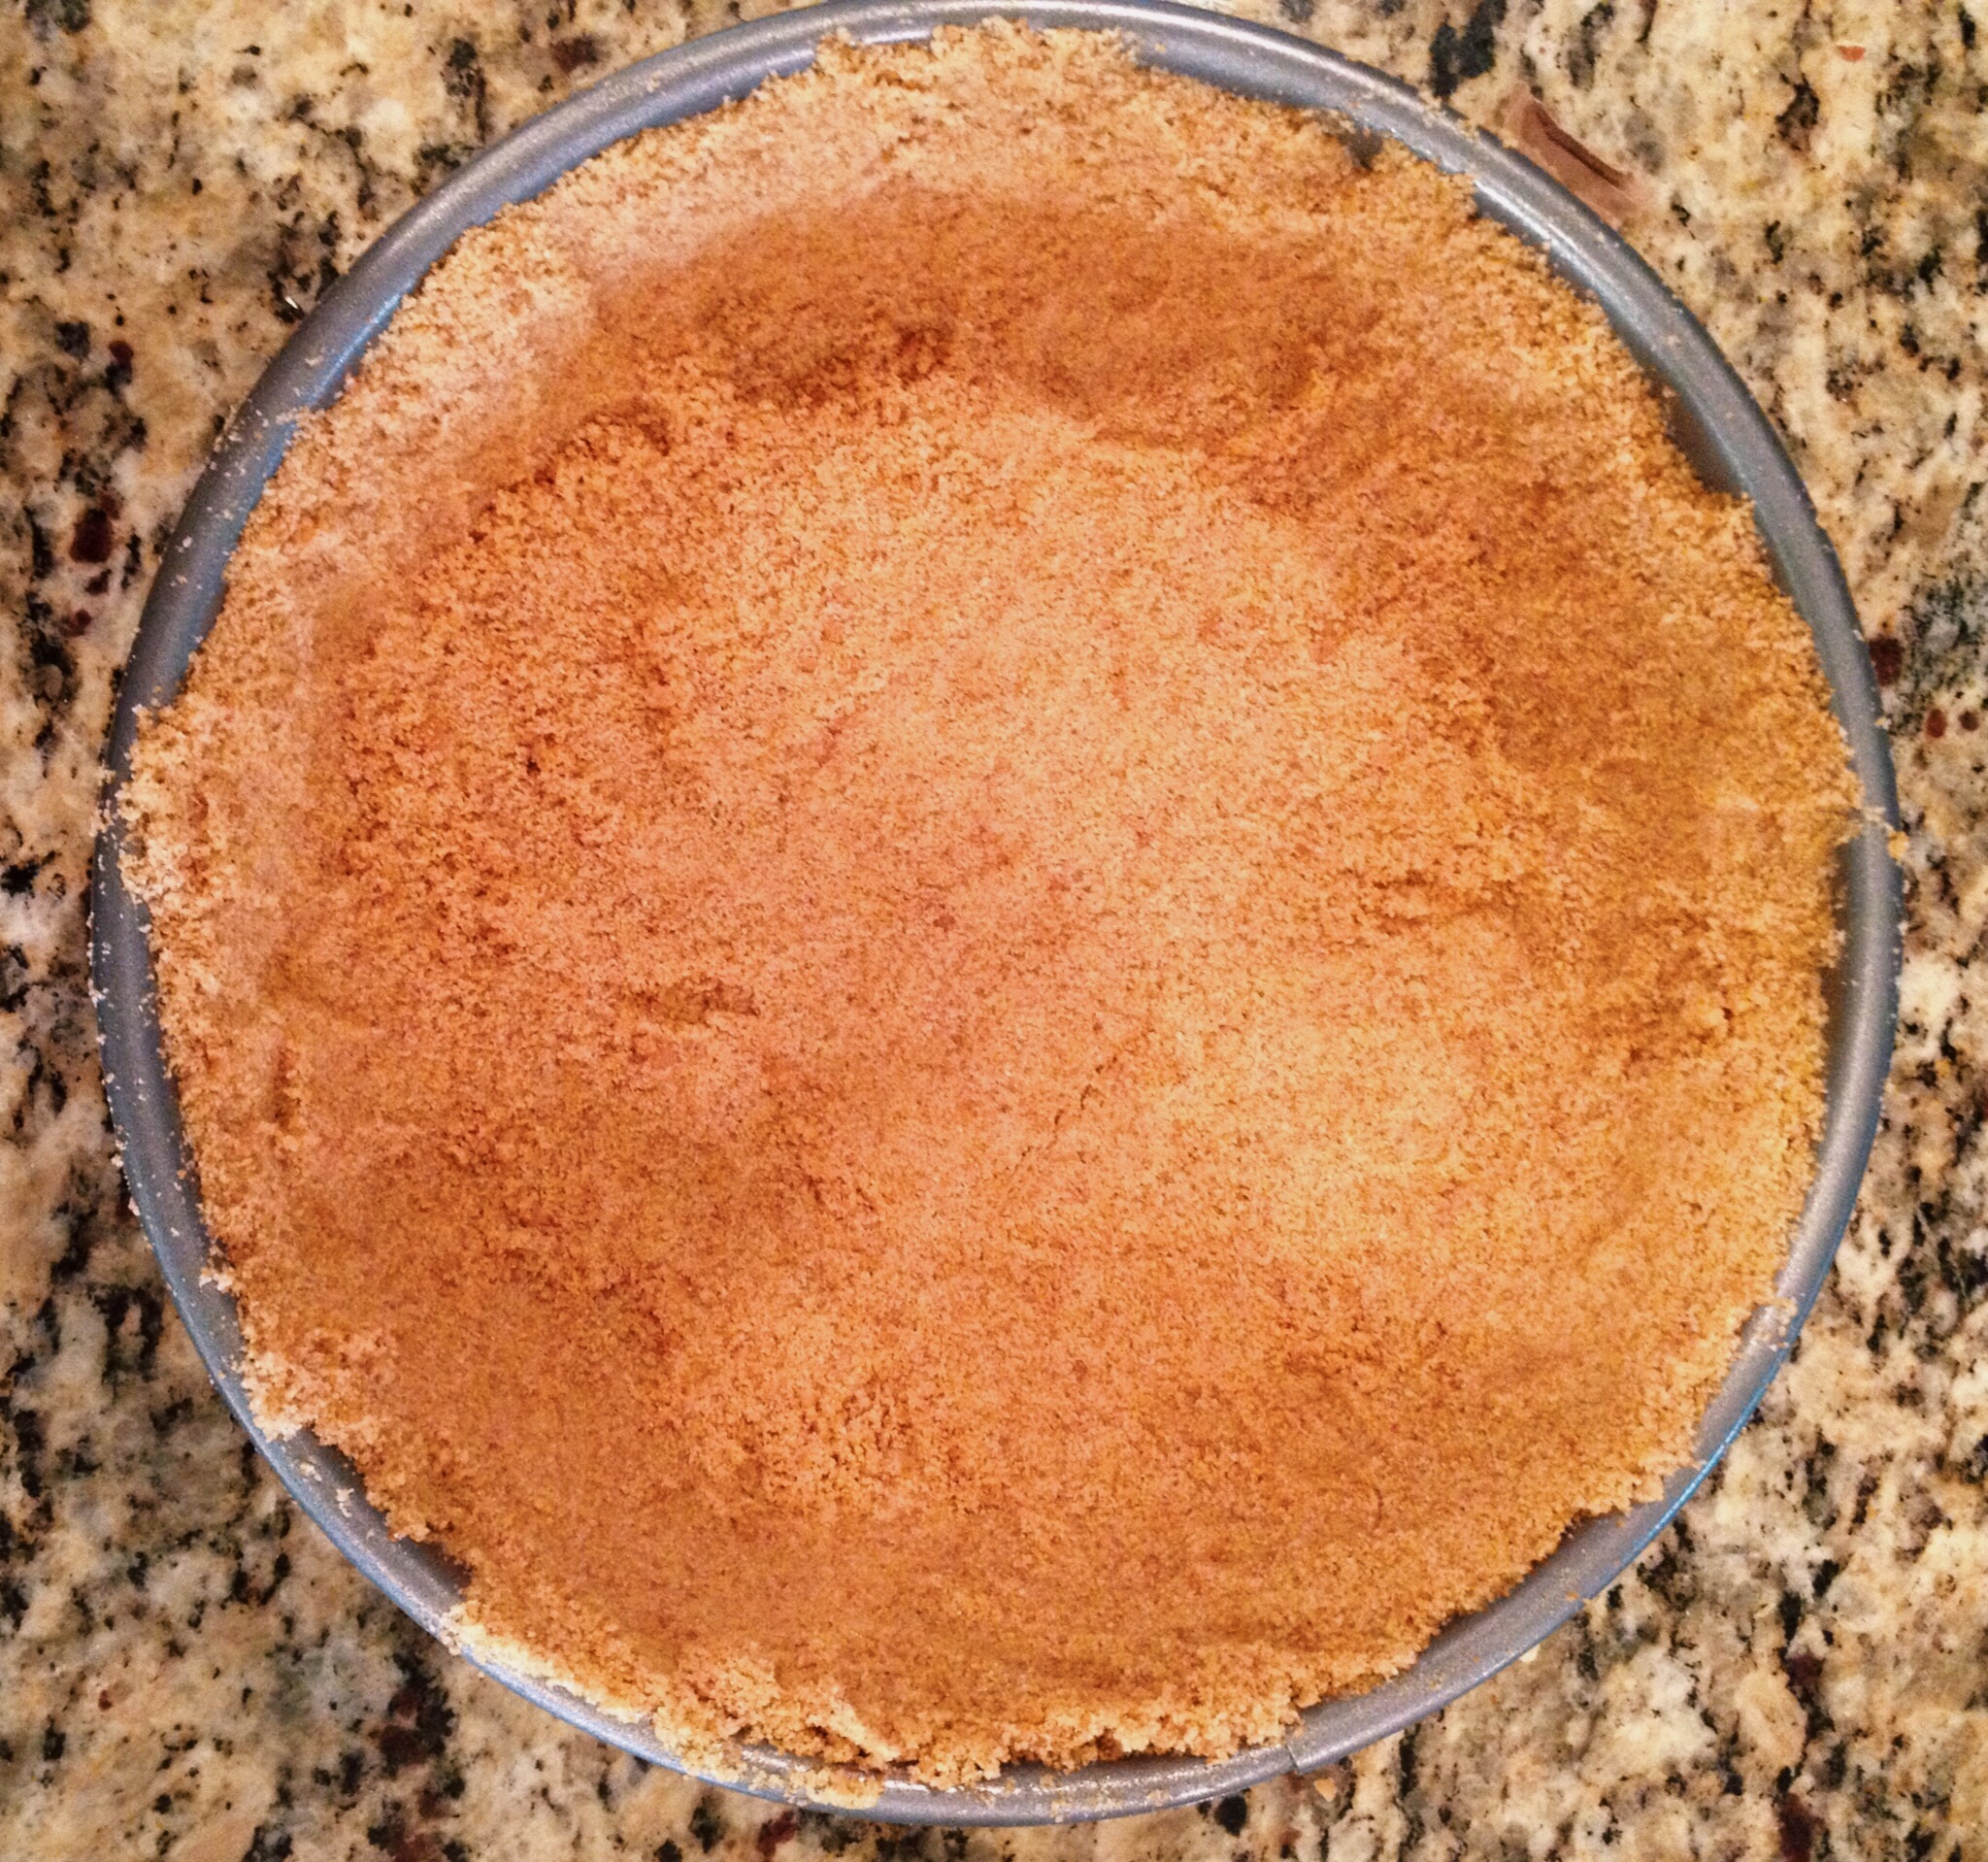
1. For the pistachio crust, combine pistachios and sugar in food processor until it becomes a fine meal. Transfer the mixture to a bowl and stir in the melted butter. Transfer the crust to a spring form pan.
2. Preheat oven to 400°F. While the oven is heating, refrigerate the crusts until chilled. Bake the crusts for 10 to 12 minutes until set. Cool completely before filling.
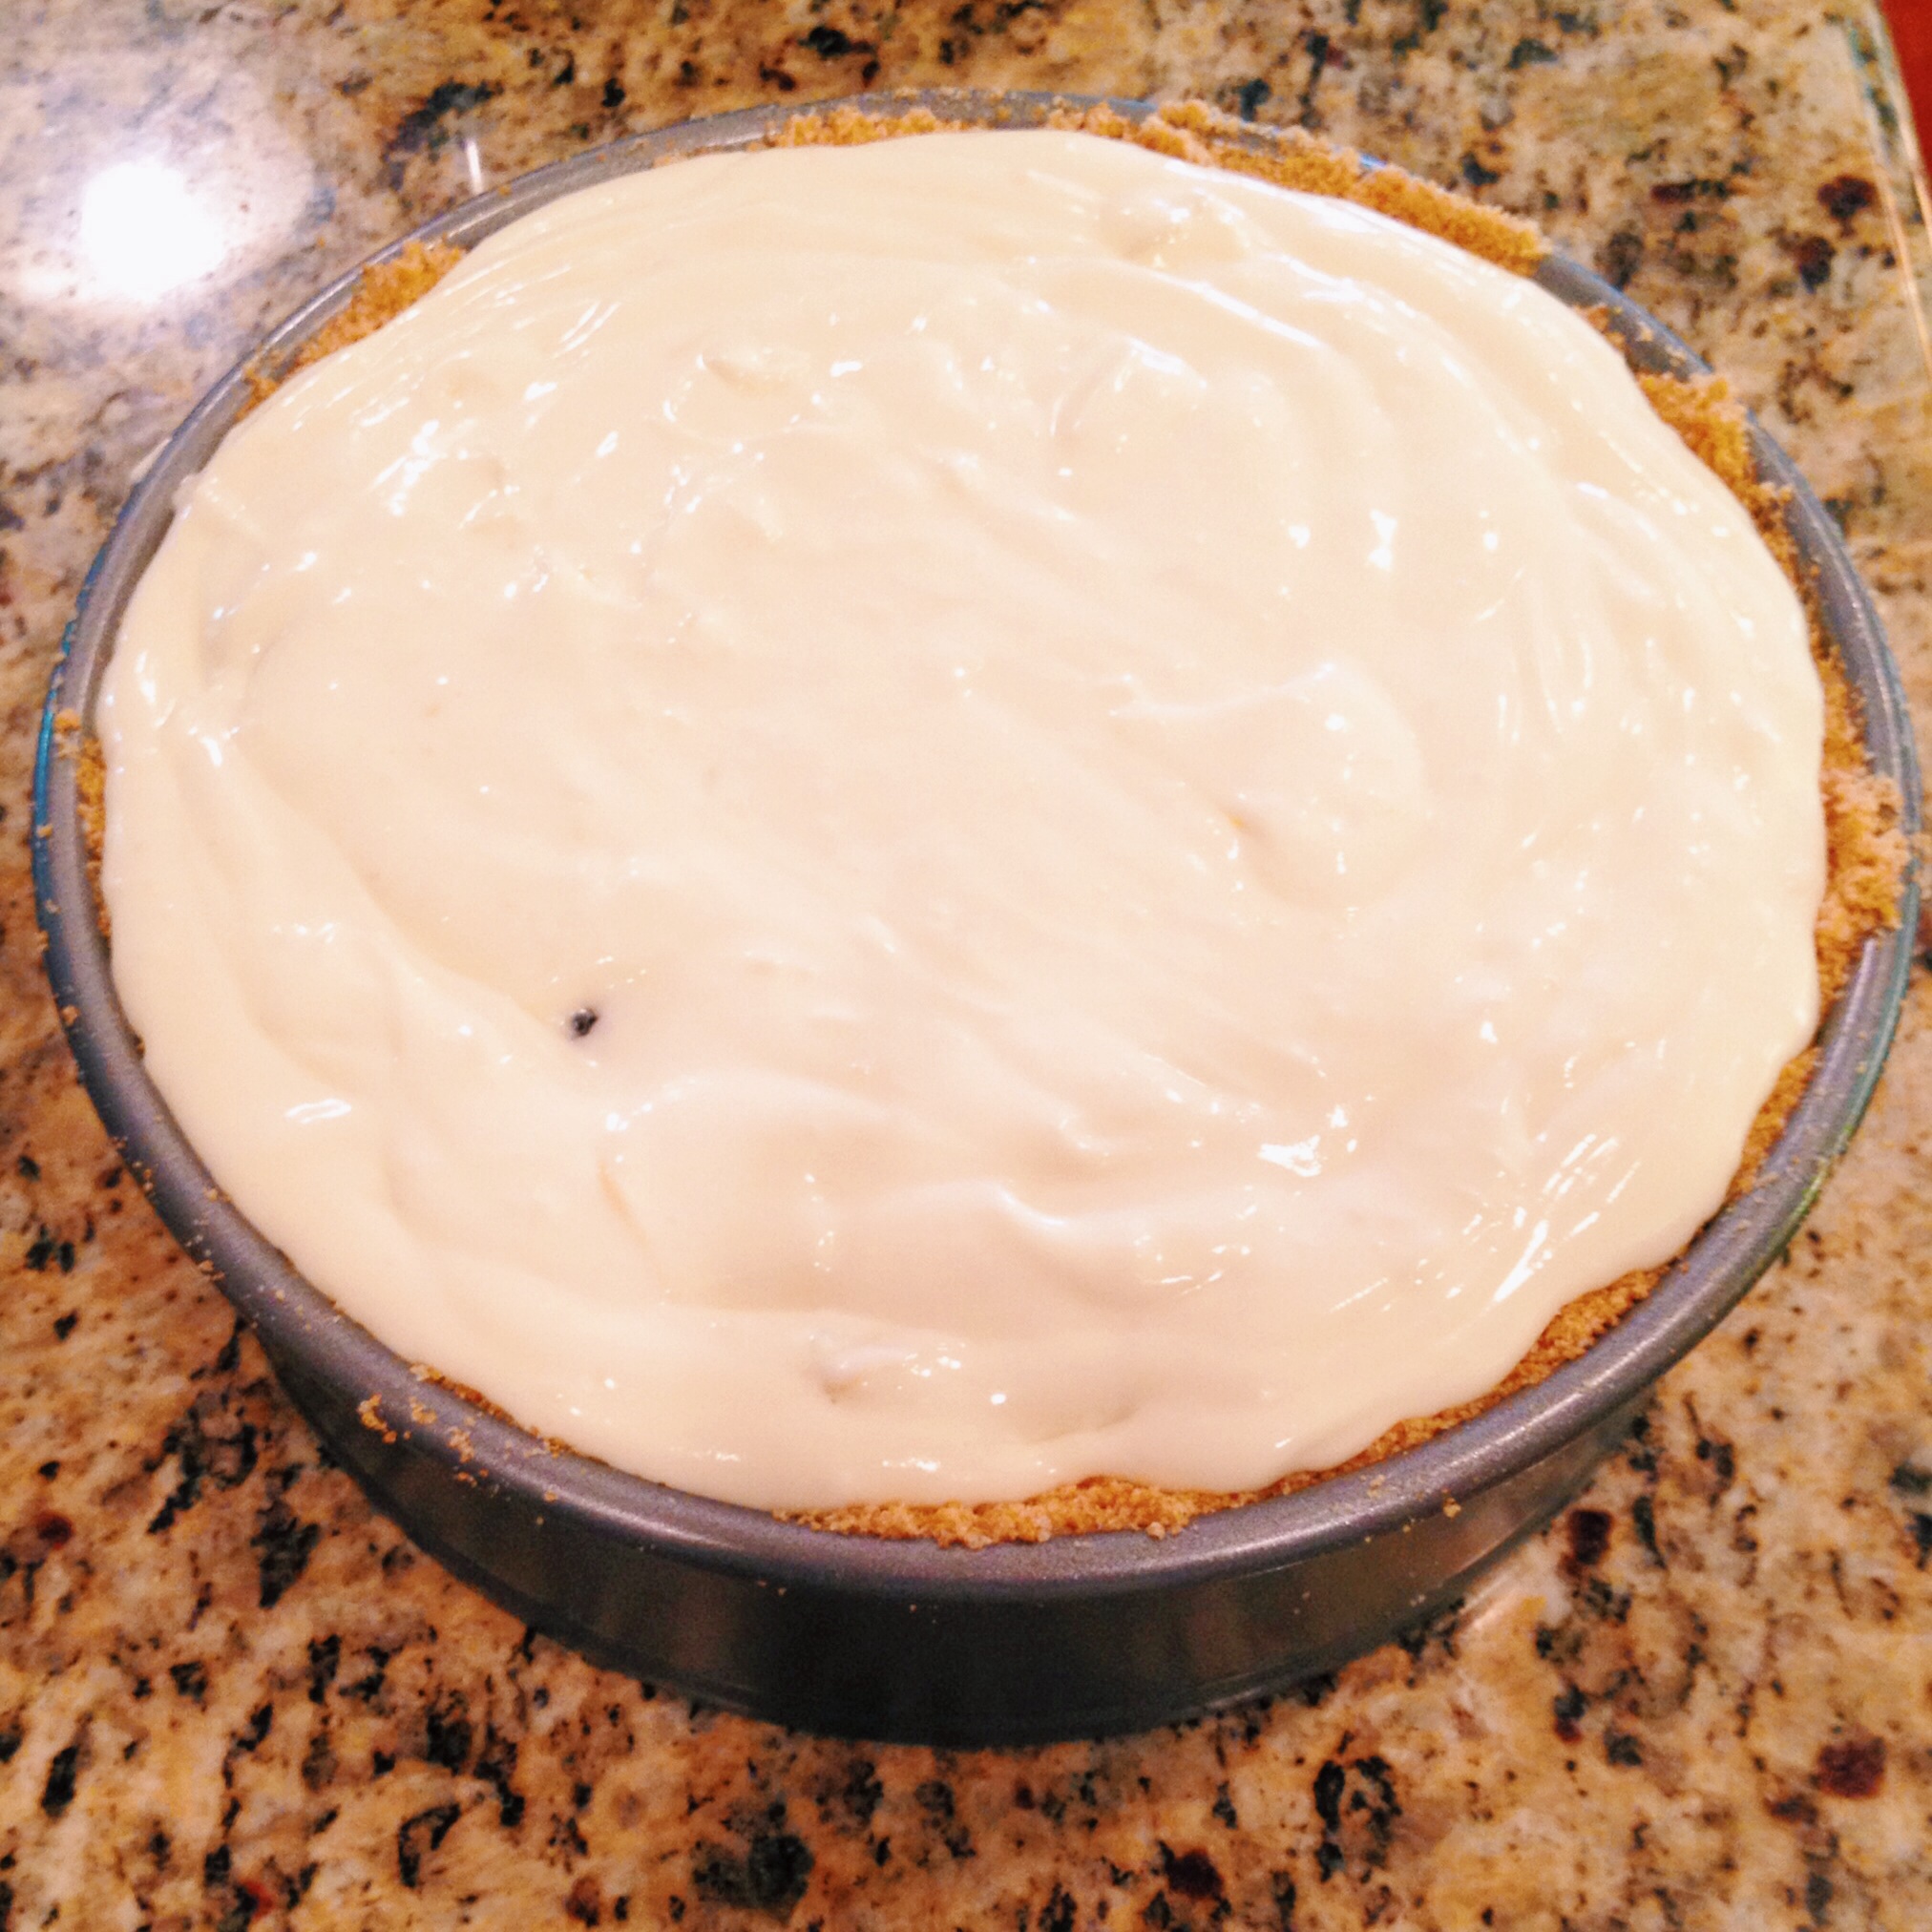
3. For the filling, lower oven temperature to 300°F. Combine the goat cheese and sugar in the kitchen aid. Add the crème fraîche, honey, vanilla, mix well. Add the eggs one at a time, and mix until just combined; do not over mix.
4. Add the filling to the top of the pistachio crust. Place the cheesecake in the oven and cook for 30-40 minutes depending on your oven. Remove from the oven and allow to cool to room temperature. Once cooled, put the cheesecake in the oven overnight.
5. For the Meyer lemon curd cream the butter and sugar in a KitchenAid mixer until light and fluffy.. Slowly add the eggs and yolks and beat for 1 minute, until well combined. Add the lemon zest, lemon juice, vanilla. Note: The mixture will become curdled and lumpy – – – don’t be alarmed!
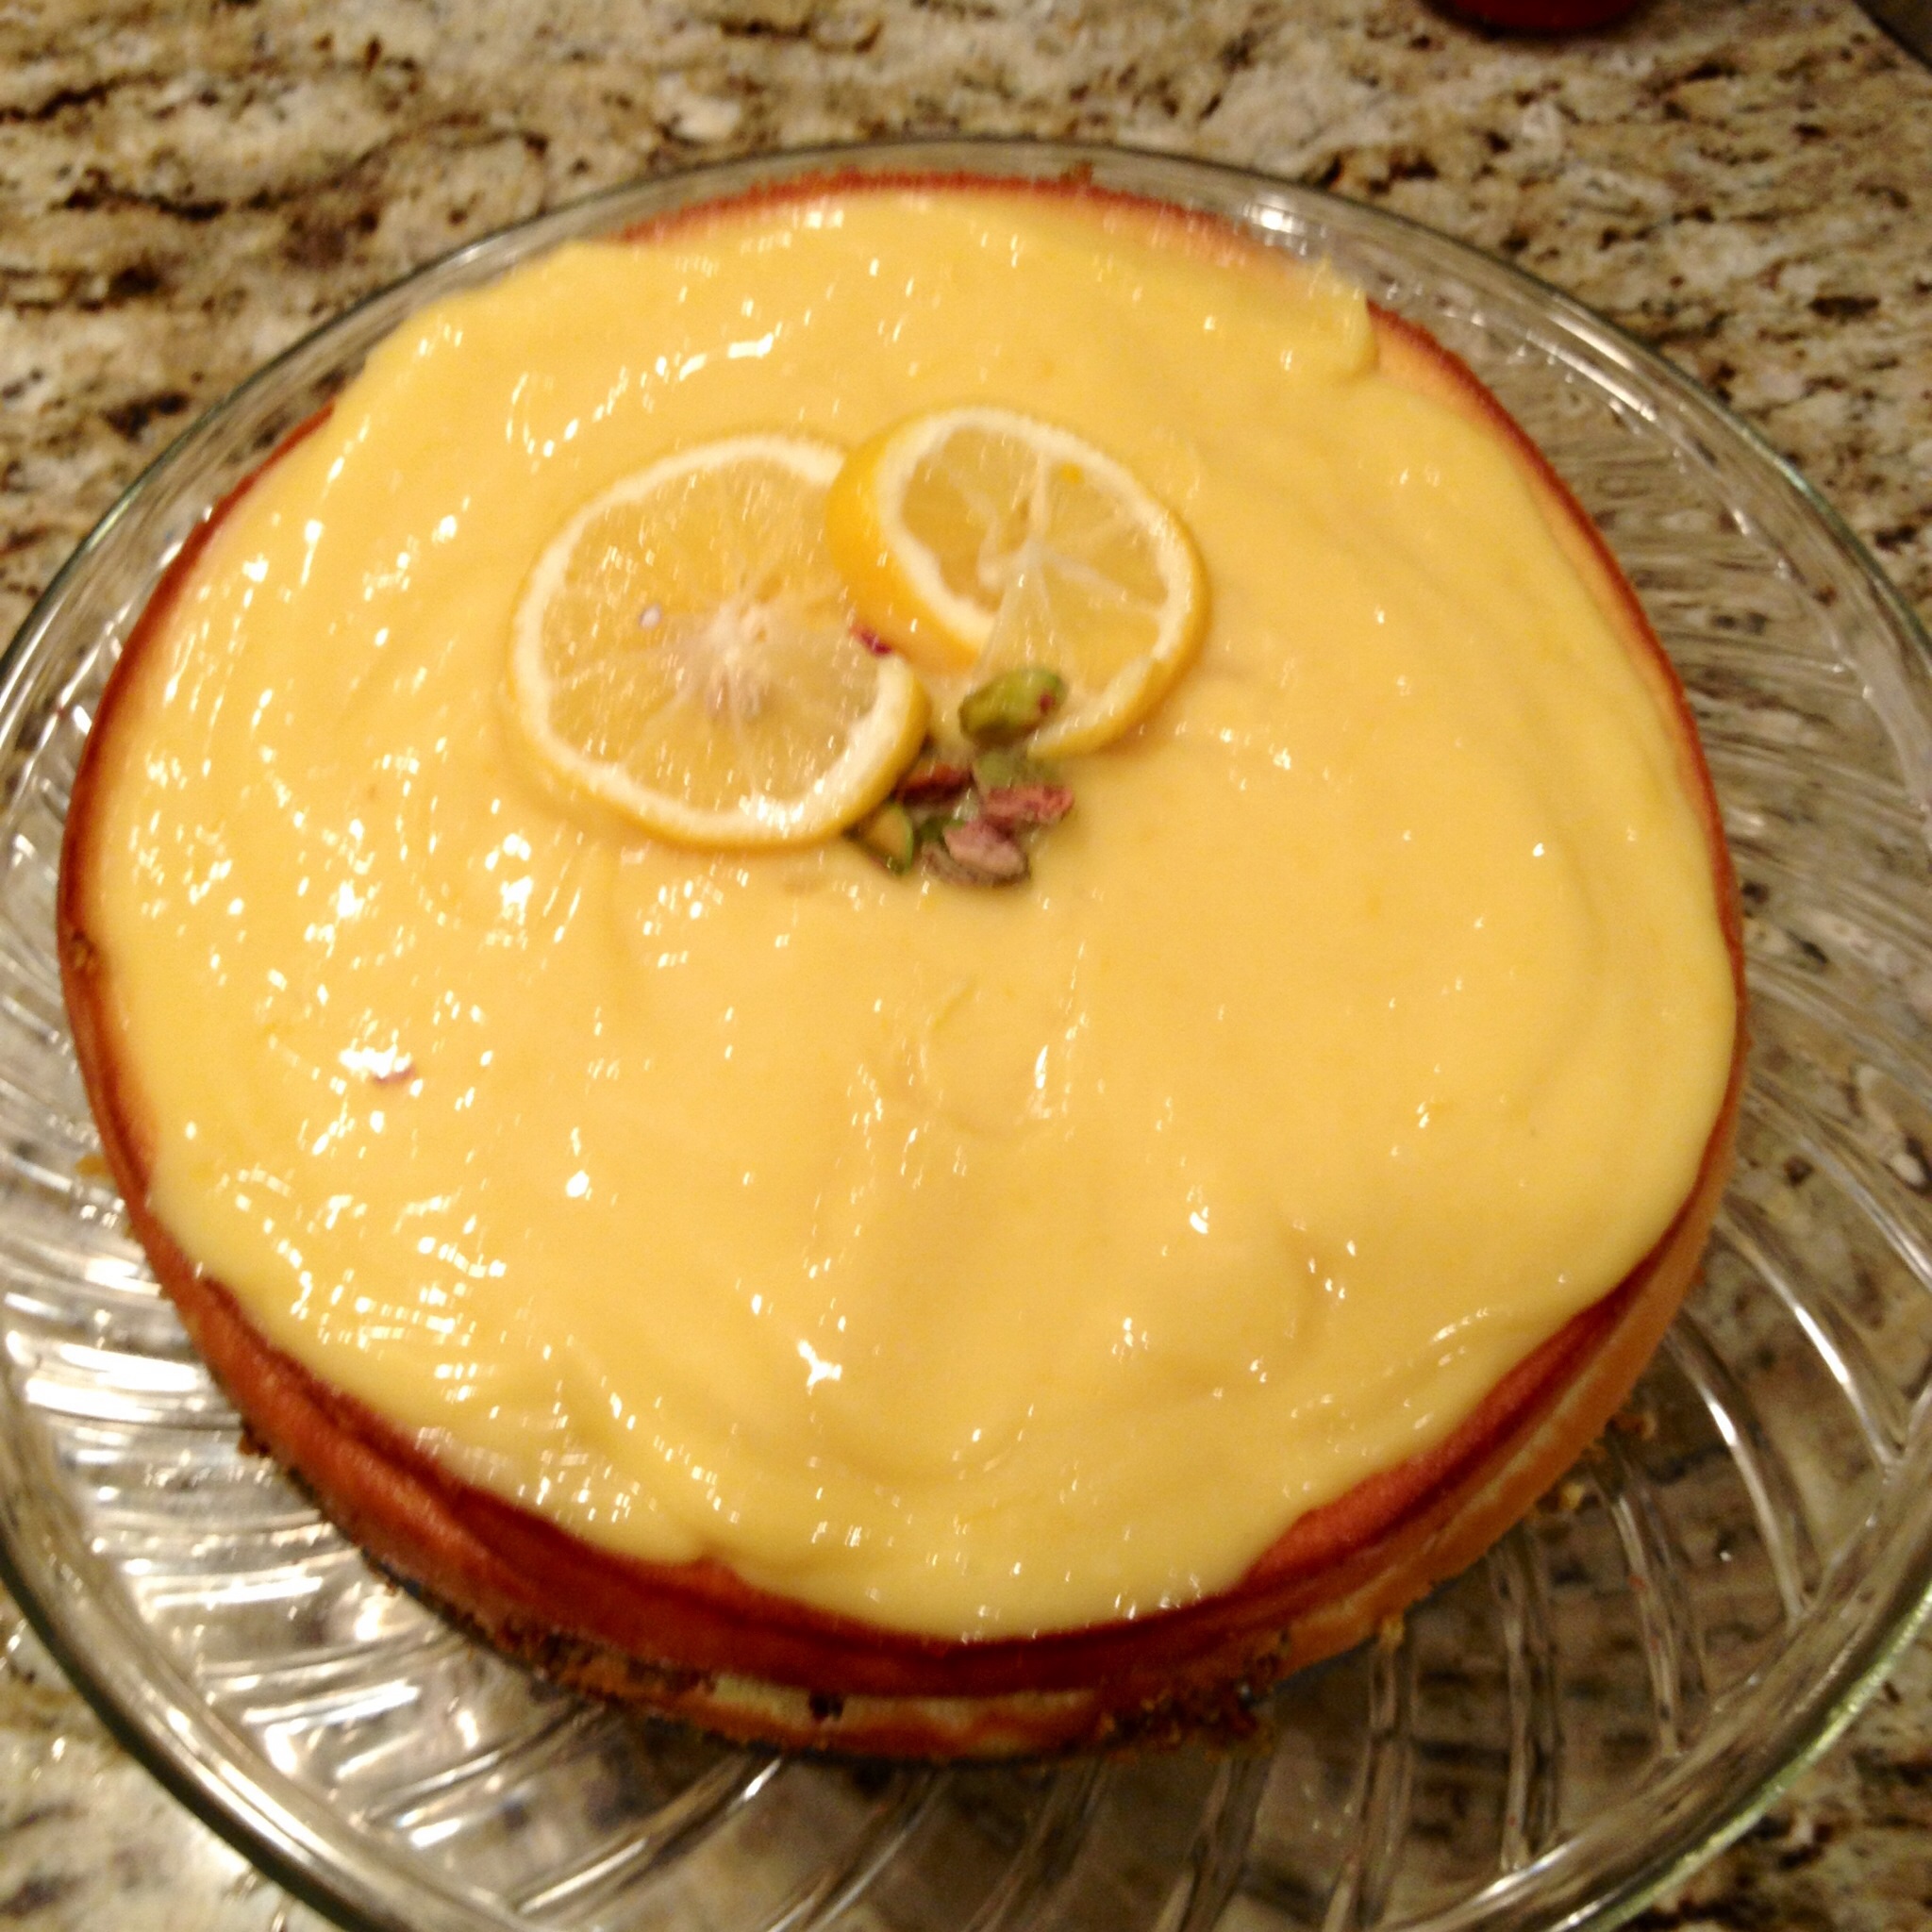
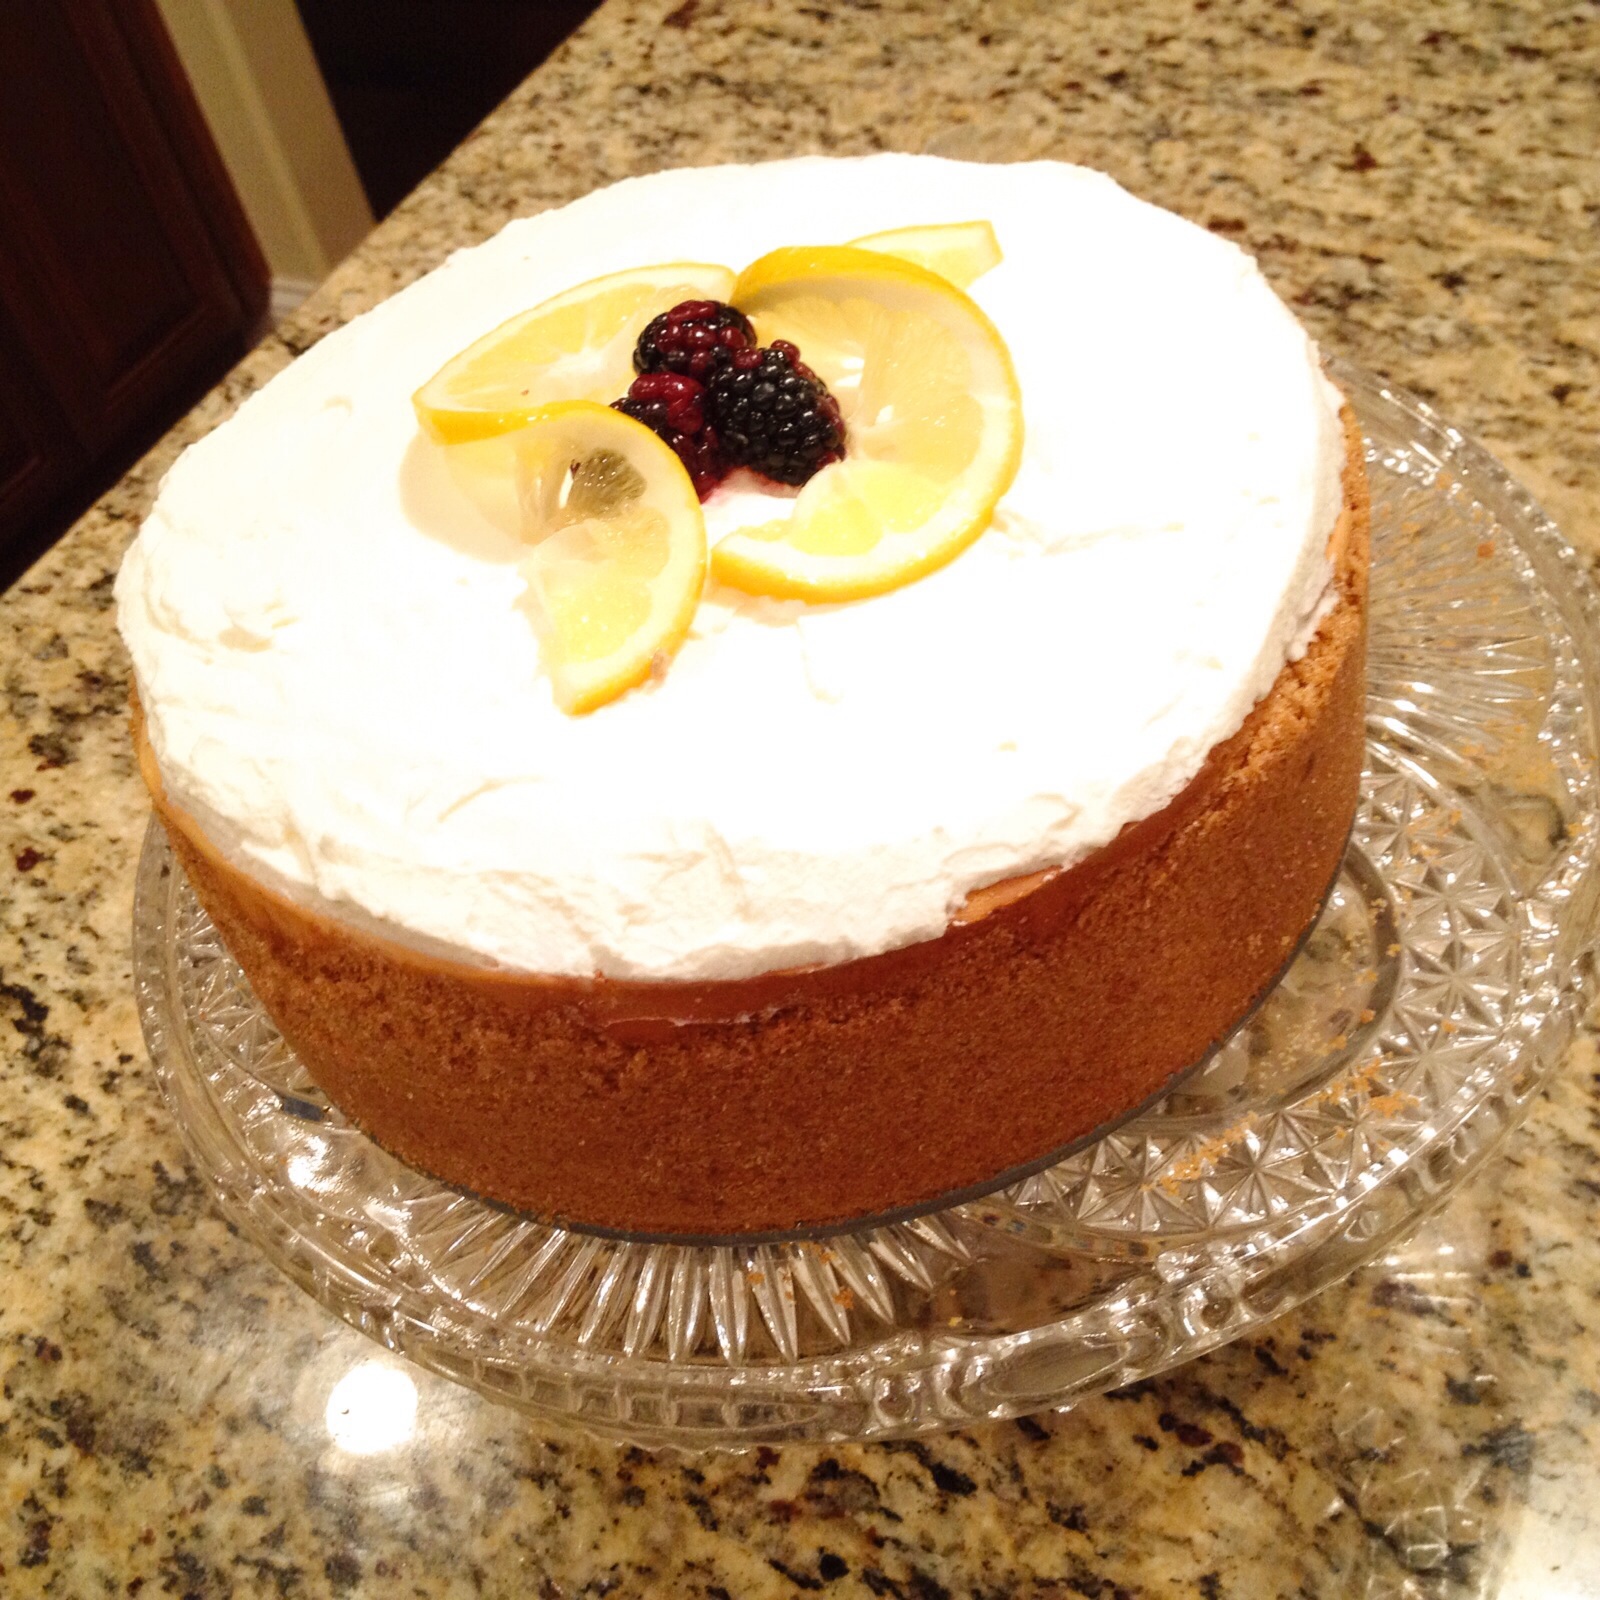
6. Transfer the mixture to a medium saucepan and cook over medium-low heat, whisking constantly. The cream will become thicker, so be sure to not overcook. Once the curd can coat the back of the spoon, transfer to another bowl and press plastic directly on the surface. Let cool at room temperature. Add to the top of the cheesecake and let it refrigerate for a couple hours.
7. When you are ready to serve, top with pistachios and a lemon slice….bon appetite!


image image image image image image image image image image

Happy Baking!

T.W.O. signature

Mud Pie Motherload

DSC_0136

Mud Pie has been a traditional birthday cake in T.W.O.’s family since we were babies. These past couple of years, we decided to step up our game and make the motherload of all mud pies. If this doesn’t get your taste buds excited, I don’t know what will. Peanut butter, chocolate, ganache, ice cream, oreo cookie crust and candy….we cover all the necessary ingredients.


Mud Pie Motherload

Ingredients:

Crust:
– 7 Tablespoons unsalted butter, melted
– 1 package oreo cookie box
Ganache:
– 16 ounces bittersweet chocolate
– 2 cup heavy cream
– 3 tablespoons unsalted butter, cut into small pieces
Filling:
– 1.5 quartz chocolate peanut butter cup ice cream, softened*
– 1.5 quartz coffee ice cream, softened*
– ½ cup crunchy peanut butter
– 1 ounce dark chocolate, finely chopped, for garnish
– 4 peanut butter cups, finely chopped for garnish
– 1 heath bar, finely chopped for garnish

Directions:

For the crust:

  1. Coat the inside of a 9-inch springform pan with 1 tablespoon of the melted butter.
  2. Place cookies in food processor and pulse until ground. Add melted butter to the crumbs and mix. Press mixture evenly and firmly into the bottom of the prepared pan and freeze until it’s good and set, about 15 minutes. Meanwhile, take the ice cream out of the freezer to soften and make the ganache.

For the ganache:

  1. Place chocolate in a medium heatproof bowl; set aside.
  2. Place cream in a small saucepan over medium heat and bring to a simmer. Pour cream over chocolate and let stand until chocolate has melted, about 5 minutes.
  3. Stir gently until smooth then stir in butter, one piece at a time. let cool slightly before using.

For the assembly:

  1. When ice cream is softened, spread one of the flavors of ice cream over the cookie crust and smooth the top.
  2. Spread peanut butter over the ice cream.
  3. Pour half of the ganache over the top and smooth and place in the freezer for 10 minutes.
  4. Remove pie from the freezer and top with the second ice cream flavor.
  5. Pour the remaning ganche on top. Spread evenly.
  6. Top with chopped chocolate candy and put in the freezer. For best results let the pie freeze for 5 hours or over night if possible.
  7. When you are ready to serve, let the pie stand for 5 minutes prior to cutting. Plate and serve!


image image image image

Happy Baking!

T.W.O. signature

Peanut Butter Rice Crispy Treats

image

Rice Crispy Treats – – they are good! Good is the key word.  T.W.O. wants to make them FANTASTIC!  So what we are going to do is add peanut butter, coconut oil, chia seeds and peanut butter cups.  Thanks to Justin’s Peanut Butter we were able to make a good dessert a FANTASTIC dessert!


Peanut Butter Rice Crispy Treats

Ingredients:
– 4 cups rice crispy cereal
– 3 Tablespoons chia seeds
– 2/3 cups Justin’s creamy Peanut Butter
– 1/3 cup coconut oil
– 1/3 cup pure maple syrup
– 2 teaspoon vanilla extract
Justin’s Peanut Butter Cups
– 3/4 cup chocolate, melted

Directions:

  1.  In a large bowl, combine rice crispy cereal and chia seeds.
  2. In a microwave safe bowl, add peanut butter, coconut oil, maple syrup and vanilla.  Cover and heat for 2-3 minutes or until all the ingredients are melted.  Stir occasionally during the cooking time to make sure you don’t overcook.
  3. Pour peanut butter mixture over the cereal and chia seeds.
  4. Transfer to a parchment paper lined Pyrex.
  5. Drizzle with melted chocolate and chopped Justin’s Peanut Butter cups.
  6. Place in freezer until set.  When it’s ready, use a large knife to cut into squares.
  7. Plate and serve!

imageimageimageimageimageimageT.W.O. signature

Very Berry Dessert with Peanut Butter Granola

image

Picture this – a family barbeque with ribs, salad, potatoes and a nice glass of VJB Wine.  Sitting outside under the stars in your patio.  Dinner has just finished and someone asks – –  What’s for dessert?  Good thing you prepared this light, refreshing and satisfying dessert – –  – Very Berry Cobbler with Peanut Butter Granola.  It is easy and pairs well with a hearty dinner.  Oh and did I mention – it is in the healthy dessert category! Check it out!

Ingredients
– 2 cups blackberries, washed
– 2 cups raspberries, washed
– 2 Tablespoons cornstarch
– 2 Tablespoons lemon zest
– ¼ cup sugar

Peanut Butter Granola Recipe Here

Ingredients:
– -4 cups rolled oats
– -1/2 cup chia seeds
-3/4 cup peanut butter*
– 
-1/4 cup coconut oil (melted/liquid)
– -1/2 cups of agave syrup
*T.W.O. loves using Justin’s original peanut butter- so delish!

Preheat oven to 350°

In a bowl, carefully mix the blackberries, raspberries, cornstarch, lemon zest and sugar.  Put in a 9×9 Pyrex that has been sprayed with PAM.  Top with the Peanut Butter Granola.  Cook for about 20 minutes or until the berry juice has bubbles.

image

imageRemove from oven and serve with a scoop of your favorite vanilla ice cream.

image image

Happy Baking!

T.W.O. signature

Blueberry Frozen Yogurt Bites

image

Blueberries. Greek Yogurt. And a Freezer. Yes – that is all you need in order to make these delicious, refreshing treats. The tartness of the Greek yogurt compliments the sweet flavors of the blueberry to make these bite size snacks the modern, healthier version of a bonbon. If you need some “pop” in your life, grab yourself some blueberries and yogurt and get to work!

image

Ingredients:
-1 package blueberries, washed
-Greek yogurt*

Lay out the washed blueberries on a mat or cutting board. Make sure the blueberries are fully dried. Using a skewer or a toothpick, dip the blueberries in the Greek yogurt. Swirl around, making sure to get enough Greek yogurt on the berry to freeze. Place on a parchment paper – lined cookie sheet.

imageimage

Once all the blueberries are dipped, place in the freezer for about 20 minutes. Remove the blueberries and store in a freezer safe Tupperware or Ziploc bag. The berries are best after an hour being in the freezer. If you can’t wait that long, 20 minutes will do! Store in freezer.

image image

Cheers to snacks!

T.W.O. signature

Peanut Butter Cookies

image

Peanut Butter Cookies

As you probably have learned, T.W.O. loves peanut butter.  We can have peanut butter in the morning, afternoon and night! We thought we would share one of our favorite peanut butter recipes that have been exchanged between our family members for many years.  The cookies are soft flavorful and nutty! Oh, and we can’t forget about the dough….it’s pretty amazing!

image

Ingredients
– 1 cup crunchy peanut butter*
– 1 cube butter, softened
– ½ cup shortening
– 1 cup granulated sugar
– 1 cup brown sugar
– 2 eggs
– 2 ½ cups flour
– 1 teaspoon baking powder
– 1 ½ teaspoon baking soda

* T.W.O. likes to bake with Skippy, Jiffy or natural peanut butter (oil pre-mixed)

Cream together peanut butter, butter and shortening with a mixer.  Add in the granulated sugar and brown sugar and mix well. Slowly beat in the eggs.  Make sure to scrape the sides of the bowl, so the ingredients blends well.  Add in the flour, baking powder and soda.  Once all the ingredients are combined, you should get sticky, thick dough.  Chill the dough for an hour or until the dough gets cold.

image

 Preheat oven to 350.°

 Remove the dough from the refrigerator.  Line your cookie sheets with parchment paper.  Take a spoonful of dough and roll into a ball. Repeat until all the dough is used.  With a floured potato masher, press down on the “balls”.  Don’t smash too much, you don’t want the cookies to burn.  If you don’t have a potato masher, you can flatten the cookie with your hand and use a fork to create a criss-cross design.

image image image

Place the cookies in the oven for 10-12 minutes.  Don’t overcook!  Remove from the oven and let it cool on the cookie sheet for 1-2 minutes before transferring them to a wire rack.

Plate the cookies, grab a glass of milk and enjoy!!!

imageimage

image image

Happy Baking!

T.W.O. signature

Berry Lemon Cheesecake

image

Berry Lemon Cheesecake – It’s fluffy, light, refreshing, and savory! Most cheesecakes are dense and filling, which bad, but it’s nice to not feel stuffed after dessert. T.W.O. loved the combination of the lemon, berries, cream cheese and eggs that created a light, mousse-like treat and are excited to share this masterpiece with our readers. We guarantee that this will be a hit at your next dinner party, family barbeque or date night. Cheers Lemon Week!

image
Ingredients:
 3 cups graham cracker crumbs
 1/3 cup butter, melted
 ½ cup granulated sugar
 2- 8 ounces packages of cream cheese, softened
 2- 8 ounce packages of Neufchâtel, softened
 1 cup granulated sugar
 4 large eggs
 1/3 cup fresh lemon juice
 zest from 1 lemon
 ¼ cup corn starch
 2 cups fresh blackberries
 Fresh whipped cream for topping
Preheat oven to 300ᴼF.
In a bowl, combine graham cracker crumbs, melted butter and sugar. Mix until the crumbs are sticking together. Press crumb mixture in a 9” spring form pan. Make sure that the crumbs are evenly distributed on the bottom and sides. Set aside.image

Using a KitchenAid mixer, cream together the cream cheese and sugar until fluffy. Add the eggs, one at a time, mixing for about 1 minute each. Before adding an egg, make sure you scrape the sides of the bowl. Add lemon juice and zest and mix for about 3 minutes. Next, mix in cornstarch and beat for an additional 3 minutes until fluffy.

Using a flexible spatula, carefully mix in the berries. You don’t want the berries to break.
Pour the cheesecake mixture in over the graham cracker crust.image

Bake for 1 hour or until a toothpick comes out clean. Set on a wire rack to cool for about 40 minutes.

image

Cover the cheesecake and place in the refrigerator overnight.
When you are ready to serve, add a layer of fresh whipped cream to the top of the cake along with some mixed berries and a lemon garnish!

imageimageimageimage

Happy Lemon Week and Happy Baking!

image

T.W.O. signature

Chocolate Cheesecake Bars

image

This Chocolate Cheesecake bar recipe has been in our family for years and has been made for birthday parties, wedding showers, dinner parties and holidays. The chocolaty, thick crust combined with the fluffy, dense cheesecake layer makes for a great easy dessert. Check out how to make these bars for your next event….or cozy night in!

image

Ingredients:

– 1-12oz package chocolate chips
– ¼ cup butter
– 2 cups Oreo crumbs
– 1-8oz cream cheese, softened*
– 1-8oz Neufchâtel, softened
– 1-14oz sweetened condensed milk
– 2 teaspoon vanilla extract
– 1 egg

Preheat oven to 350ᴼF.

Heat chocolate chips and butter in a microwave-safe bowl. Once the morsels are melted, add the Oreo crumbs to the chocolate. Place ¾ the mixture in the bottom of a 9×13 pan. Make sure it is spread evenly. Set aside.

image

Using a KitchenAid (or handmixer), beat the cheese until fluffy. Add in milk, eggs and vanilla. Mix for about 5 minutes.

image

Pour the mixture into the pan. Top with the left over crumb mixture.

Bake for 25 minutes or until a butter knife comes out clean.

image

Remove the bars from the oven and set to cool for about 20 minutes. Refrigerate overnight for best results!!

image

Enjoy!T.W.O. signature

Peanut Butter Cups

image

The idea of making homemade candy might intimidate a lot of people. It sounds difficult, time consuming, and a lot harder than just getting in a car and driving to the market. Well put down those car keys and stay put because T.W.O. has the recipe for you!  Candy making can be easy, fun, and tastier than store-bought candy! We decided to take one of our favorite ingredients-peanut butter- and make homemade peanut butter cups! You will never want to buy store bought Peanut Butter Cups after making this recipe!

Ingredients

-1/2 cup peanut butter*
-2 Tablespoons unsalted butter
-2 Tablespoons light brown sugar, packed
-1/2 cup confectioners’ sugar
-pinch of salt
-1 Tablespoon Crisco or butter
-2 to 3 cups chocolate chips

IMG_3142

 *T.W.O. used crunchy peanut butter, but also suggests using creamy-both are delicious!

First, line a muffin pan with paper liners and set aside. Mini muffin pans can also be used for smaller candy pieces.

Next, add the peanut butter and brown sugar to a medium saucepan. Set over low-medium heat, stirring constantly until the mixture is melted and smooth. When the mixture starts to bubble around the edges, take the pan from the heat and add the confectioners’ sugar in steps, mixing well after each addition. Then add a pinch of salt and mix. Set aside to cool.

IMG_3143

While the peanut butter mixture is cooling, place about 1-1½ cups chocolate chips into a microwave safe bowl. Add the Crisco or butter to the chocolate chips and microwave for about 30-45 seconds. Take the bowl out of the microwave and mix. If the chocolate chips are not fully melted, place back into the microwave for a very short time. You don’t want them to burn!

IMG_3144

Once melted, spoon the melted chocolate into one well of the prepared muffin tin. Use a paintbrush or the back of the spoon to spread the chocolate about ¾ of the way up the sides of the paper liner. Fill one well at a time so the chocolate doesn’t set before you have time to spread it. Once all the liners have a chocolate coating, place the muffin tin into the freezer for about 10 minutes or until the chocolate has set.

IMG_3145

While the chocolate is setting, begin shaping the peanut butter filling. Take about 1 tablespoon (1 teaspoon if using the mini muffin tins) of the peanut butter mixture and roll into a ball.

IMG_3150

Then flatten into a patty with a size a little smaller than the diameter of the muffin well bottom. Repeat with the remaining peanut butter mixture and then chill in the freezer for about 5-10 minutes. Once chilled, remove the muffin pan and peanut butter patties from the freezer. Place one patty in each chocolate cup.

IMG_3153

Next, place the bowl of chocolate (if left over) plus the remaining chocolate chips back into the microwave to melt. When the chocolate is melted, pour it over each of the peanut butter patties until covered. Once each well is filled with chocolate, put the muffin pan into the freezer for about 15-20 minutes to chill and harden.

IMG_3154

When this time is up, take the pan out of the freezer and allow to sit for 3 minutes. Then it is time to take the peanut butter cups out and enjoy!!! There is no doubt you will be enjoying T.W.O. of these!

IMG_3160

IMG_3161

image

Enjoy!

T.W.O. signature

French Silk Pie

image

Are you a chocolate lover? Are you a pie lover? Well, you are in luck! T.W.O. has the perfect recipe for your –French Silk Pie. It’s a rich, fluffy, dense mousse pie that will be great for your next dinner party!

Ingredients:

-4 oz. bittersweet or semisweet chocolate
-1 teaspoon butter or shortening
-1 cup unsalted butter, softened
-1 ½ cups granulated sugar
-2 tablespoons vanilla extract
-4 eggs, room temperature
-1 fully pre-baked 9 inch pie shell (See recipe HERE)
-3 cups whipped cream

 Preheat oven to 350°F.

In a microwave safe bowl, head the chocolate and butter/shortening in 20-second intervals, stirring between each interval until completely melted. Cool for 10 minutes.

image

With a KitchenAid or handmixer, cream together butter, sugar until fluffy. Add the melted chocolate gradually until mixed well. Add vanilla.

Using a whisk or the whisk attachment, add one egg at a time. Each egg should be beat for 5 minutes, totaling 20 minutes. The filling should be thick and fluffy. Once you get the consistency, add the filling to a pre-baked pie shell.

image

image

Place the pie in the oven and bake for 30 minutes or until a butter knife comes out clean. Let the pie cool for about 30 minutes. Once cooled, place the pie in the refrigerator for a minimum of 4 hours. It’s best to make this pie the night before.

Just when you are ready to serve, put the whipped cream on top of the pie. Garnish the top of the pie with shaved chocolate.

By this time, I am sure you are ready to taste this delectable, chocolaty pie!

imageimage

Happy Baking!

T.W.O. signature